Simple and Useful – Boxed Corners Sewn on a Child’s Quilt
I’ve been meaning to share this sewing project for so long, and recently a friend inspired me to finally do it!

Several years ago, I became frustrated and deflated at my children’s (in)ability to make a bed. What is so hard about pulling up a sheet and a quilt and straightening it out? It takes me 30 seconds or less! But the children? Forget it! I was mildly irritated, but not enough to go to battle over it, so I sat down and started thinking about the process of making a bed. At the time, my daughter must have been about 9 and my oldest son was probably about 5 or 6. Come on! Boys – neat beds? The two ideas don’t belong together in the same sentence!!!!!!!! Still, I had hope I could figure this out.

I remembered an old Lands End catalog….from maybe 20 years ago….and I remember being so impressed with the kids bedding section. I didn’t have kids at the time, so I just filed it away, and I’m glad I did! I remembered that in the Lands End catalog, they took a simple comforter and had the ends sewn up so it fit the end of the bed like a box, thus rendering the act of making the bed simpler for a child. Could this really be the ticket? I wanted to find out!
I knew that I could not sew up a thick comforter on my home machine, so I tried working with a quilt. And what I came up with was so simple to accomplish and it has utterly transformed the bed-making process around here. It’s been 5 years now since I first did this, and we’ve added 2 more children to the mix, so I can definitely say that this one stands the test of time! I hoped you all might enjoy a little tutorial of the process! Here you go!
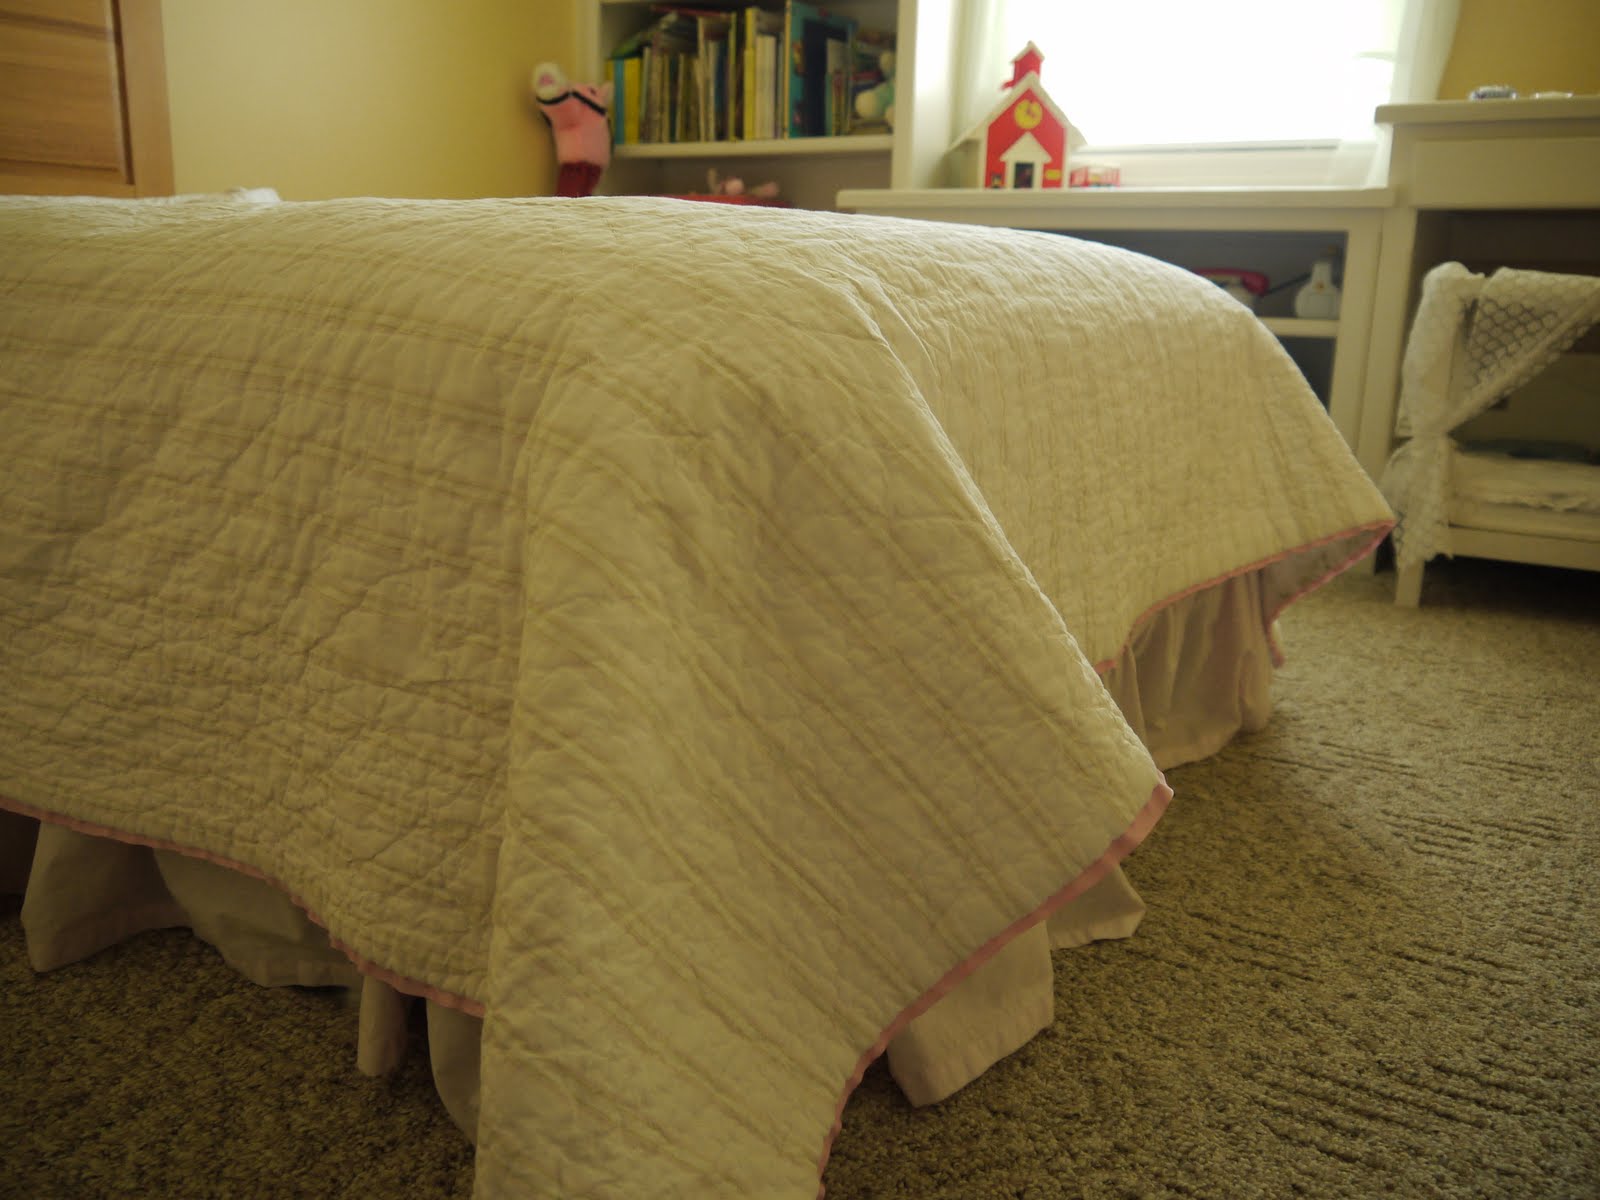
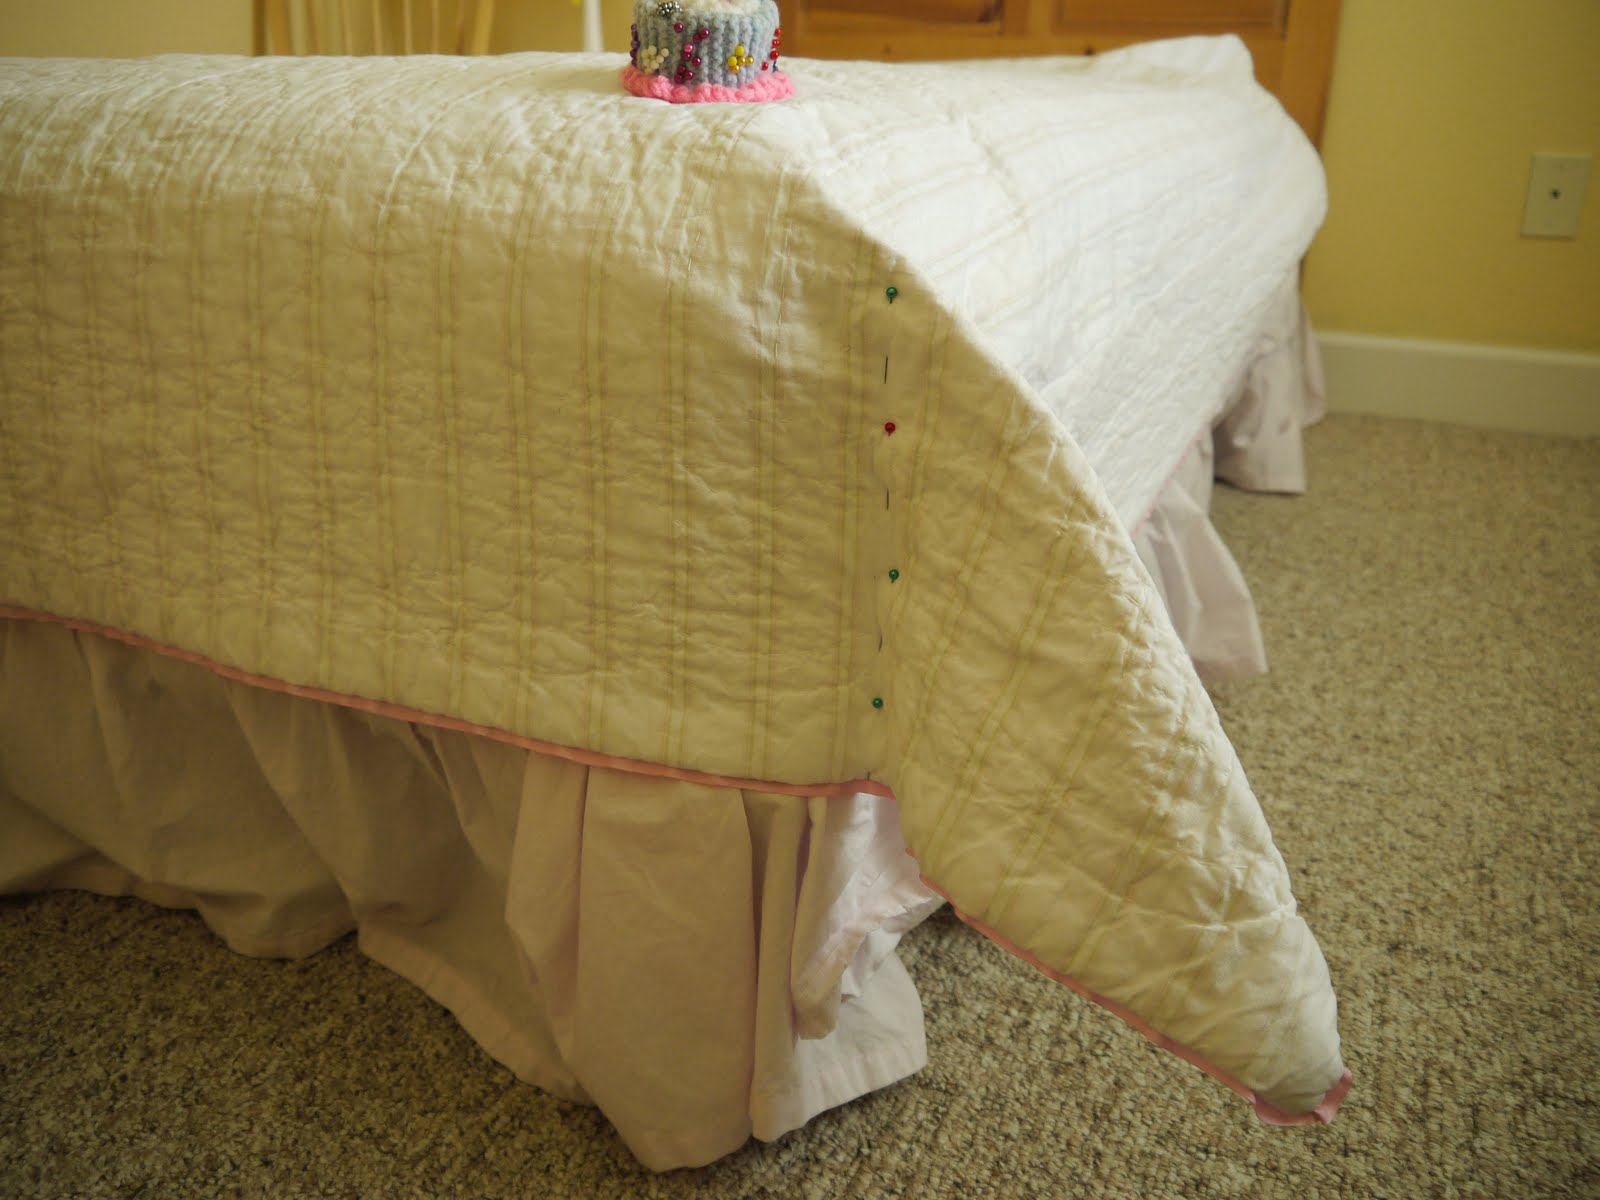
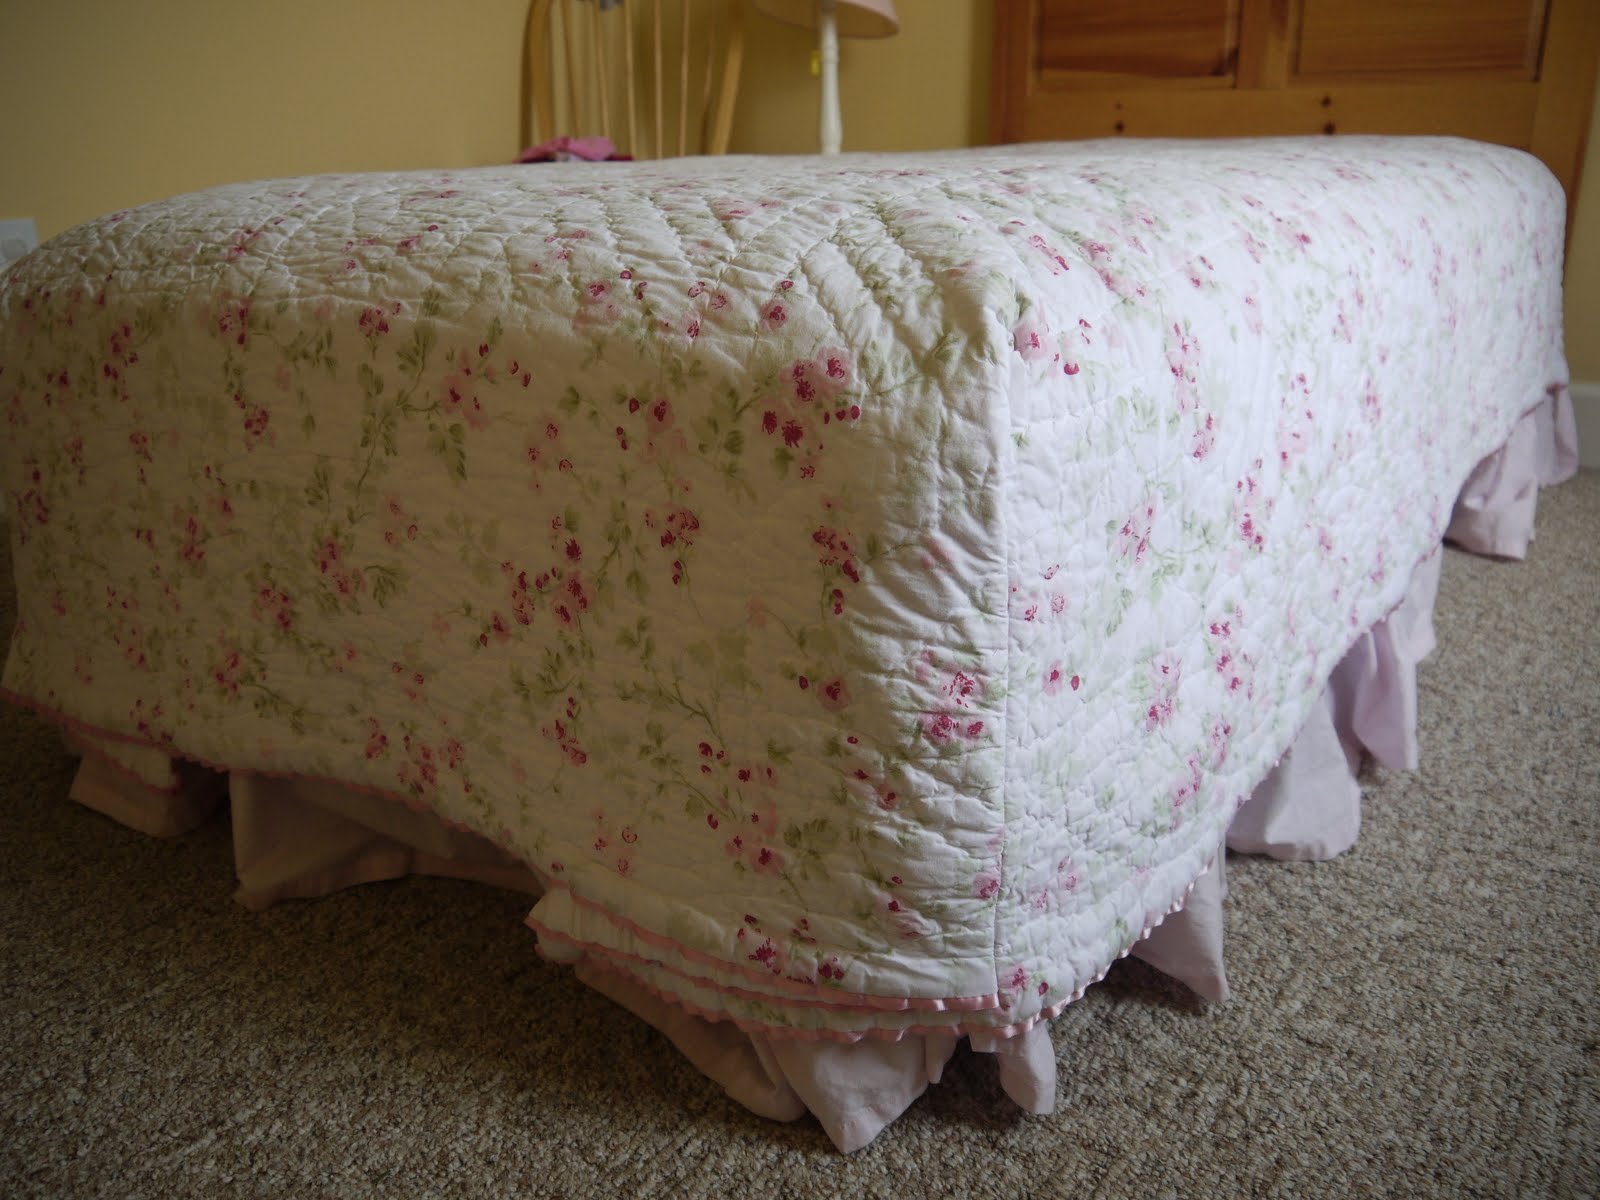
1) Place the quilt on the bed and position with the WRONG side (back side) of the quilt facing up. Make sure the quilt is centered in place and that you’re happy with the position of the top of the quilt, where it meets the headboard.
SIDENOTE THOUGHTS: As you can see, my quilt hangs a little low off the end of the bed and that is so that when the bed is made, the quilt just barely reaches the top of the bed. Kids don’t know what to do with overhang – it mystifies them! They stand and stare at it, wondering what to do. So, sew that excess into your pockets so they don’t have to deal with it. (I’ll show you how to deal with that excess at the bottom in another step.) Another tip for you is that if you are CERTAIN that your child’s bed will ALWAYS be against a wall, like in a set of bunks, you might position the quilt off-center so that the side of the quilt that shows when the bed is made is shorter and doesn’t hang down a great deal….or excessively. This will be fine and in the end, once your pockets are sewn, it will ensure that the easily made bed will have a quilt that doesn’t hang down, infringing on another bunk’s space. IF….you do this….consider purchasing a quilt that DOES NOT have a definite middle, or it will look wonky when you’re done.
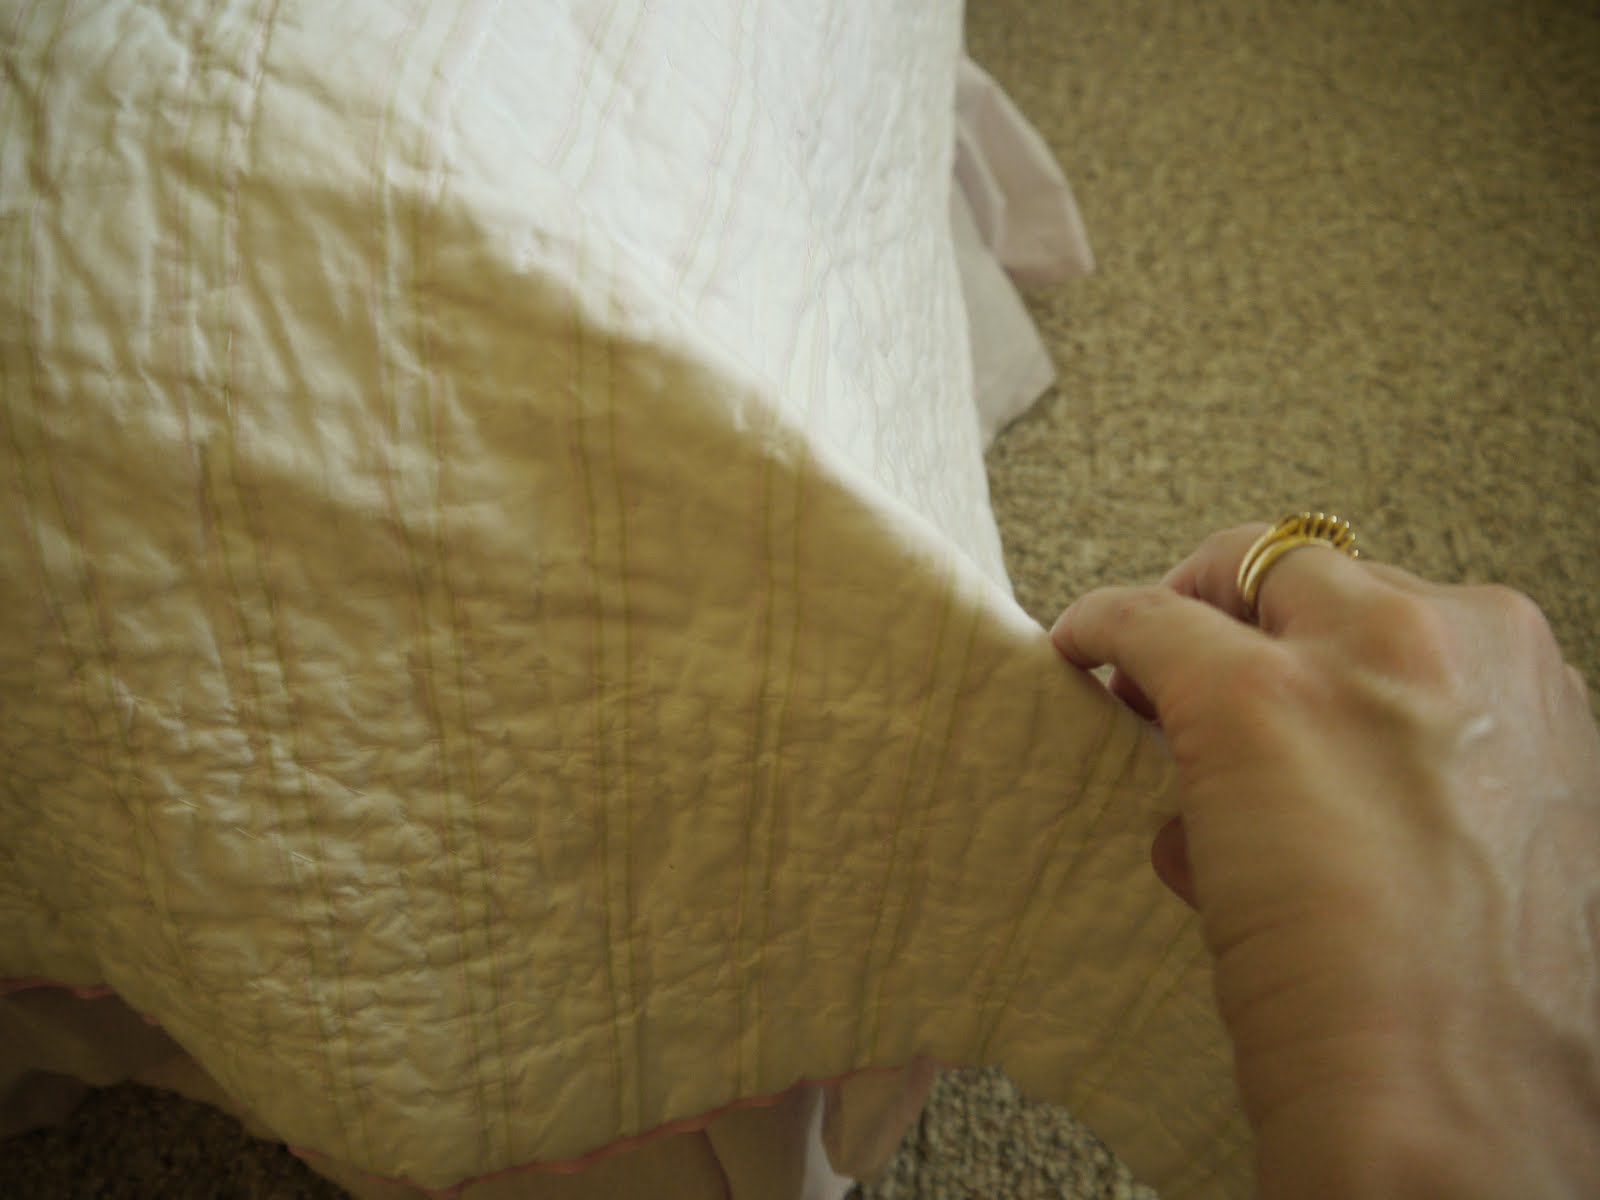
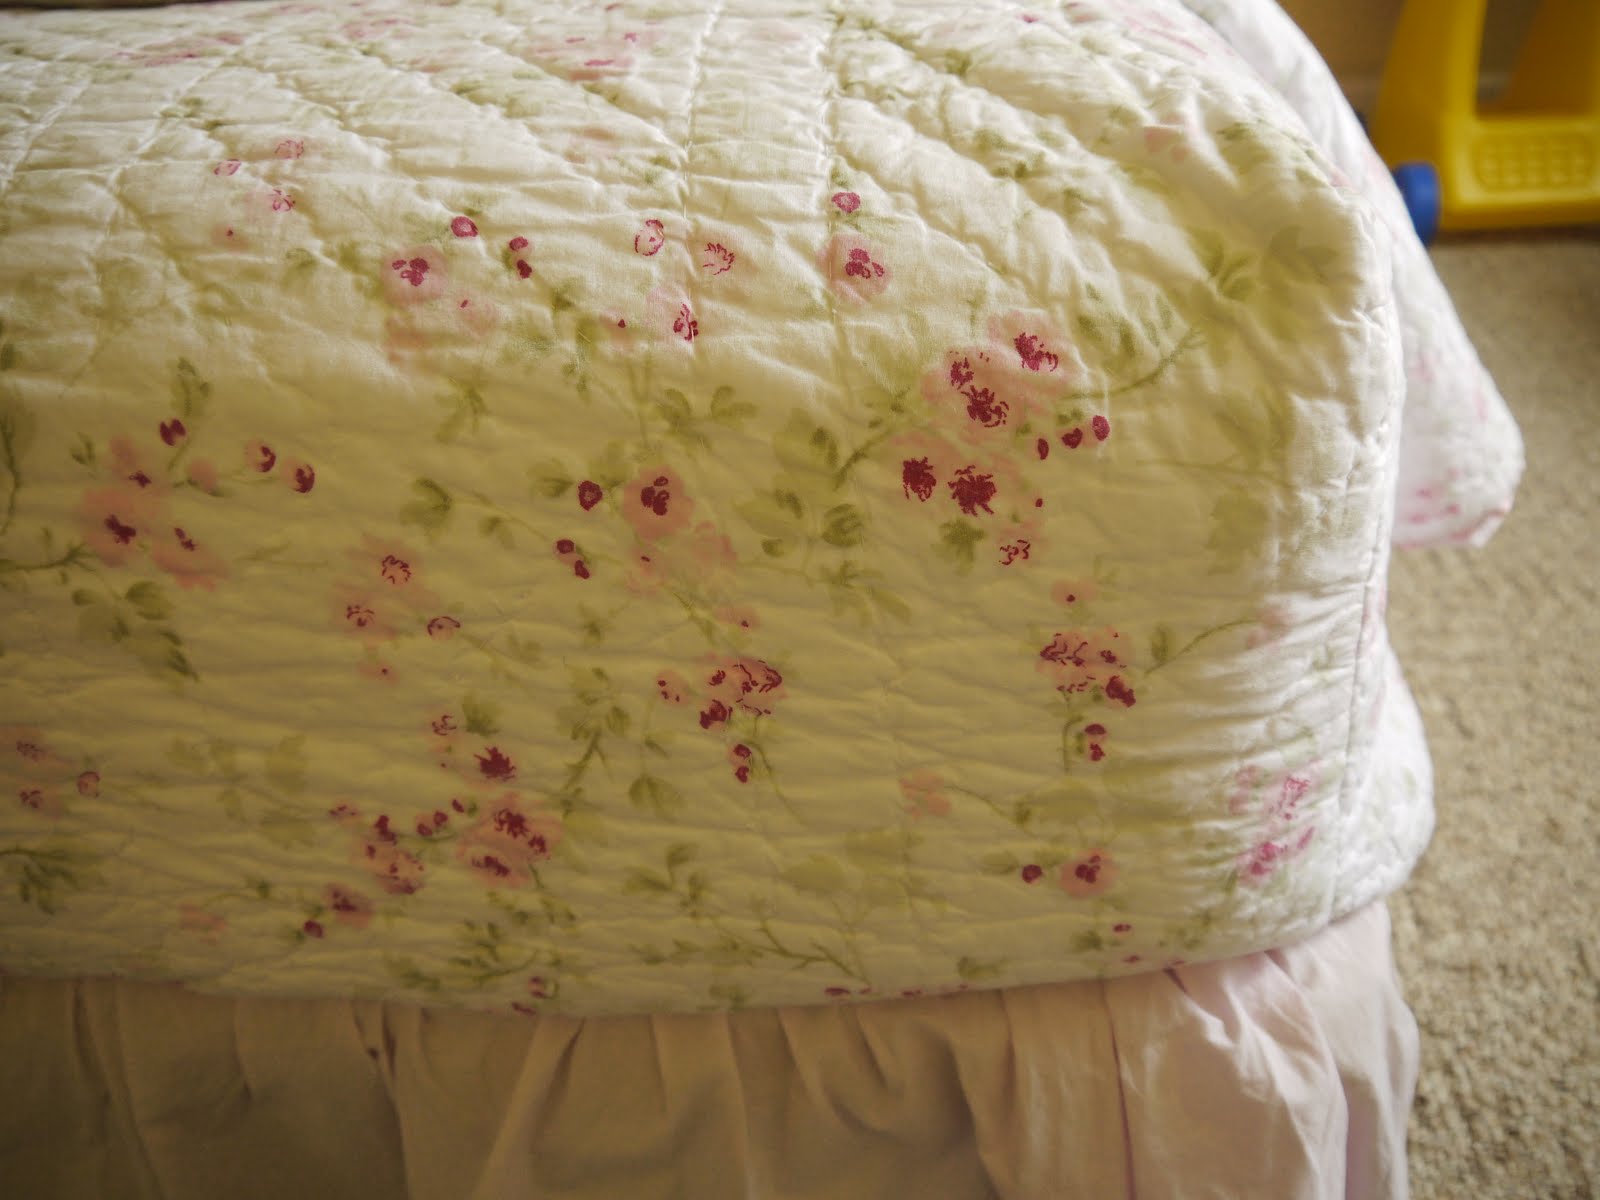
2) Gather the material that forms the corner. Pull it out to the side as an extension of the end of the bed, so that it is 90 degrees from the long side of the bed. Pinch the corner together and crease it with your fingers.
3) Start pinning – I pin while the quilt is on the bed so I can get the fit right, but be careful that you don’t pin sheets to the underside of the quilt. I was fortunate that this quilt had helpful lines to keep my pins straight, but this isn’t necessary and not all of my quilts had this! Just try to pin in a straight line down. You want to pin snugly against the mattress, but you don’t want it to be super tight either. This really doesn’t have to be too exact. Just snug.
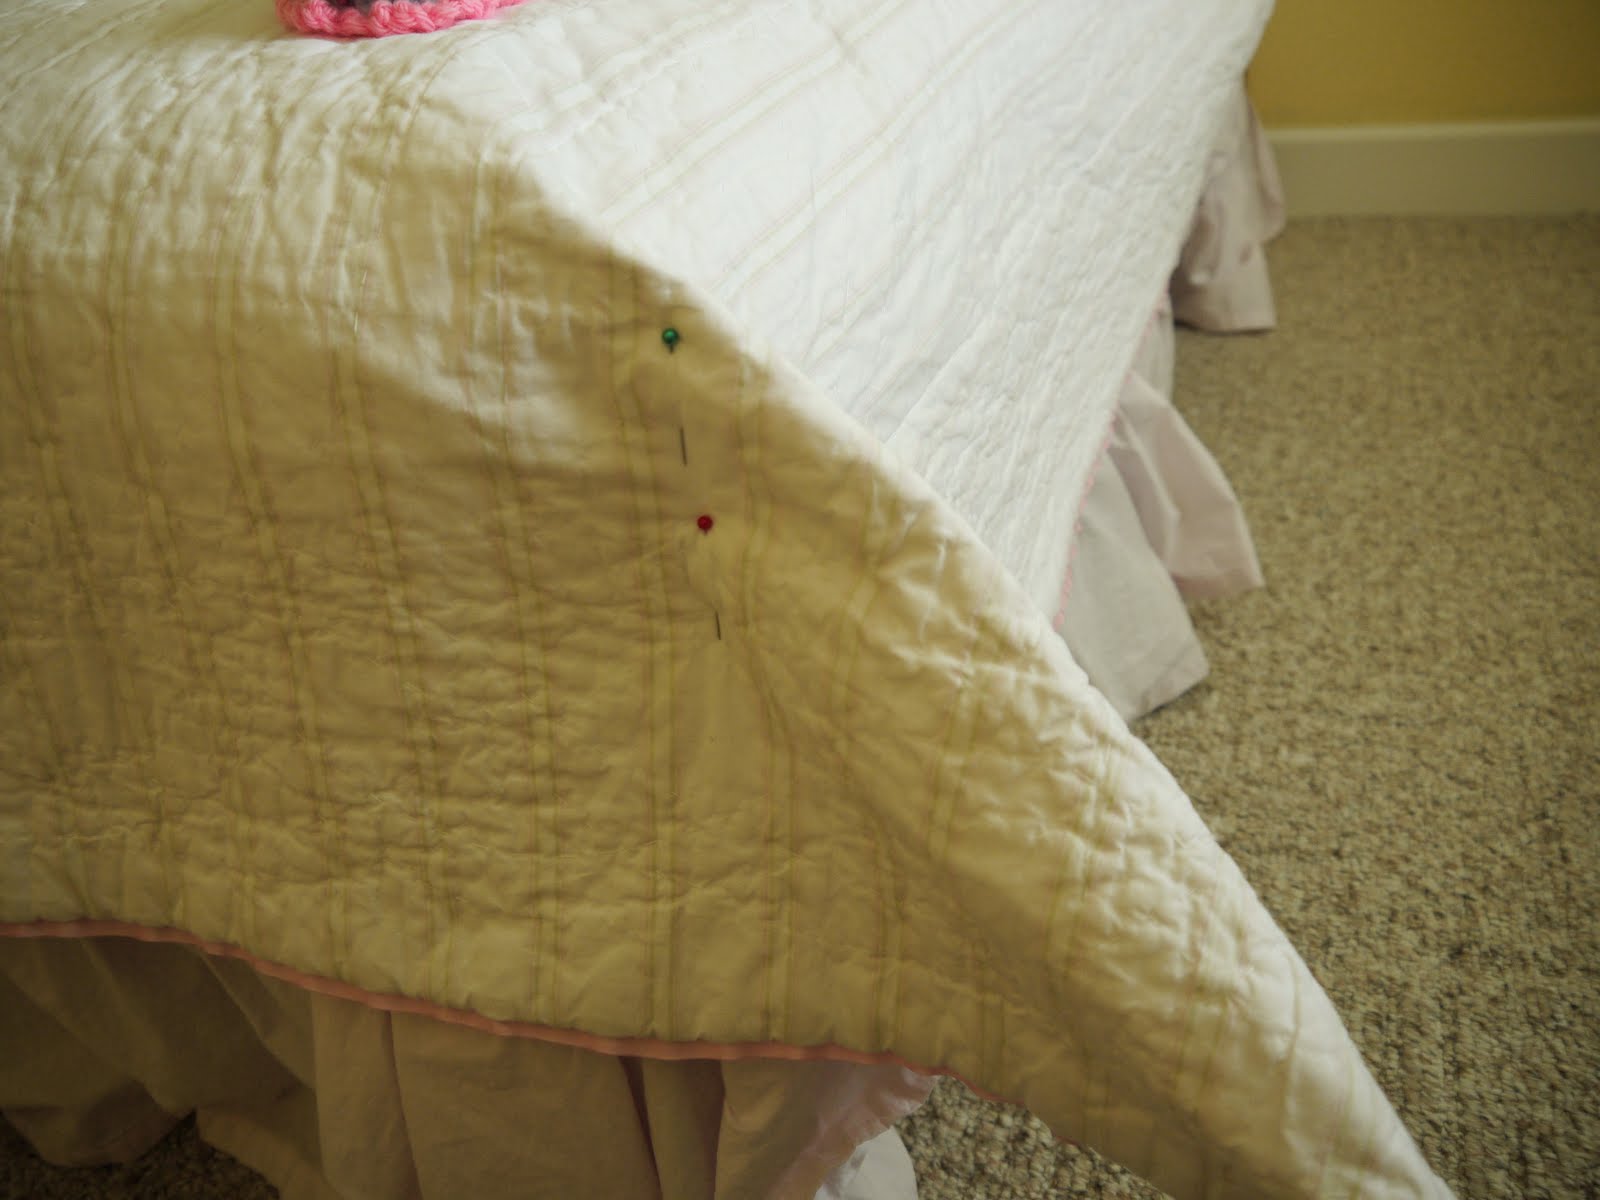

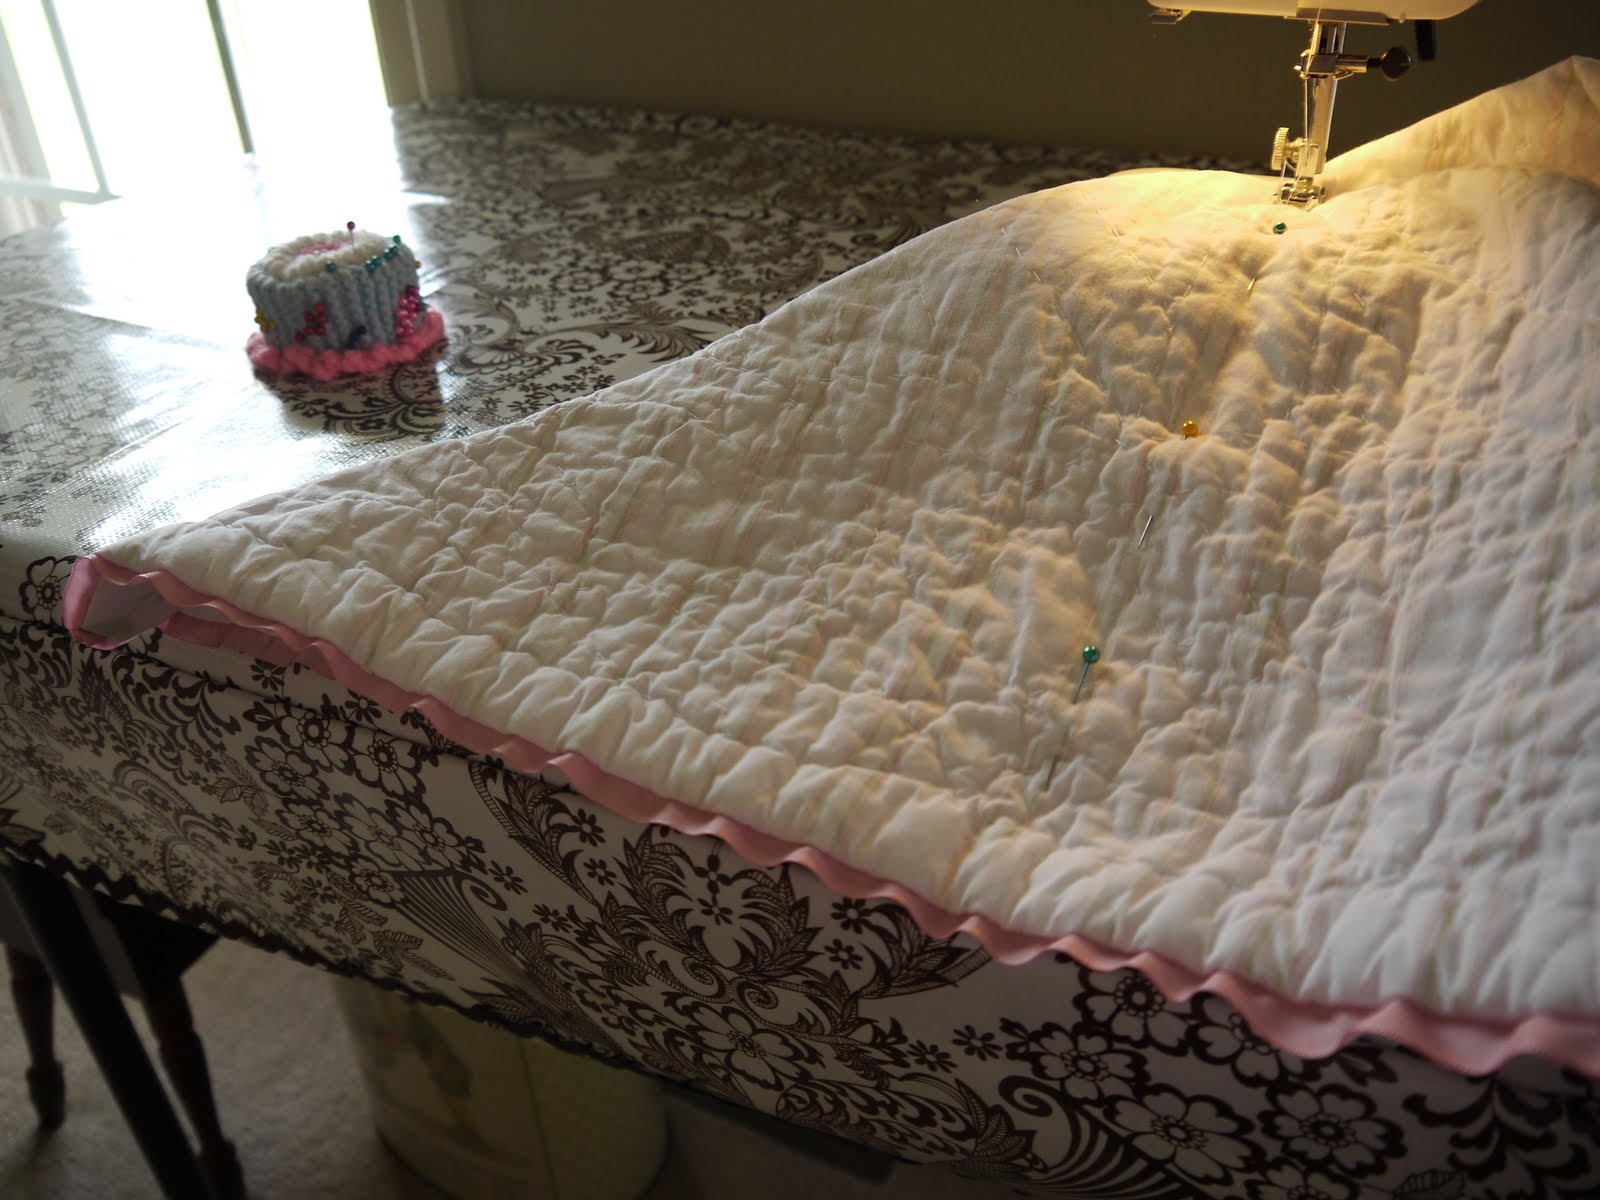
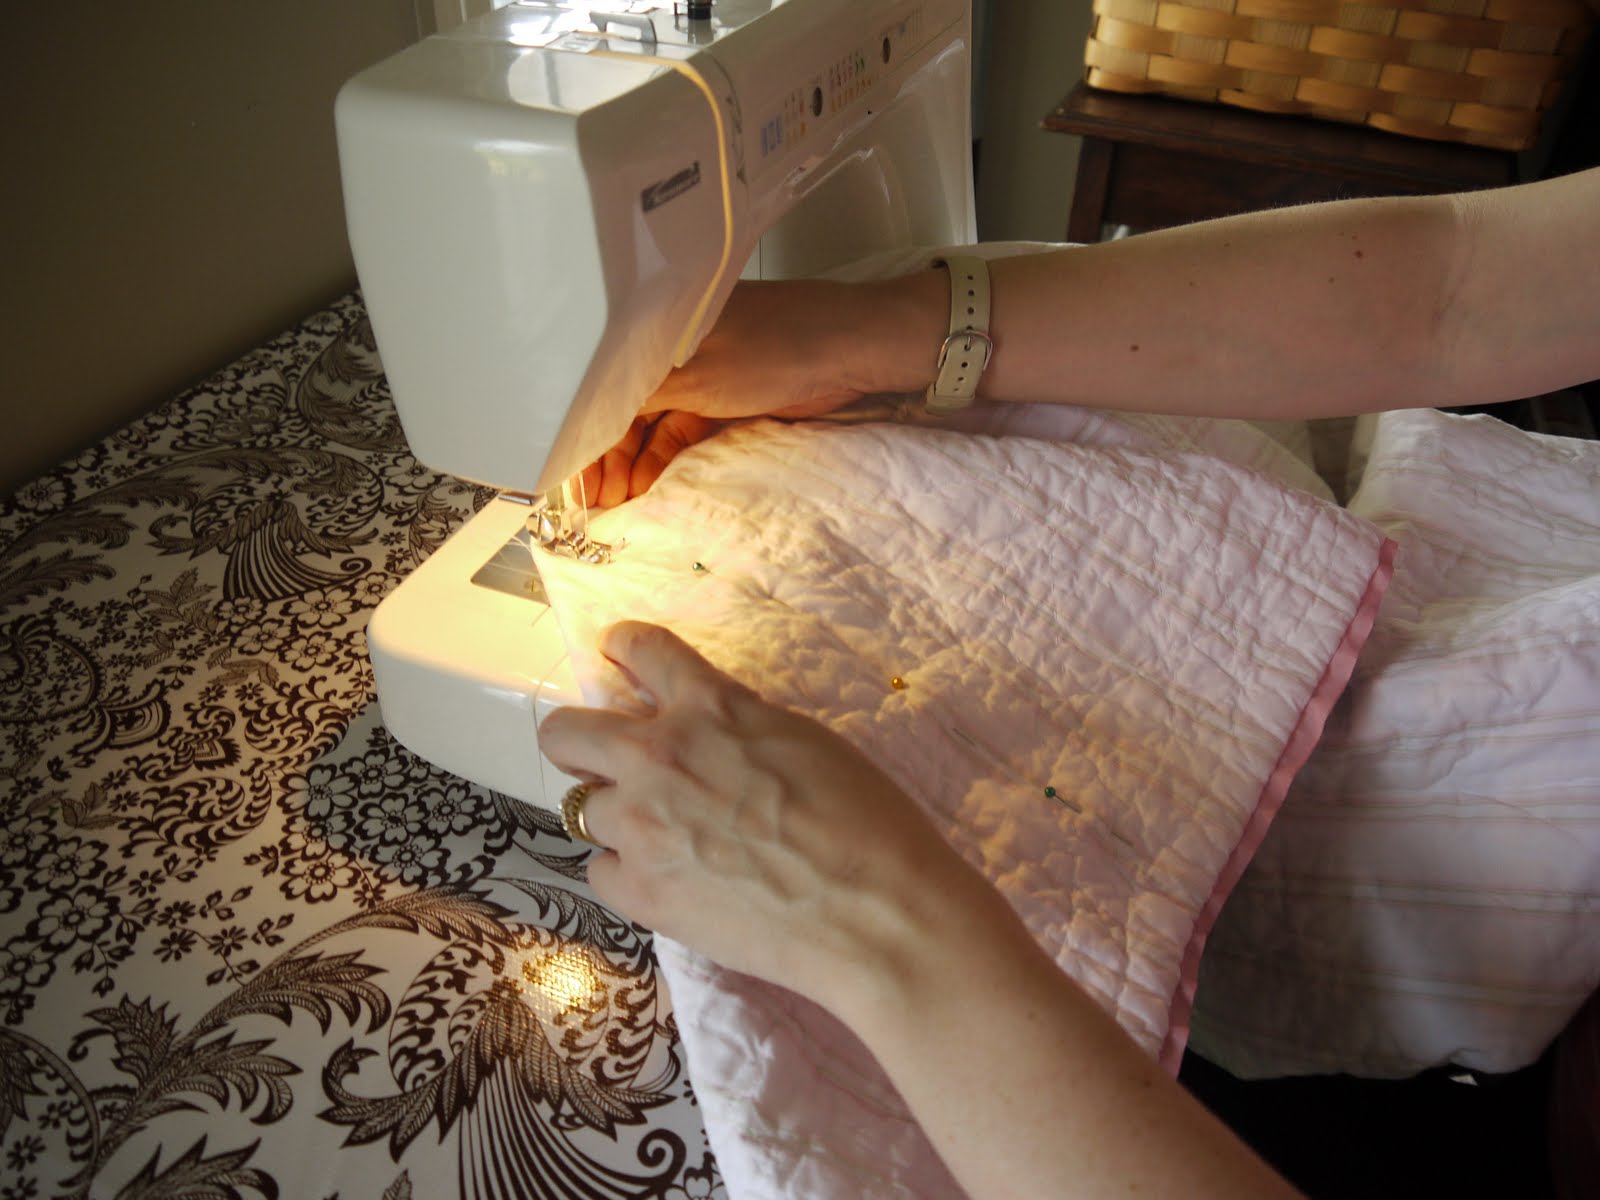
4) Pin all the way to the bottom in a straight-ish line. Pin both sides and CAREFULLY remove the quilt from the bed, with pins intact, and head to your sewing machine….

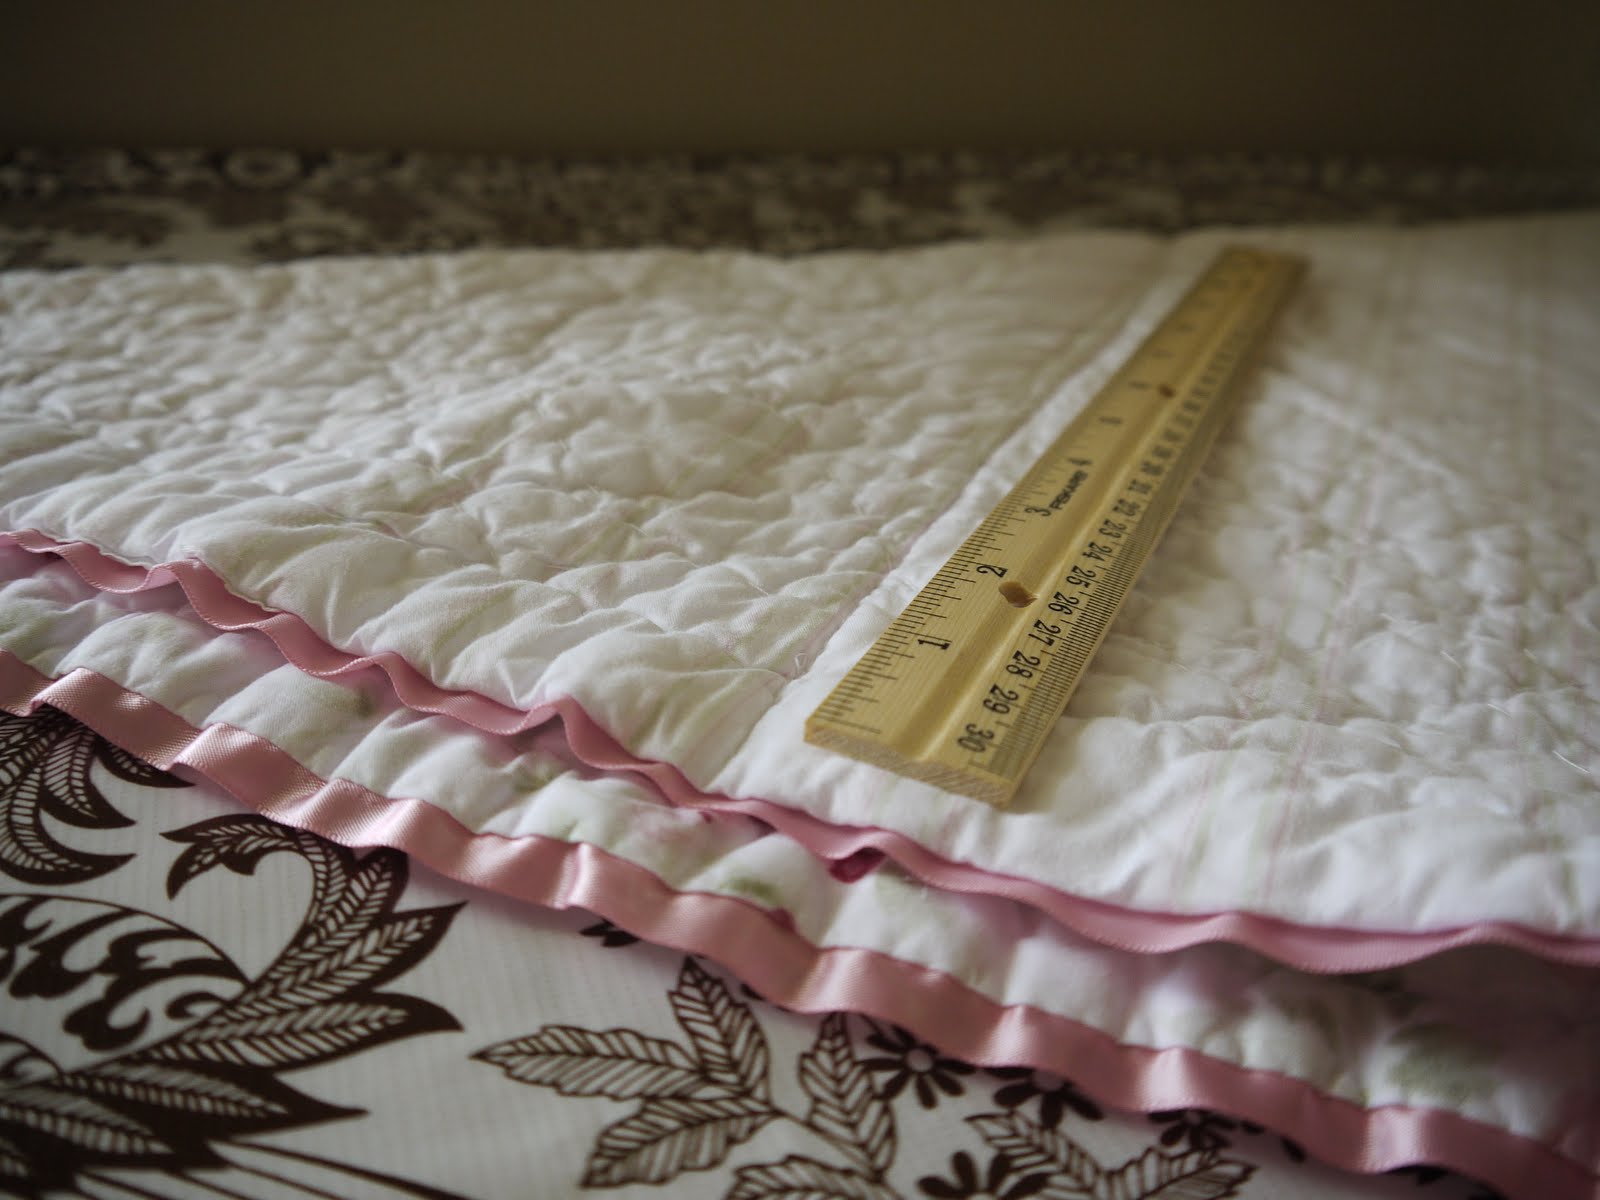
6) When you’re done, you should have a simple, straight line sewn where your pins were. You can see my line just to the left of the ruler in this picture below. Notice that my edges don’t meet – that’s because I pulled my quilt down rather far at the bottom of the bed when I positioned it so that I wouldn’t have that extra overhang at the top of the bed when the bed was made – remember?
8) Tuck the excess under the bed. It stays – it really does!!! Wanna know why? Because the quilt doesn’t shift around that much….because you’ve just spent 10 minutes sewing AMAZING POCKETS onto the ends of your quilt!

NEXT….TUG THE OTHER CORNER OF THE SHEET….

Now the beauty of this corner pocket reveals itself….
NOW….GRAB A CORNER OF THE QUILT AND GIVE IT A GOOD PULL UNTIL THE MIDDLE OF THE QUILT IS IN THE MIDDLE OF THE BED….

FINALLY….GO TO THE OTHER SIDE OF THE BED (translation for all little boys: fling yourself over the bed like a circus performer) AND GIVE THE OTHER CORNER A LITTLE TUG TO STRAIGHTEN OUT THE QUILT!


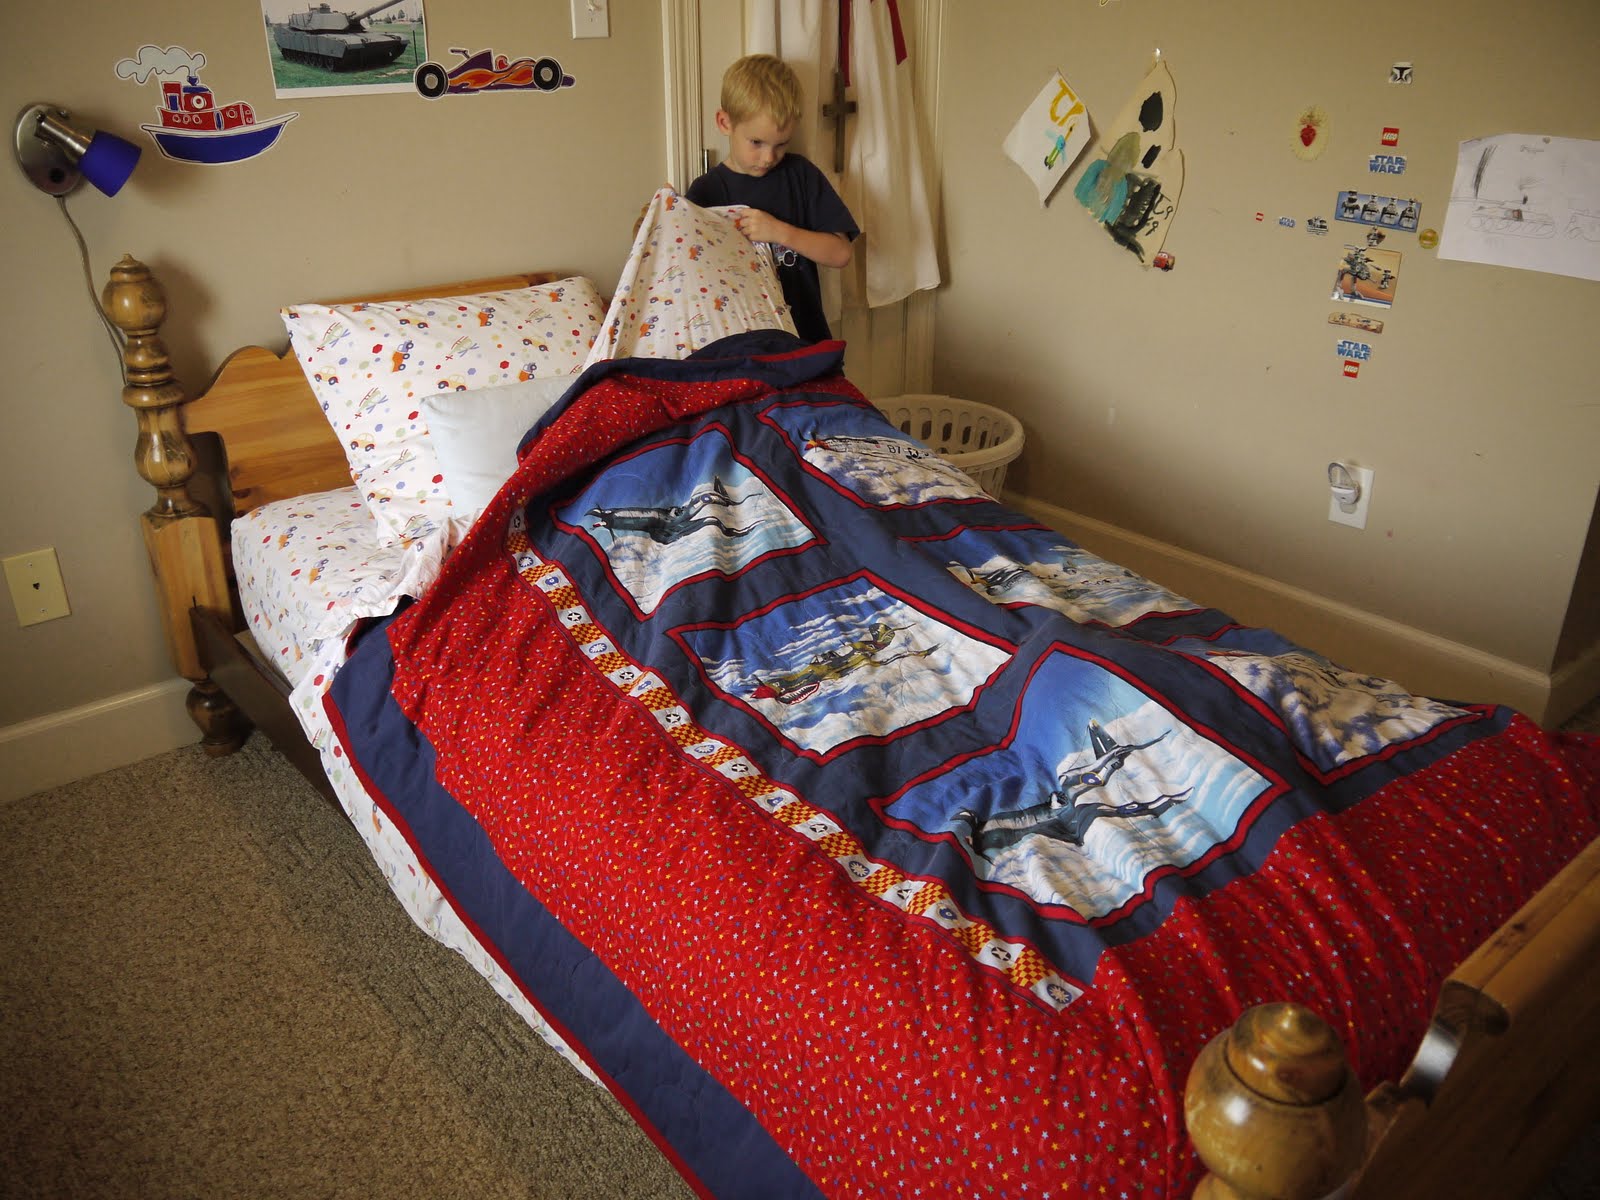
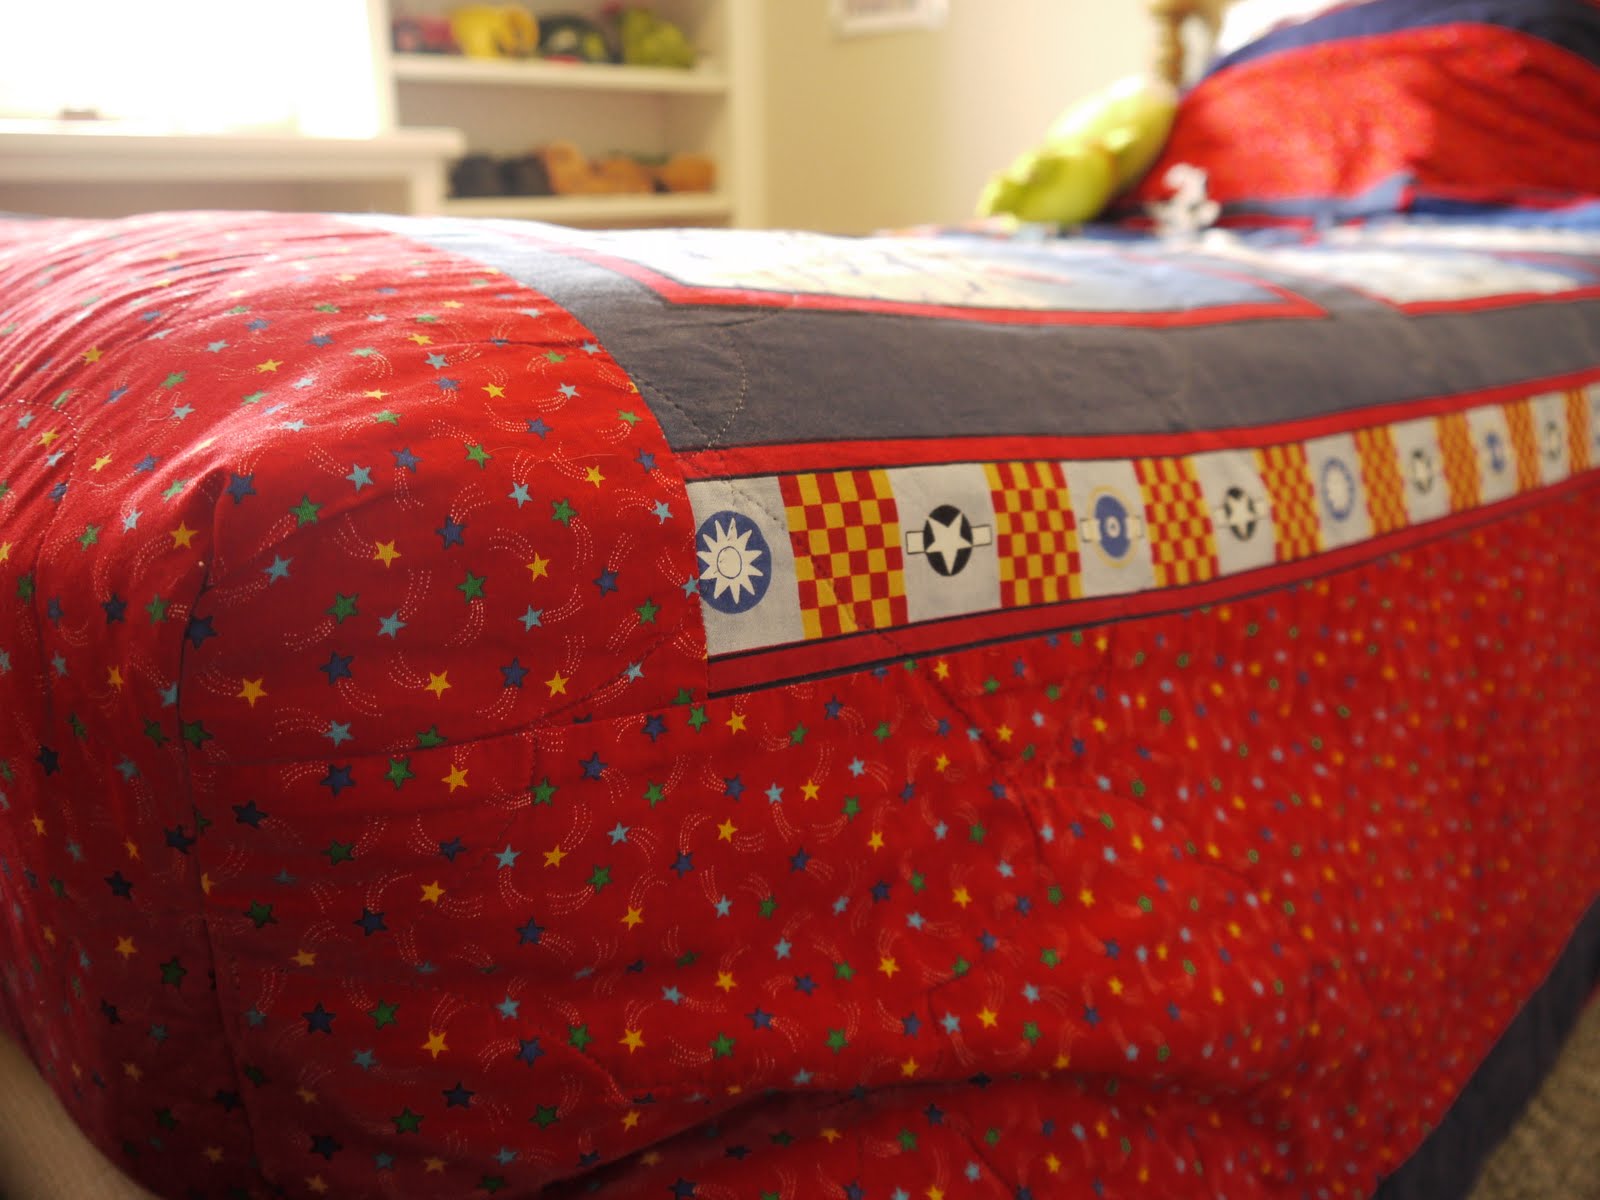
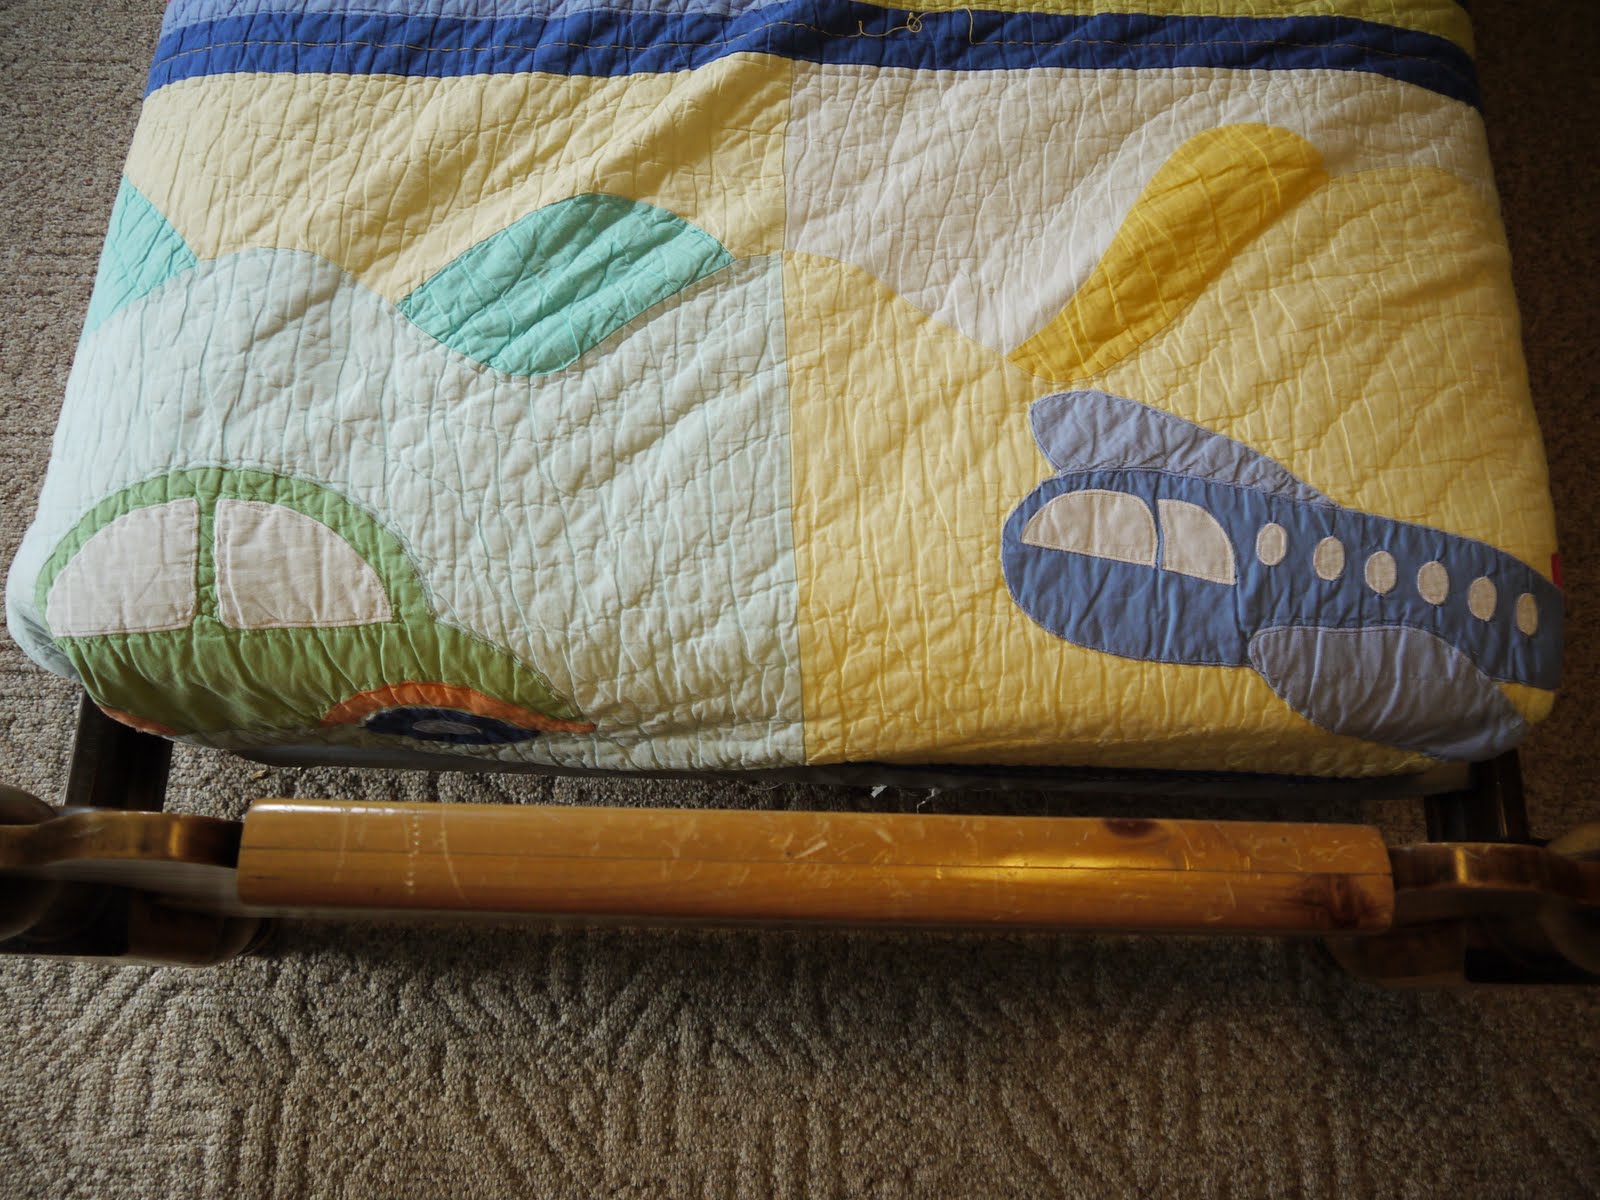
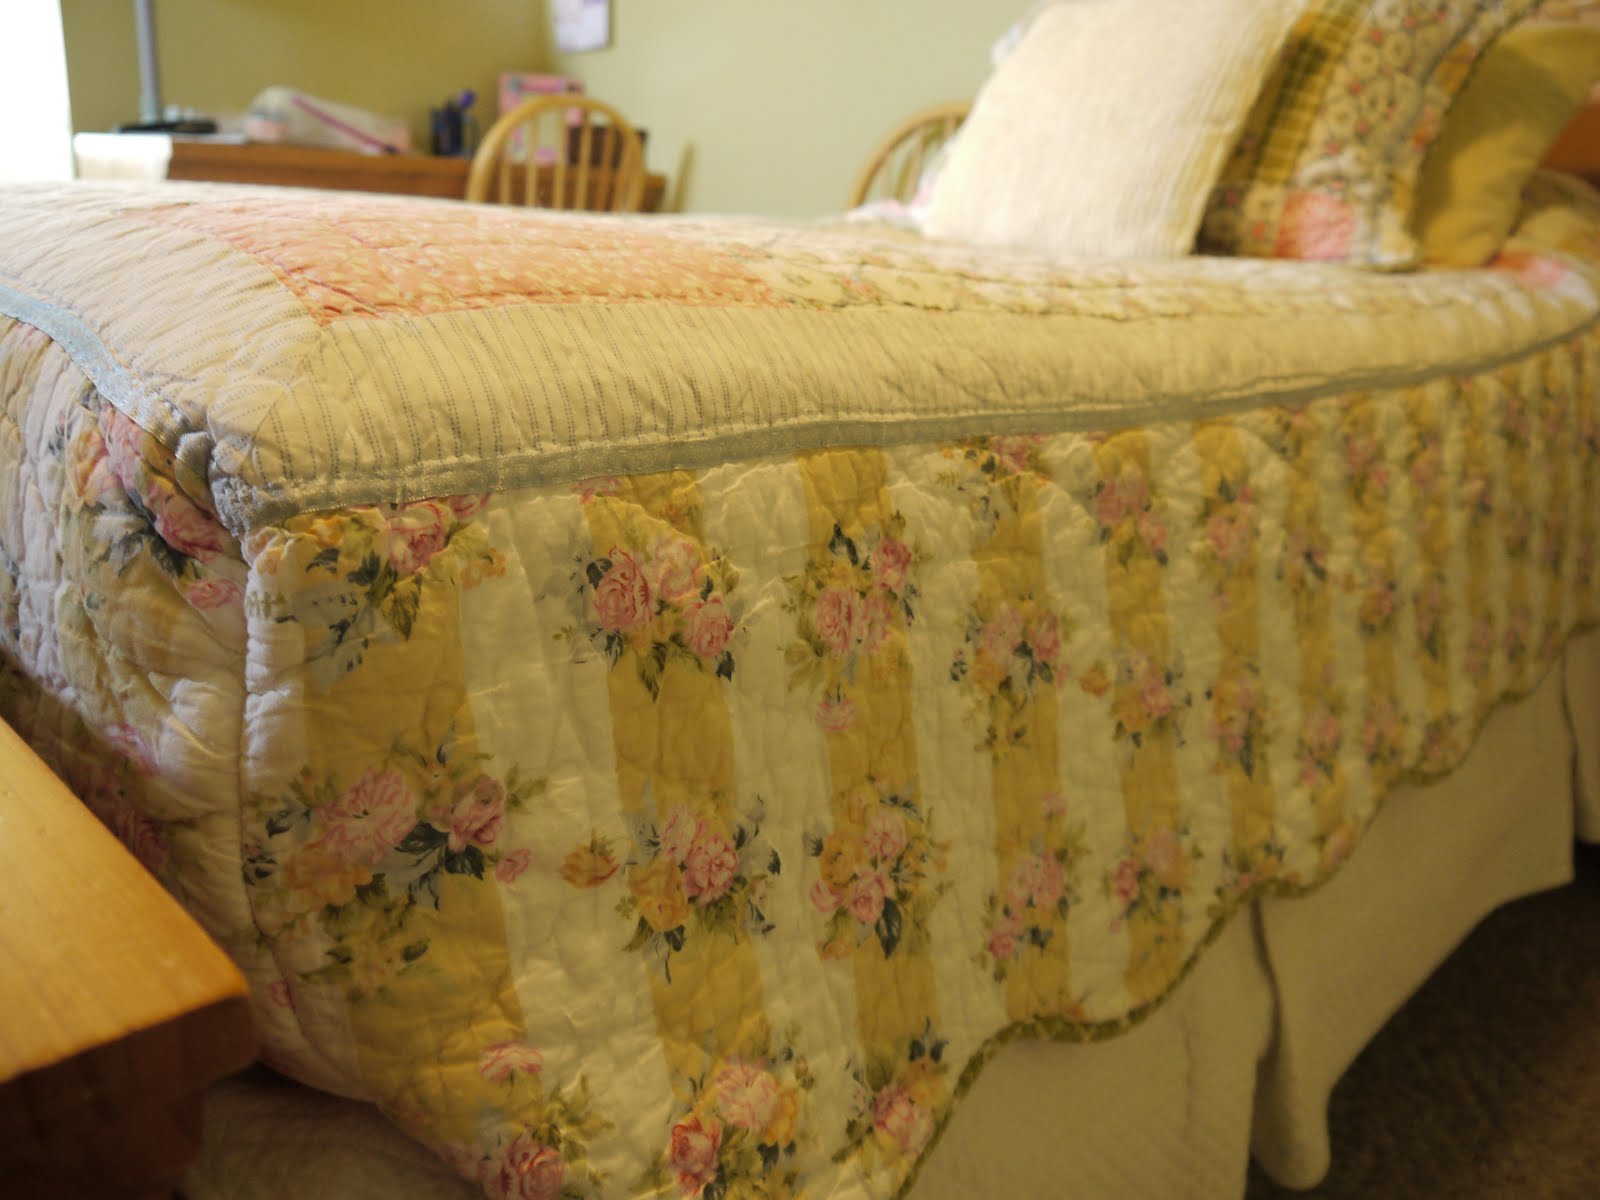
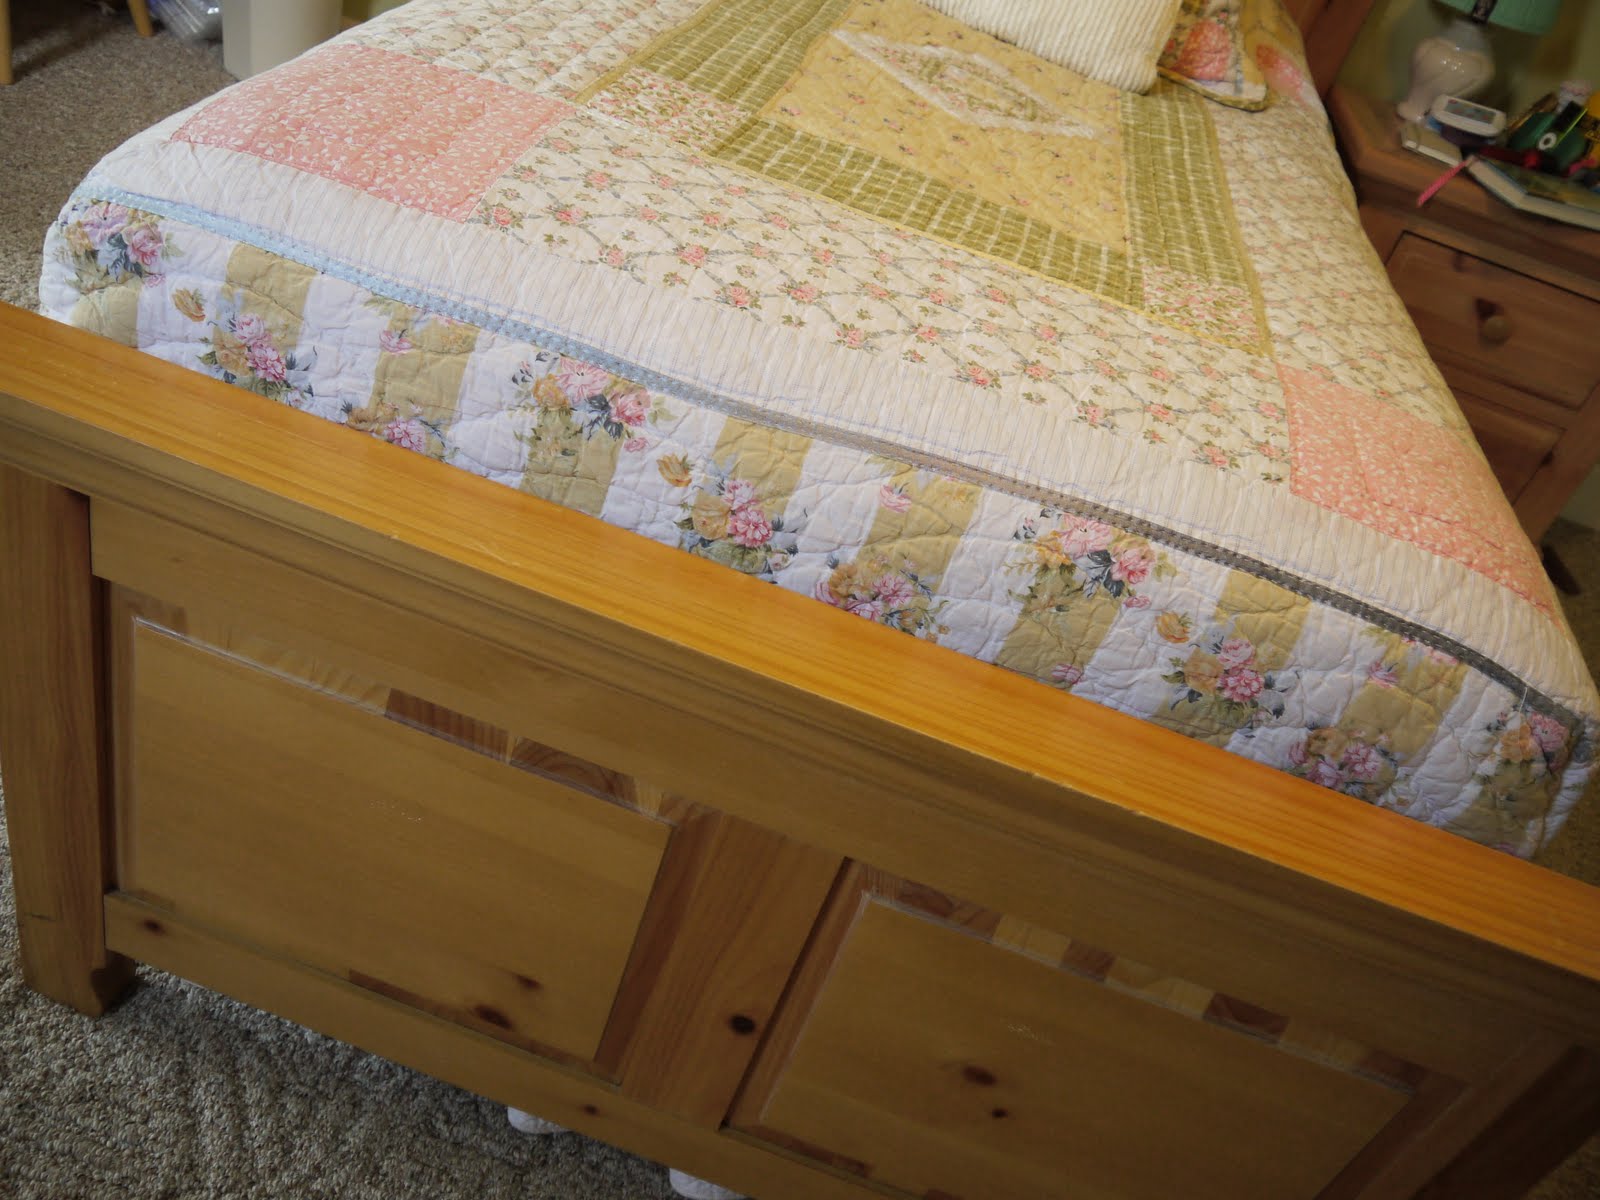
Here are the other boxed corner pockets I’ve sewn for the other kids beds in our home:

How’s that for a super simple project without a lot of time spent or skill required? Fabulously simple! Happy sewing!


Genius! Now I need a solution for bunk beds…
You can absolutely do this with bunks, Nadja! In fact, this idea really sings with bunks…because how else do you make those things? With a boxed corner on the end of a bunk, the child just needs to lay in the bed in the morning before getting up, pull up on the sheets, pull up on the quilt, and slide out. Easy peasy!
I love this idea Jen and I am so glad that you chose now to share it. We are about to go shopping for new comforters. Forget comforters – we are going back to quilts and I am doing this! Thank you.
I am overwhelmed at the brilliance LOL!!! Seriously!! And furthermore I am overwhelmed by the tidiness of this child's bedroom. Give me your secret for getting your kids to keep their rooms/areas tidy!! My oldest is 3.5 and for the most part if I TELL him to pick something up he will. But that is about as good as it gets around here. I also have a 2yr old (and one on the way) and the messes seriously are making this momma crazy!
Love this idea!!! Thank you…and the circus performer bit made me giggle!! Blessings!!
Jamie Carin and Claudio Romano said:
>> Give me your secret for getting your kids to keep their rooms/areas tidy!! << Sure thing! Here you go…. My post on TOYS:
http://wildflowersandmarbles.blogspot.com/2010/02/toys-my-thoughts-on-choosing-organizing.html
Jen thank you so much! Clearly I need to rummage through your archives for more gems!! That was a great post. We have a similar toy philosophy about what comes IN….but I am not disciplined with limiting access. I will be working on this. An example of my issue. This morning my 3.5yr old made a “town” with a castle, dollhouse, farm, Noah's Ark, and tree house. And so all of the differing accessories for all those toys are on the floor in the middle of all the buildings. I have told him to please put everything back, but he then sits down and plays some more….now he is laying on the couch listing to a book on cd….and the mess remains LOL…he will revisit many times I am sure, but meanwhile my dining room is a disaster as a result. (of course I see that if there was only the Ark and castle available we would have only 1/5th of the problem)
Thanks!
Great tutorial, Jen! Everyone needs to know about this. It makes such a huge difference.
We now have FIVE quilts sewn up for my girls' bunk beds and they look so lovely and NEAT! And so much easier to make.
LOVE IT!
They look so lovely Jen, thanks for sharing 🙂
Jen, this is sheer genius! It's so obvious, but I never would have come up with it. I think I am going to dust off the old sewing machine and do this one for my boys!
Thank you for sharing! Great idea and so timely for me! We're about to move and I'm determined to implement new chore guidelines…this little fix is on my “to do” list to for sure 🙂
What a fabulous idea!! We have such a hard time getting beds made around here!!
Now if you could just tell me how you get your boys to LEAVE ALL THE BEDDING ON THE BED, instead of ripping it off every day to build forts, caves, holes, dens, and giant piles! LOL Your quilts are beautiful. I really need to learn how to sew.
What a neat idea! However, I think I am even several steps behind that with regards to my kids' rooms. How do I get my kids' rooms to look as beautiful as yours? Do you have them clean their rooms every morning? My four sons like to pin up posters all over their walls and drawings they make, etc. so the walls are kind of a mish-mosh. Plus, they have too many toys that I try to reduce every few months but it never seems to be enough 🙂
I have always liked your blog!
Gina
Neat O!
Could that be oilcloth that I spy on your sewing table, Jenn? How does it hold up? I was thinking of doing that to my school table.
And Angela? I was thinking of making those dyed silks in large sizes for the kids to play under. They take up sooo much less space and look nicer than a tangle of sheets and blankets. I was going to try and do this for Christmas in interesting colors and such and make sure it had a container to go in. I'll let you know how it goes sometime in March, if you wish. My nearly 3yods is giving me a run for my money with things like that.
I was thinking of giving him a little m&m or something I can easily pop into his mouth every time I find his bed made in the middle of the day (somewhere near the hour of deconstruction) LOL
Hi Donna Marie!
Had a minute….but YES!!!! That IS oilcloth on my sewing table and I ADORE IT!!!!!! First, it's a toile!!!!!! Who doesn't love toile in an oilcloth?! And second, I had a lovely lady from Etsy sew it to fit my (very cheap little fold-up plastic) table! Perfect! Useful! Pretty! Practical! Cheery!
Goodness, there's a blog post in there somewhere, doncha think?!
Lovely idea, Jen!
I pinned something on Pinterest and put your name on there for a tutorial using oilcloth to cover composition books!!…wipeable and I can imagine they can take a hit better if they are covered that way. I need pretty for my things and I think I am going to visit the fabric store in the next few days for some crafty things like this AND my school/dining room table…
Love the quilt idea, and I am definitely doing this project. Question though, where did you get those fabulous flower/alphabet magnets? I need a set!
Aren't those great, Gillian! They're not magnets at all though – those are wall art cards – done by a delightful artist, Melissa Sweet. The company eeBoo sells a number of wall art cards in a variety of delightful, vintage-like styles. The one you see pictured on the Doodlebug's wall are the Fairies in the Garden Alphabet Wall Cards:
http://www.amazon.com/Fairies-Garden-Alphabet-Wall-Cards/dp/B0008236L0/ref=pd_sim_t_5
Thank you for the link! The cards are fantastic, and there is another set I like too.
Super Cool-o-rama!
This is great, especially for the Montessori Home! I'll have to link up to this at the blog!
Thank you for your great tutorial!
-Susana
Thanks Jen, that has helped greatly with an ongoing problem with the beds in my house!
I have another question for a possible future post. My 8- and 9- year olds are doing great with the plan I have created based on your 'A Considered Booklist' post – thank you SO MUCH for that. It has made homeschooling a pleasure, at least for those two.
However my five-year-old seems to be slipping through the cracks. She is resistant to learning to read and write, yet obviously wants to be treated as a serious student just as her siblings are. If I had lots of time just for her it would be much better but as it is, I can offer her snippets here and there (with three younger children interrupting constantly). And she feels cheated that she can't go to school. Any advice?
Thank you for your tutorial! My issue with bedmaking is not a preschooler, but my husband who has had several strokes and really wants to help. He can balance with his walker and pull up the sheet and quilt. One more productive thing he can do that helps both his self-esteem and with the daily chores that I do. I did put boxed corners on the sheets to help them stay tucked too. Thanks again for sharing!
Ahan Thats Awesome ^_^
Thank you for this wonderful idea! My kids' beds are complete messes–this will be perfect for them! You have a wonderful blog-I especially love all of your wonderful homeschooling ideas and resources you share! Blessings to you! 🙂
I decided to convert my fluffy comforter in the guest bedroom to one with fitted ends. I just like the clean look. Thanks for a super easy solution. I had mine finished pretty quick. And I used safety pins so I could flip the comforter over and re-fit as needed before sewing. Worked like a charm. The fabric is very thin and silky and moved a lot so it’s not a perfect seam, but it was the best it would allow. I still think it looks so much better. I posted in my blog with photos and a link to your instructions..
The safety pin idea is brilliant!! I’m so glad this tutorial was helpful!! Thank you for sharing the link back to my blog!