Working With Oilcloth :: Projects

I’ve been meaning to post this oilcloth project for some time! Erin’s post, Re-discovering Our Creativity, and her corresponding thread at 4Real that discuss simple and easy ways to unleash creativity have motivated me to get these pictures up here so I can show you my simple oilcloth projects and by way of showing you those, show you our new art center!
Everything began with this old tv stand. No one has televisions that sit on top of large pieces of furniture anymore. Teleivisions have become slim, and thus many of these old tv cabinets are cast aside. This one was free. We bought some furniture off Craigslist and the family just threw in this old tv cabinet!
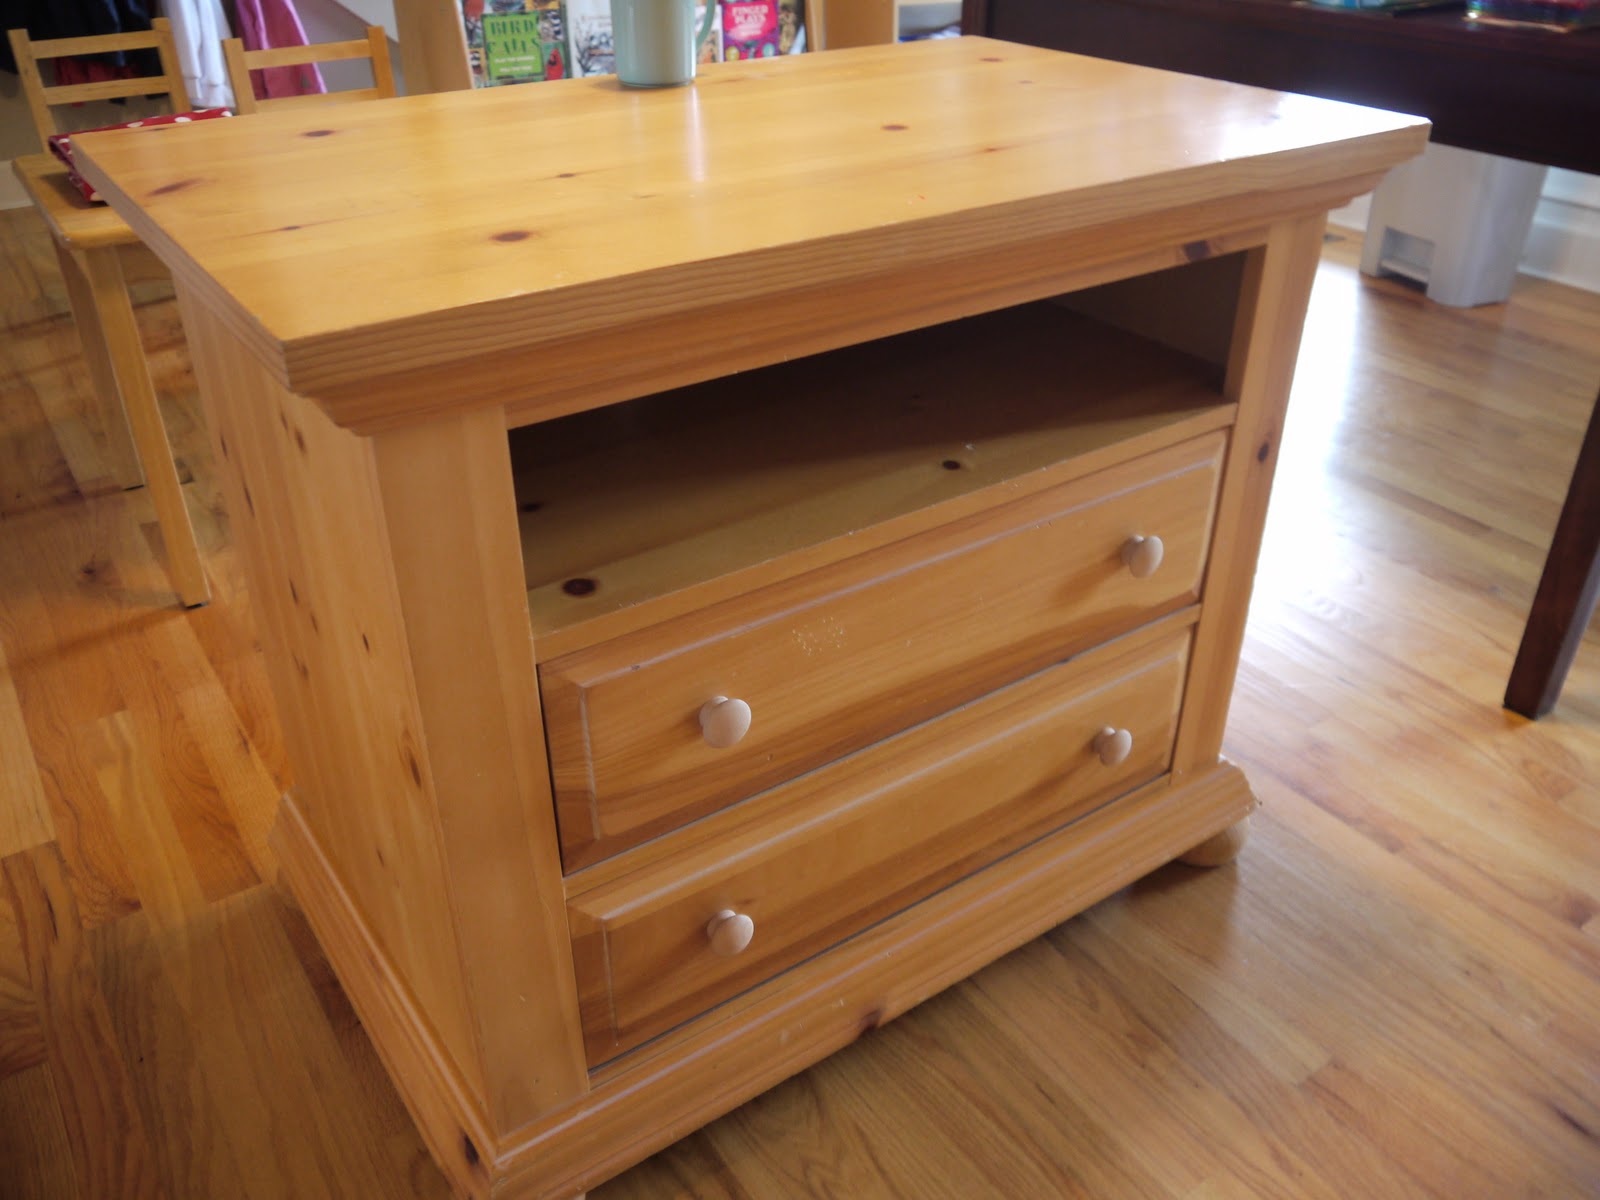
It’s a sturdy piece of furniture, from the Broyhill Fontana line. Solid pine and not a piece of pressboard on it….except on the ugly backside of the cabinet….

I really wanted to use this cabinet in our learning room for our art supplies, but our limited wallspace is already spoken for. It would have to float in the room. But, what to do about the ugly backside??? OILCLOTH!
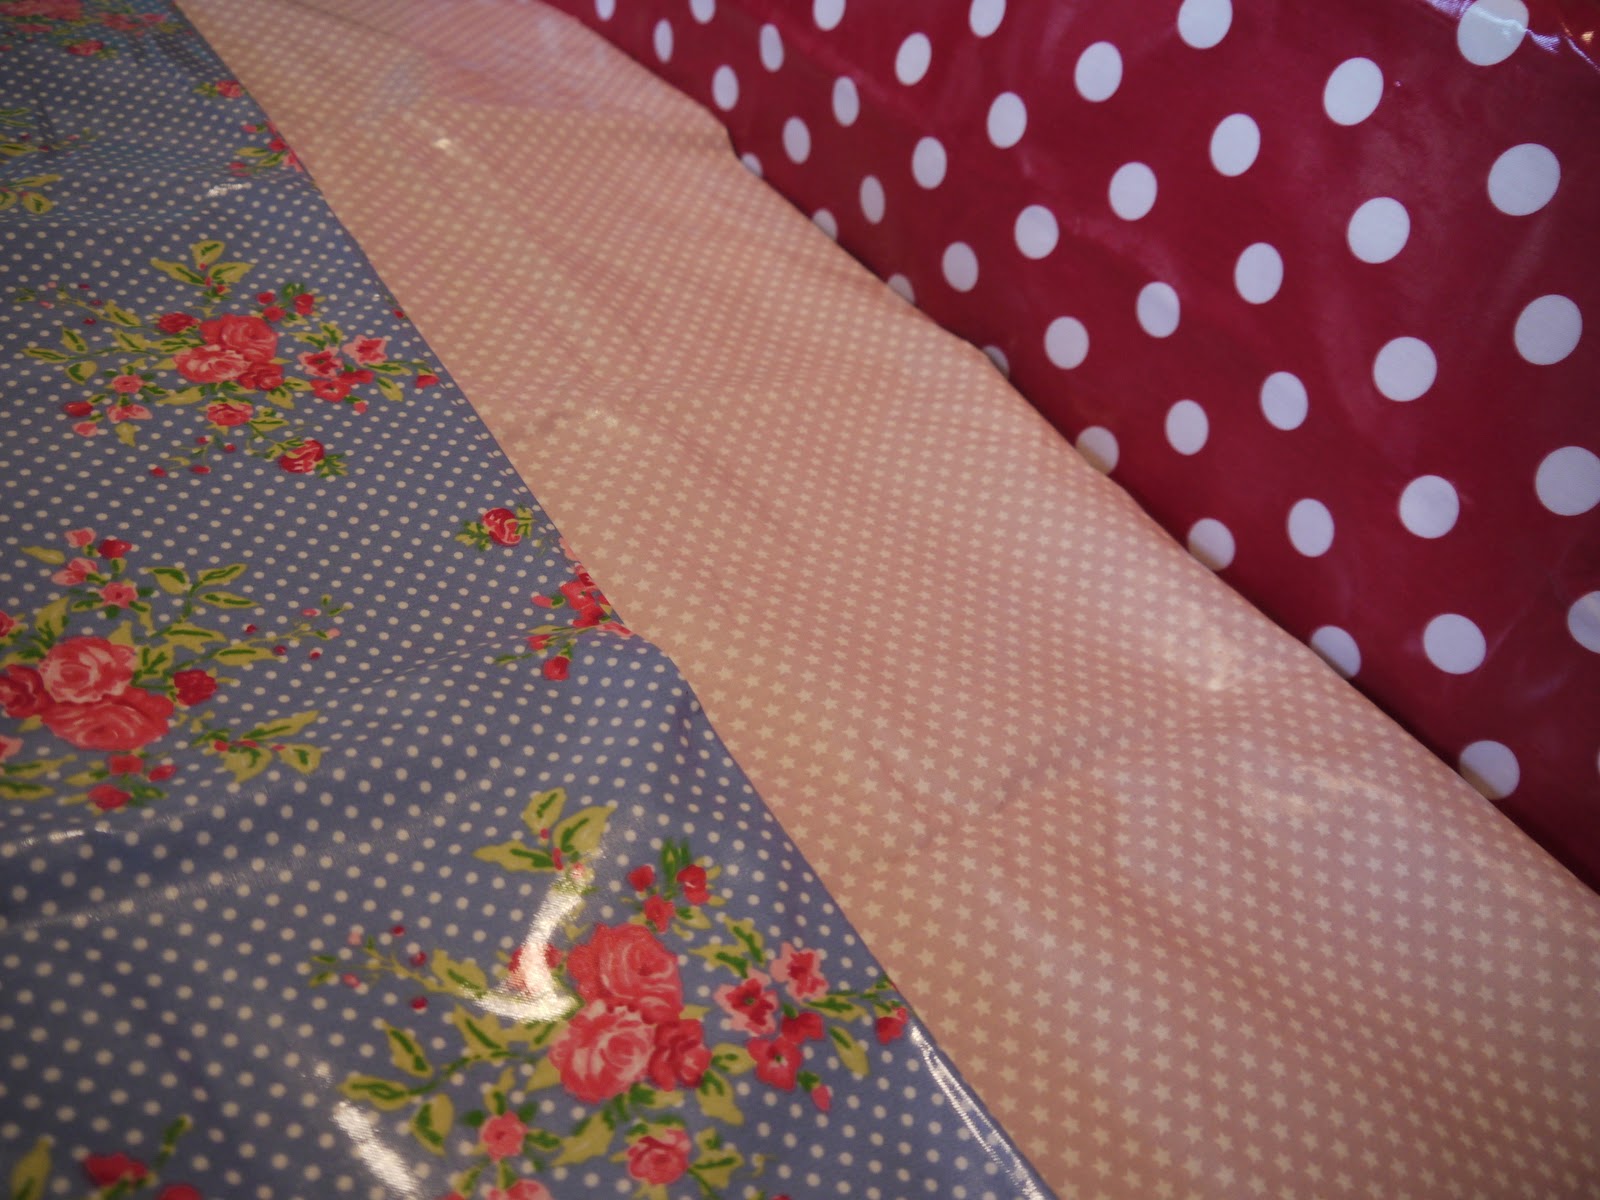
I found a few good quality oilcloth pieces to try. I have a few UK companies that supply oilcloth that I like:
The Tablecloth Co. (ebay shop)
The Fabric Factory (ebay shop)
Le Pin Parasol – beautiful Provencal fabrics which are then coated with a laminate (custom sizes are their specialty and their customer service is EXCELLENT!)
I like the PVC coated cotton oilcloths which are popular and sold in the UK for my projects, though typical oilcloth, known as “Mexican oilcloth”, definitely has some uses! You can see a good example of it here, hanging on my sewing desk in brown toile!
Sew, Mama Sew has a good explanation of the difference in today’s “oilcloth”, which is entirely different from the true oilcloth of yesteryear (which was coated in linseed oil).
What you find in the US is usually Mexican oilcloth and is a vinyl coated over a cotton mesh base (the mesh base allows the vinyl to penetrate so that the end result is a top and bottom that both have a plastic coated feel). It isn’t as thick as PVC or vinyl coated cotton, or at least, it doesn’t *feel* as thick to me. Overall, the laminated, or coated cotton has a more fabric feel and drape, and as a result seems more substantial.
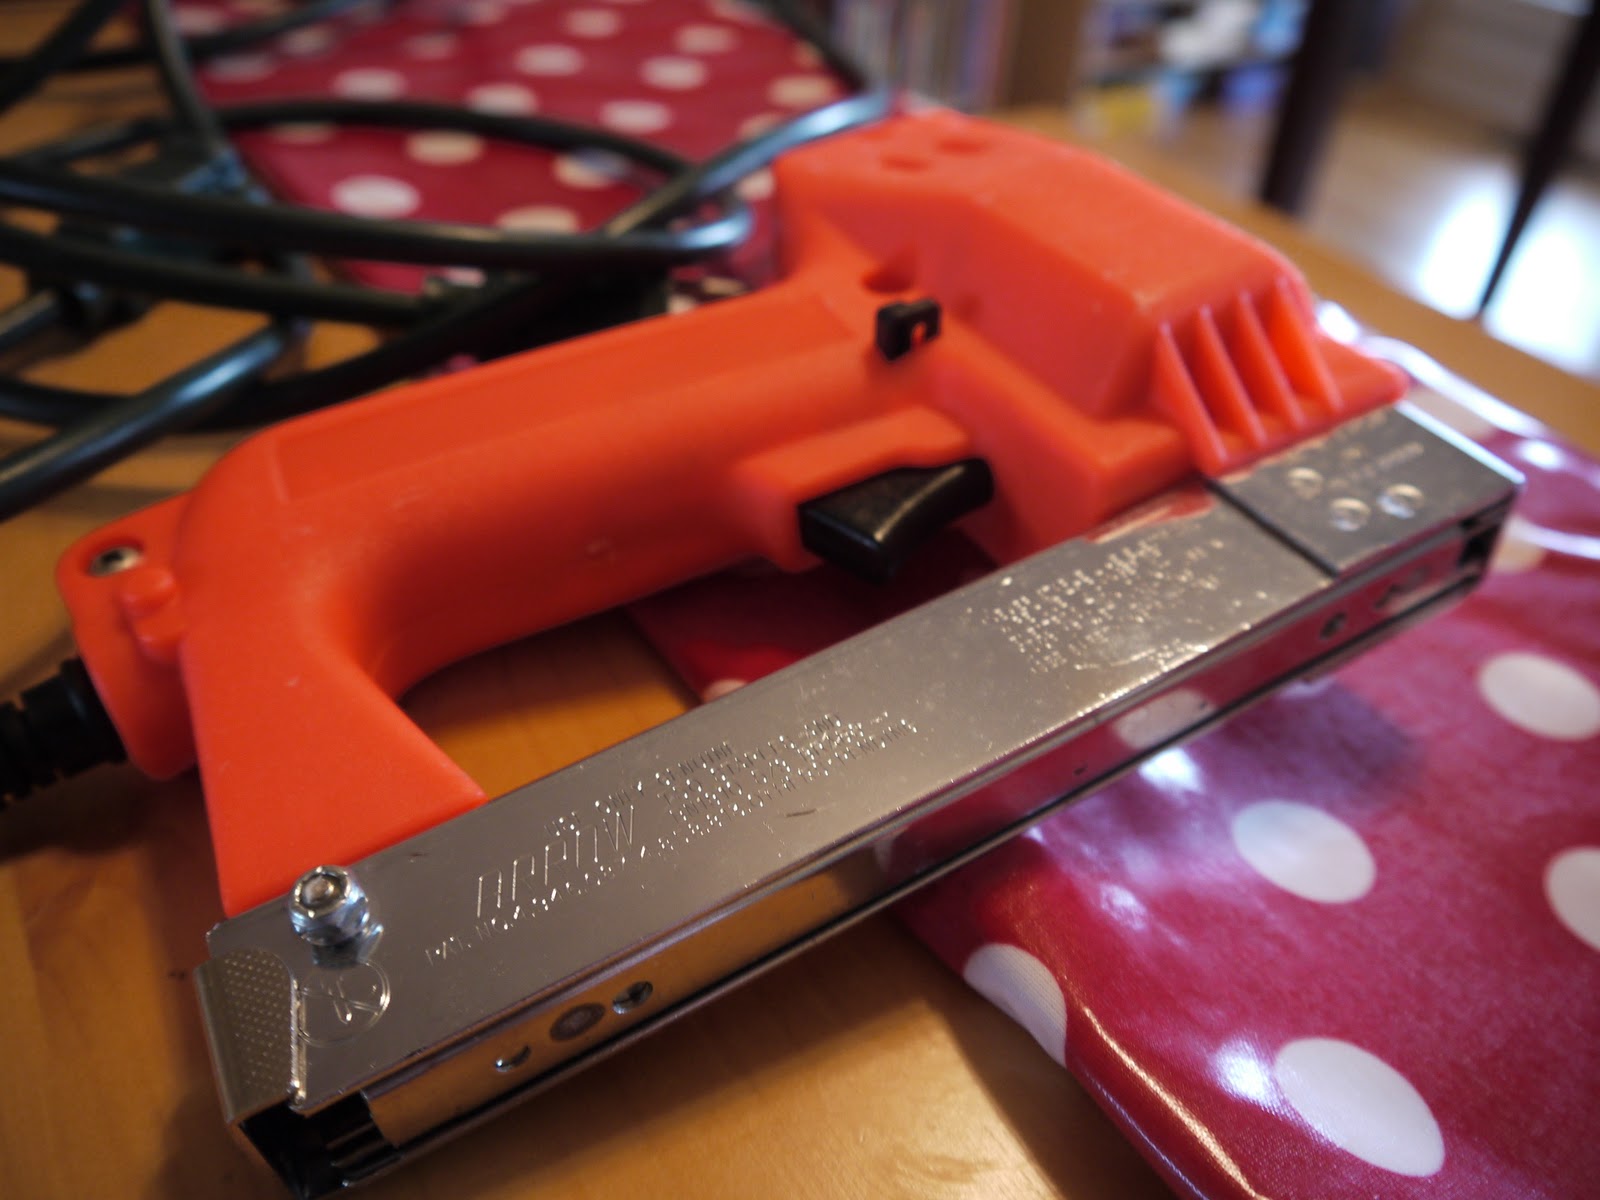
For this project, I used one of my FAVORITE TOOLS: the staplegun. Load it with staples and you’re ready to roll! (**NOTE** When using a staplegun, ALWAYS put a lot of weight on the gun when you staple or your staples won’t penetrate the wood entirely. I staple with one hand and lean on the gun with the other hand. If you make a mistake, grab your needlenose pliers, pull out the wonky staple, and try again!)
Cut your oilcloth and leave about 1 – 2 inches of extra material on each side.
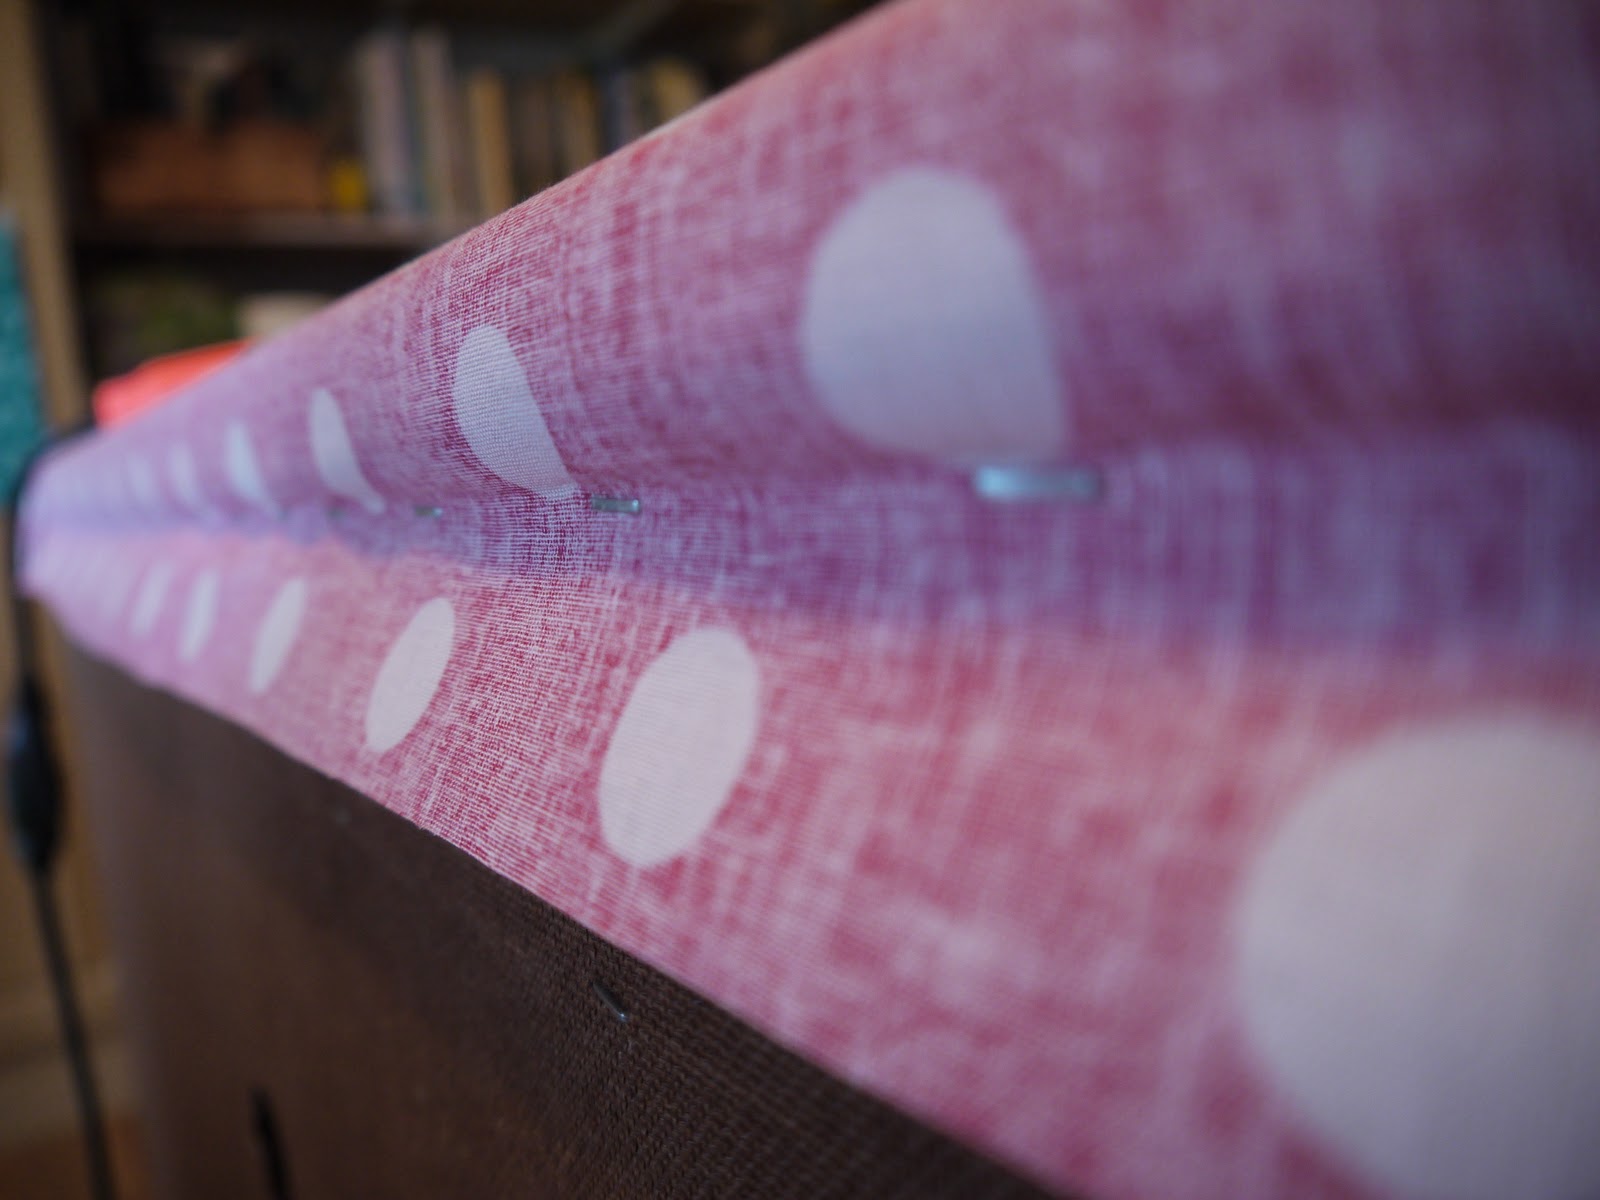
Since I knew the top would be most visible, I folded and creased the wrong-side-of-the-fabric just under the top lip of wood and stapled the underside of the oilcloth right next to the lip of wood so that when it was folded back over itself the top staples would be hidden. Start stapling IN THE MIDDLE and work your way out from the middle, alternating sides as you staple, re-creasing, following the crease and pulling firmly so that the oilcloth will lay nice and flat when you are done stapling.
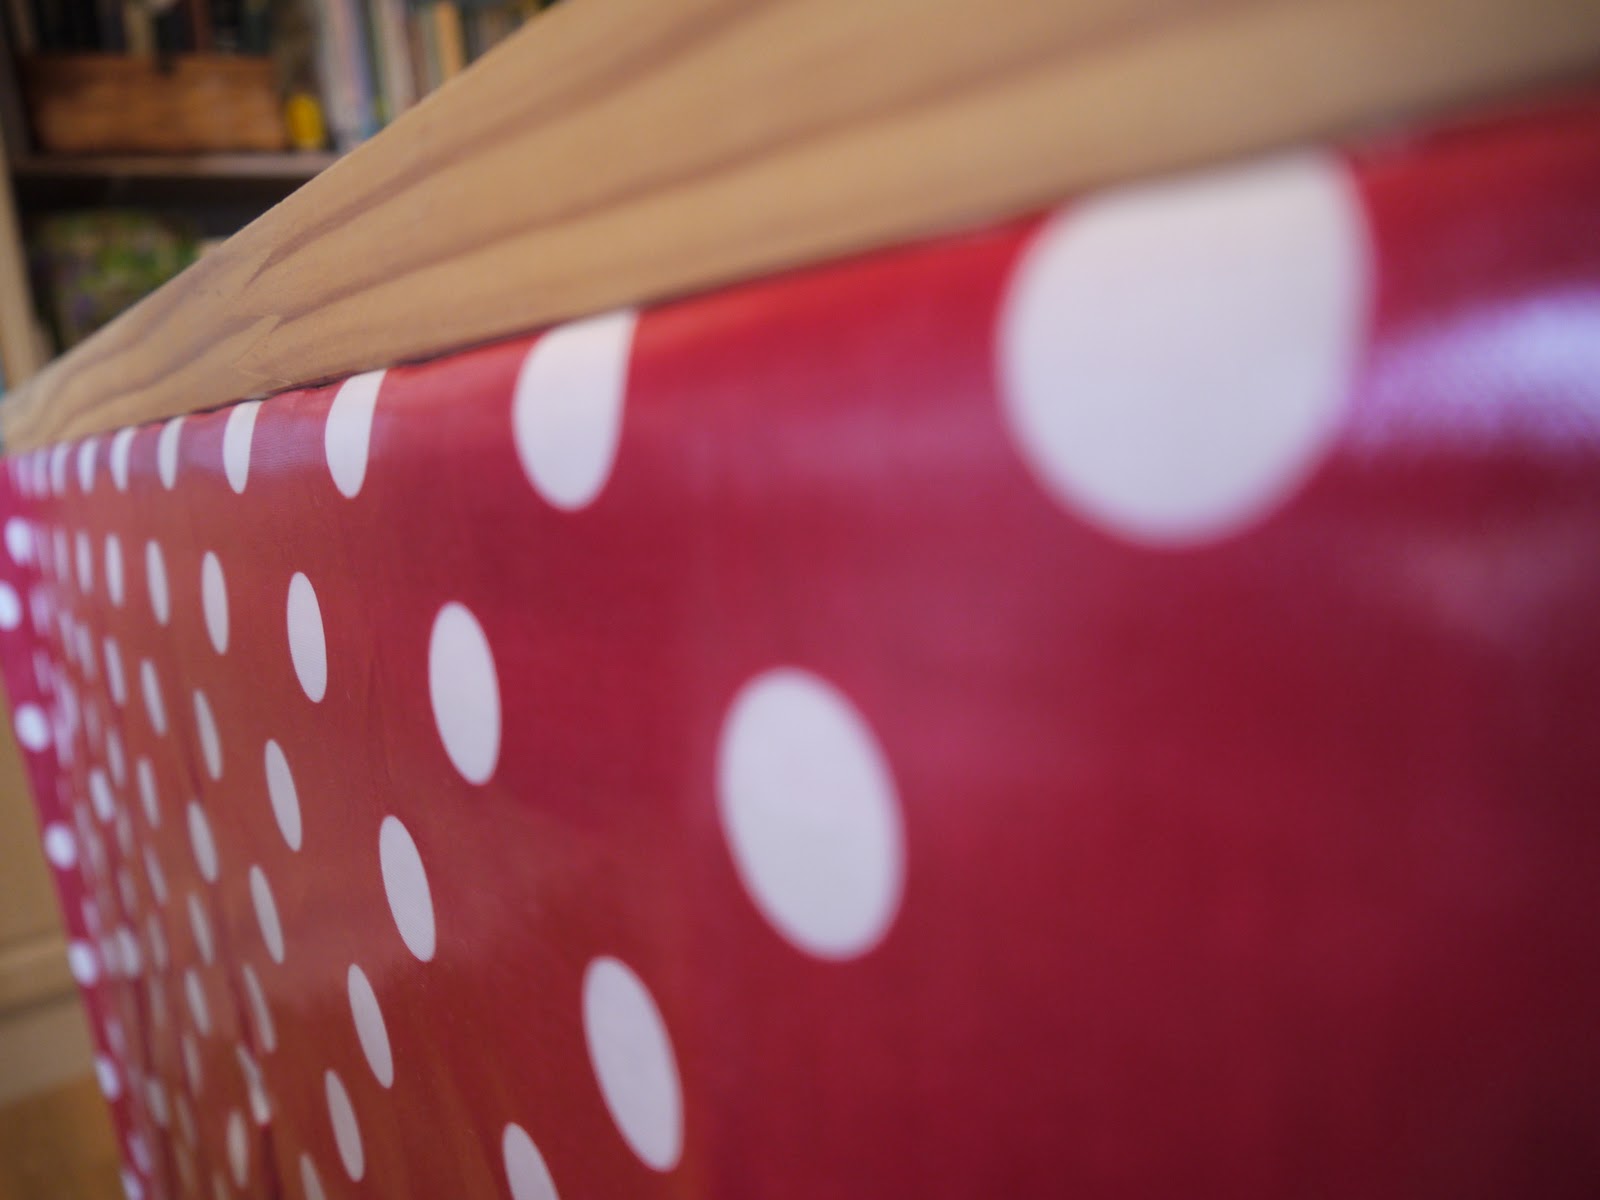
See how nice that looks when the oilcloth is folded back on itself? And you can’t see those top staples!

For the sides, just find the edge of your furniture. It helps to have an extra pair of hands for this part! With your fingers, tuck as neatly as you can down the side. Pull tightly and staple as you go. (This is an art, not a science….so don’t be paralyzed and not do this because you think you’ll make a mistake!! I used pliers and pulled out several staples when I messed up on this project! It’s super forgiving!) Work your way down the side, and keep pulling the oilcloth firmly as you go. If you have extra helpers have someone sit on the opposite side…the one you’re NOT stapling right now…and keep that side pulled taut.
 |
| Note the wrinkles on the bottom right side of my work – WHO CARES! I say fold, tuck, and KEEP STAPLING! 🙂 |
Work the sides and the bottom the same way – tuck extra under, pull down firmly so there are no wrinkles, and staple.
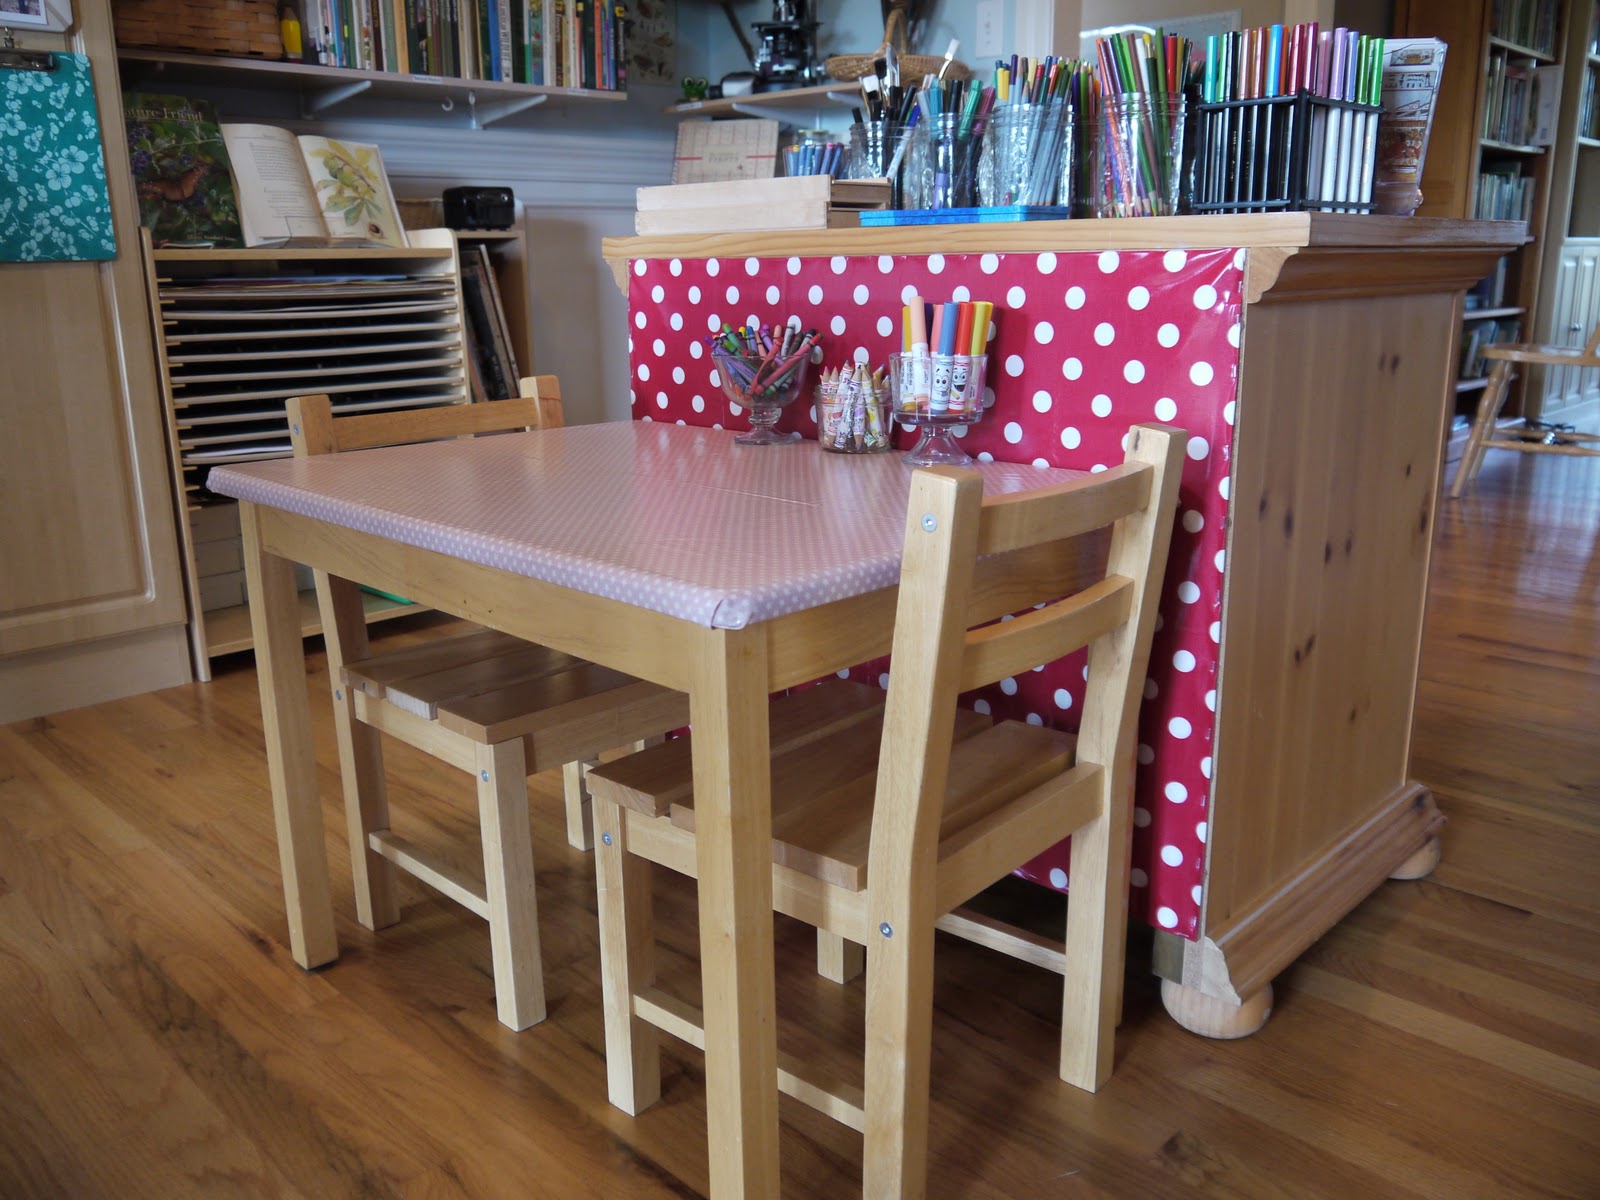
Viola!!! Ugly backside of tv cabinet/soon-to-be-art-center covered in cheery red polka dot oilcloth!
But, I wasn’t done!
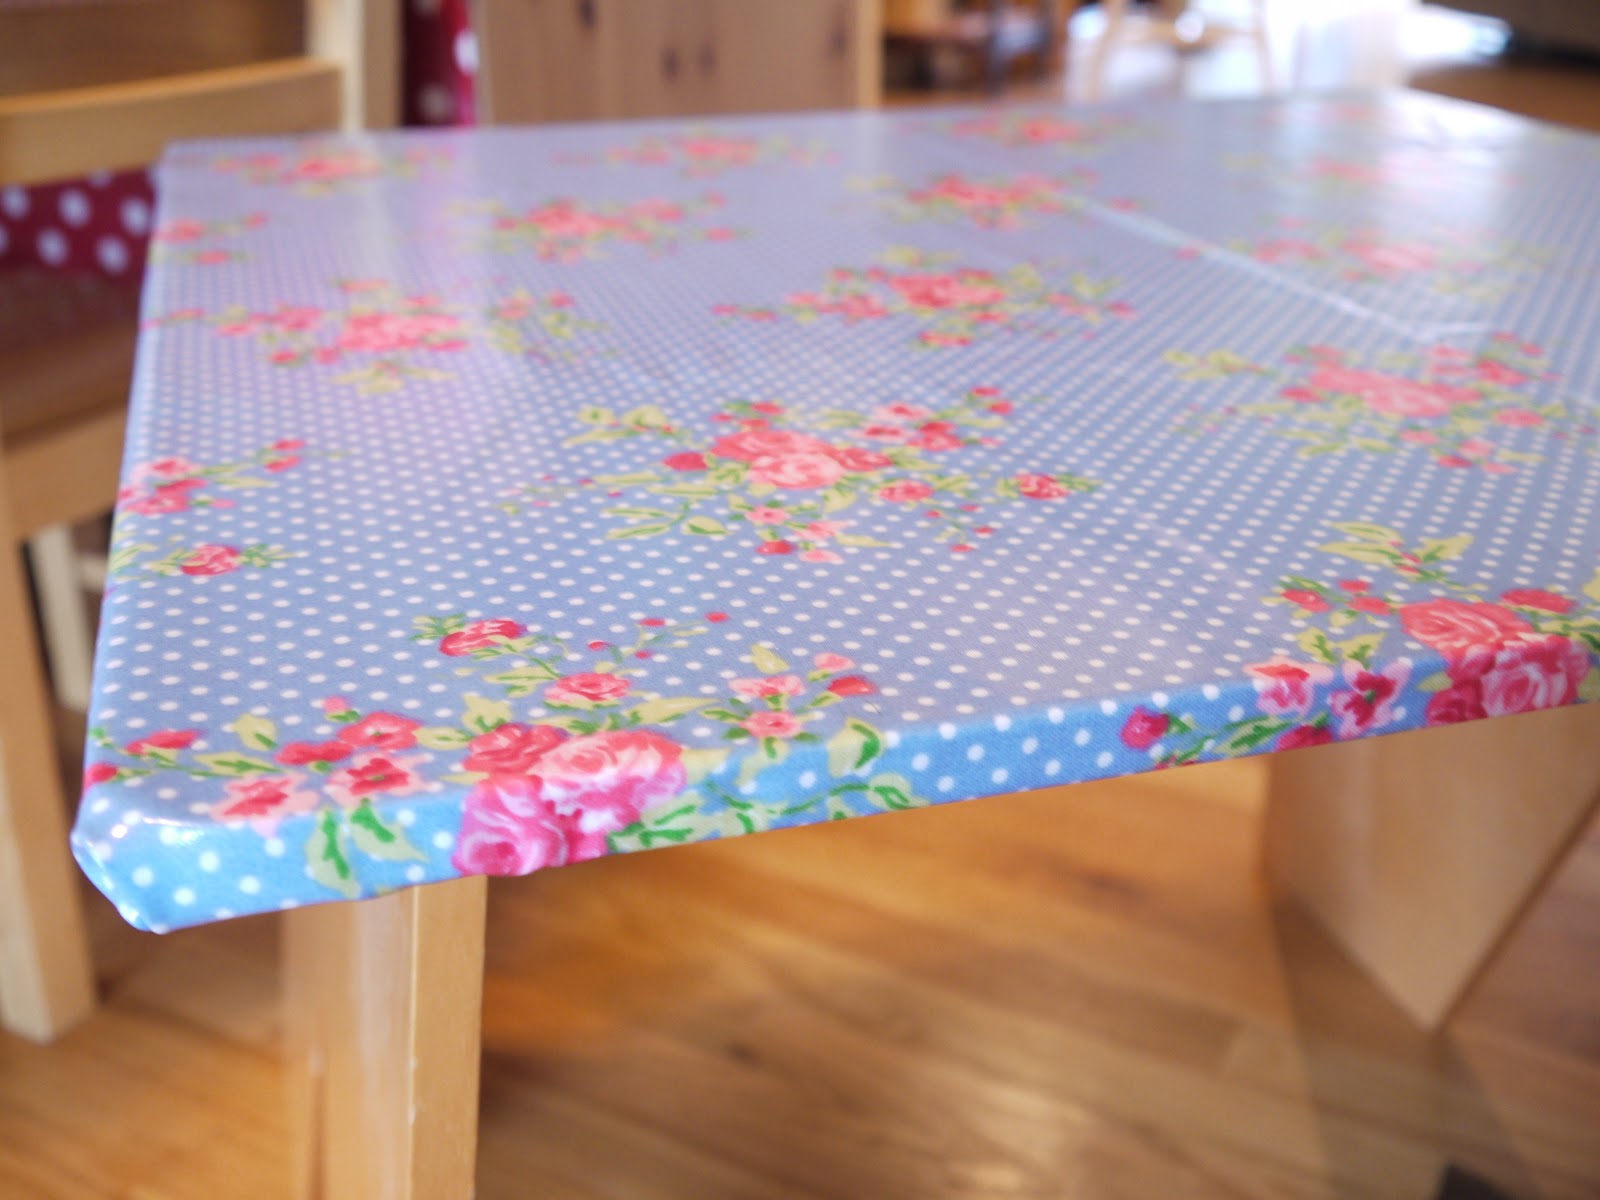
Time to cover the little wooden table! A certain someone spilled silver and army green model paint on the top of our little wooden table when he sat down to paint his B52 at the little person table {ahem….we will not discuss my thoughts on THAT particular maneuver! Back to making lemons out of lemonade}.
Little tables are SUPER EASY to cover! Just flip them over and follow the edge of the table to cut your oilcloth, again leaving an inch or two overhang.
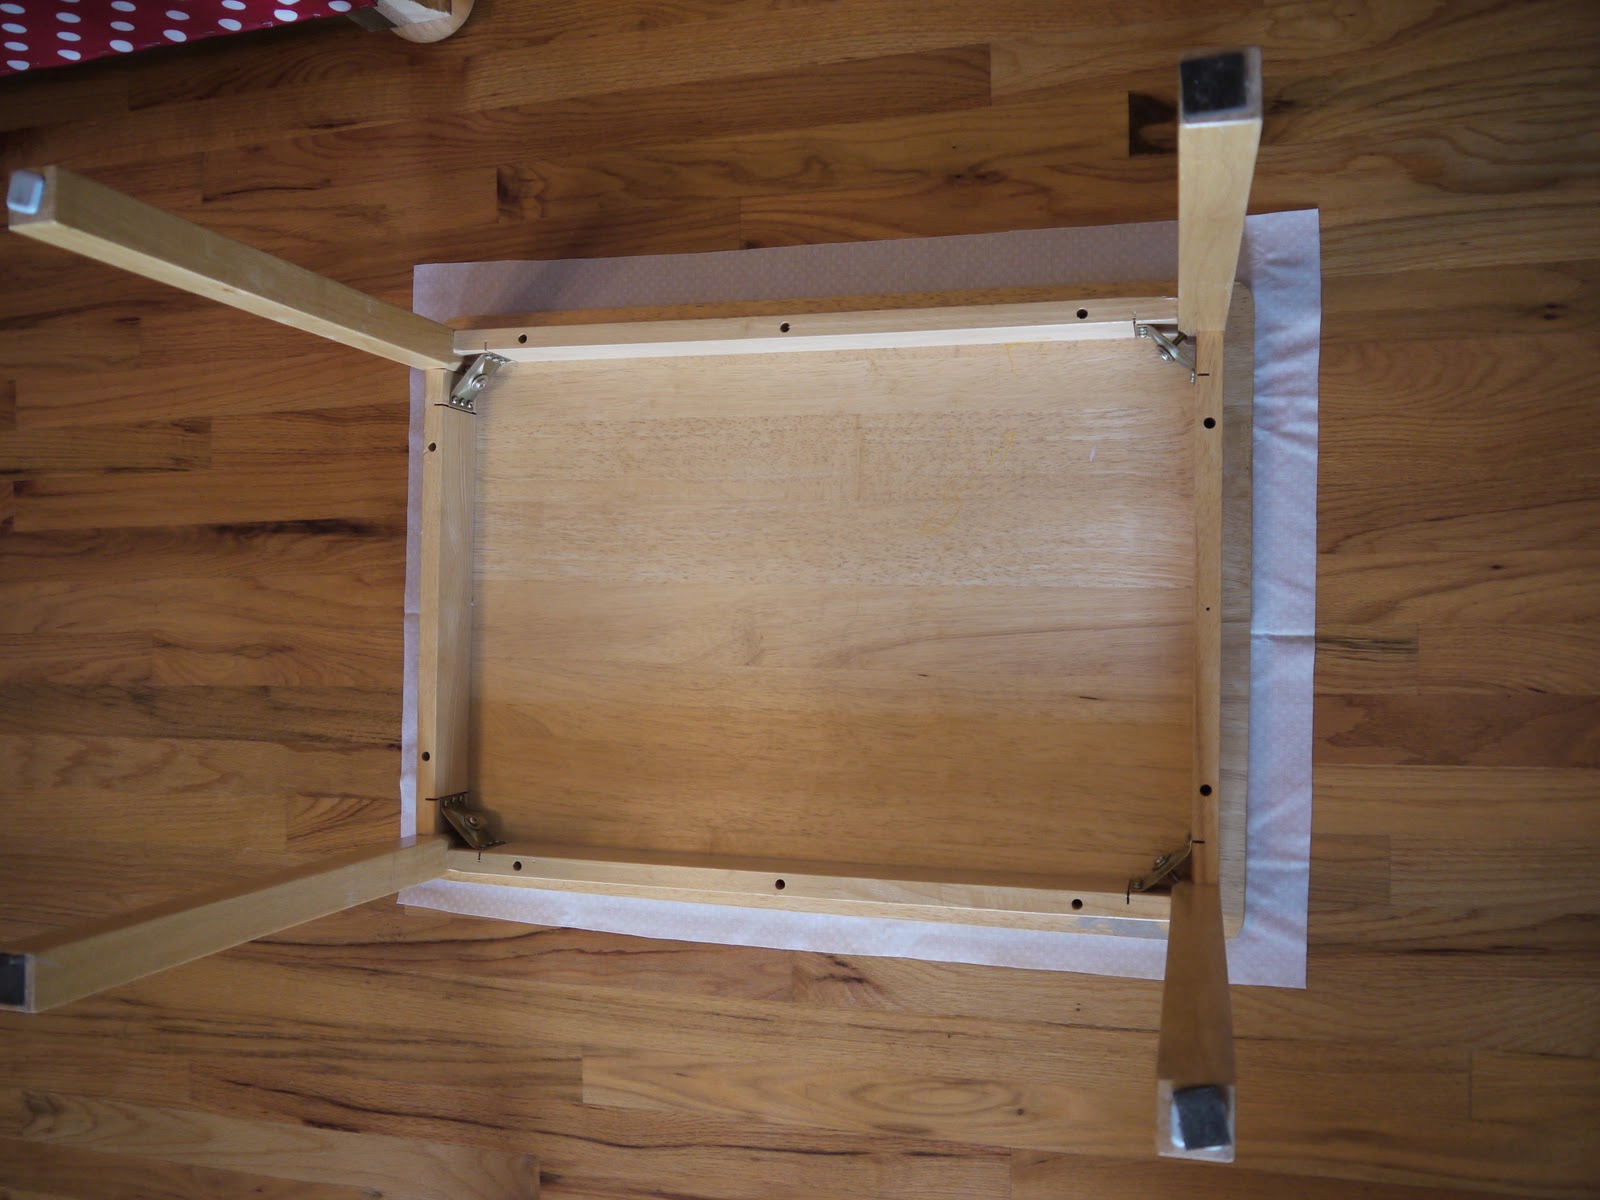
Follow the same procedure for stapling the oilcloth to the underside of the table:
- Find the middle of a side and start stapling in the middle.
- Go to the opposite side, give a firm pull to stretch wrinkles out, and staple in the middle of that side.
- Do this until all four sides have a staple in the middle, always giving a firm pull to stretch wrinkles.
- From the middle staple, work your way out from each side, alternating left and right, and don’t forget to pull firmly to remove wrinkles.
- When you get to the corners, channel your inner gift-wrapper and tuck, fold, staple.
- If you make a mistake, use your needle nose pliers and pull out the offending staple and try again!
Simple!

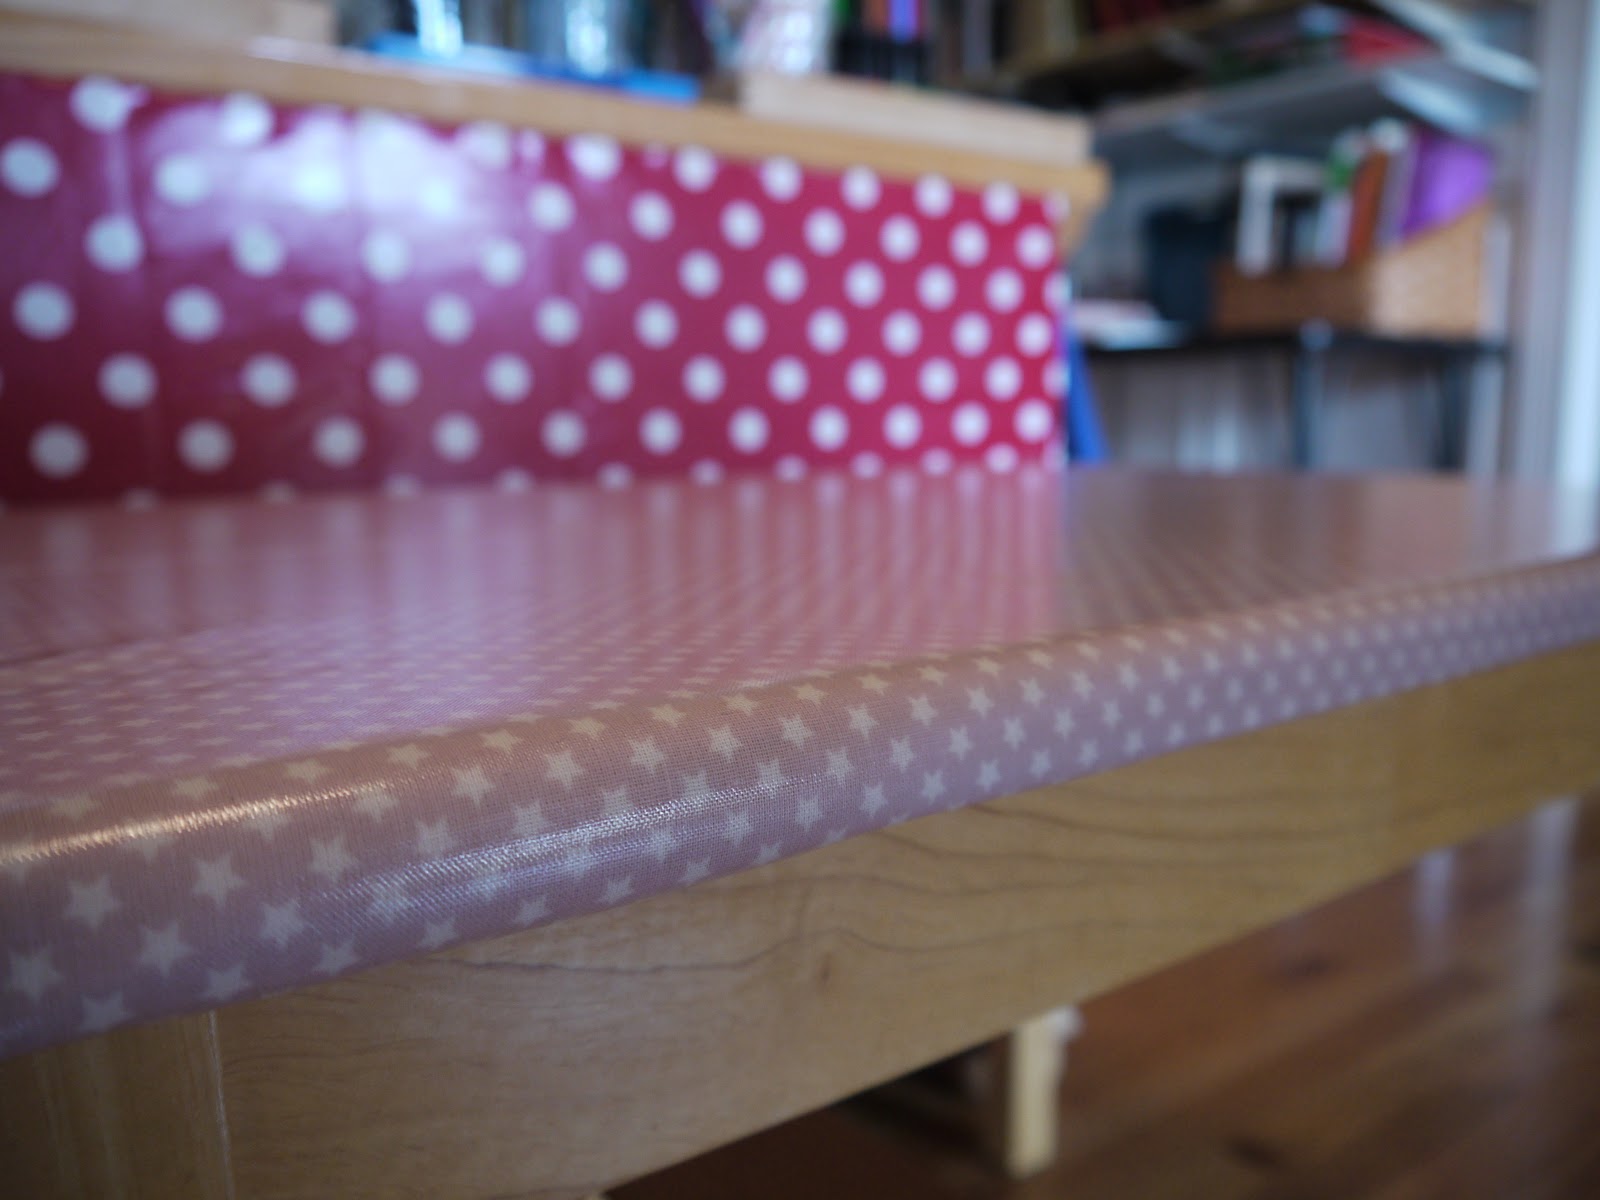
And now the table-covering is secure and won’t come off. And it’s very wipeable! We finished this project over the summer and since then we’ve wiped markers, paint and oil pastels off the little table. Model paints have been banished to another part of the house! 😉
Since the old tv cabinet became our new art center, I backed the little person table right up to it in the room and they both float out in the center of the room. This works out great for my littlest, who loves art projects and really enjoys having the art supplies right next to her! My littlest fella (almost 7) can often be found sitting opposite her and working.
It’s a great space!
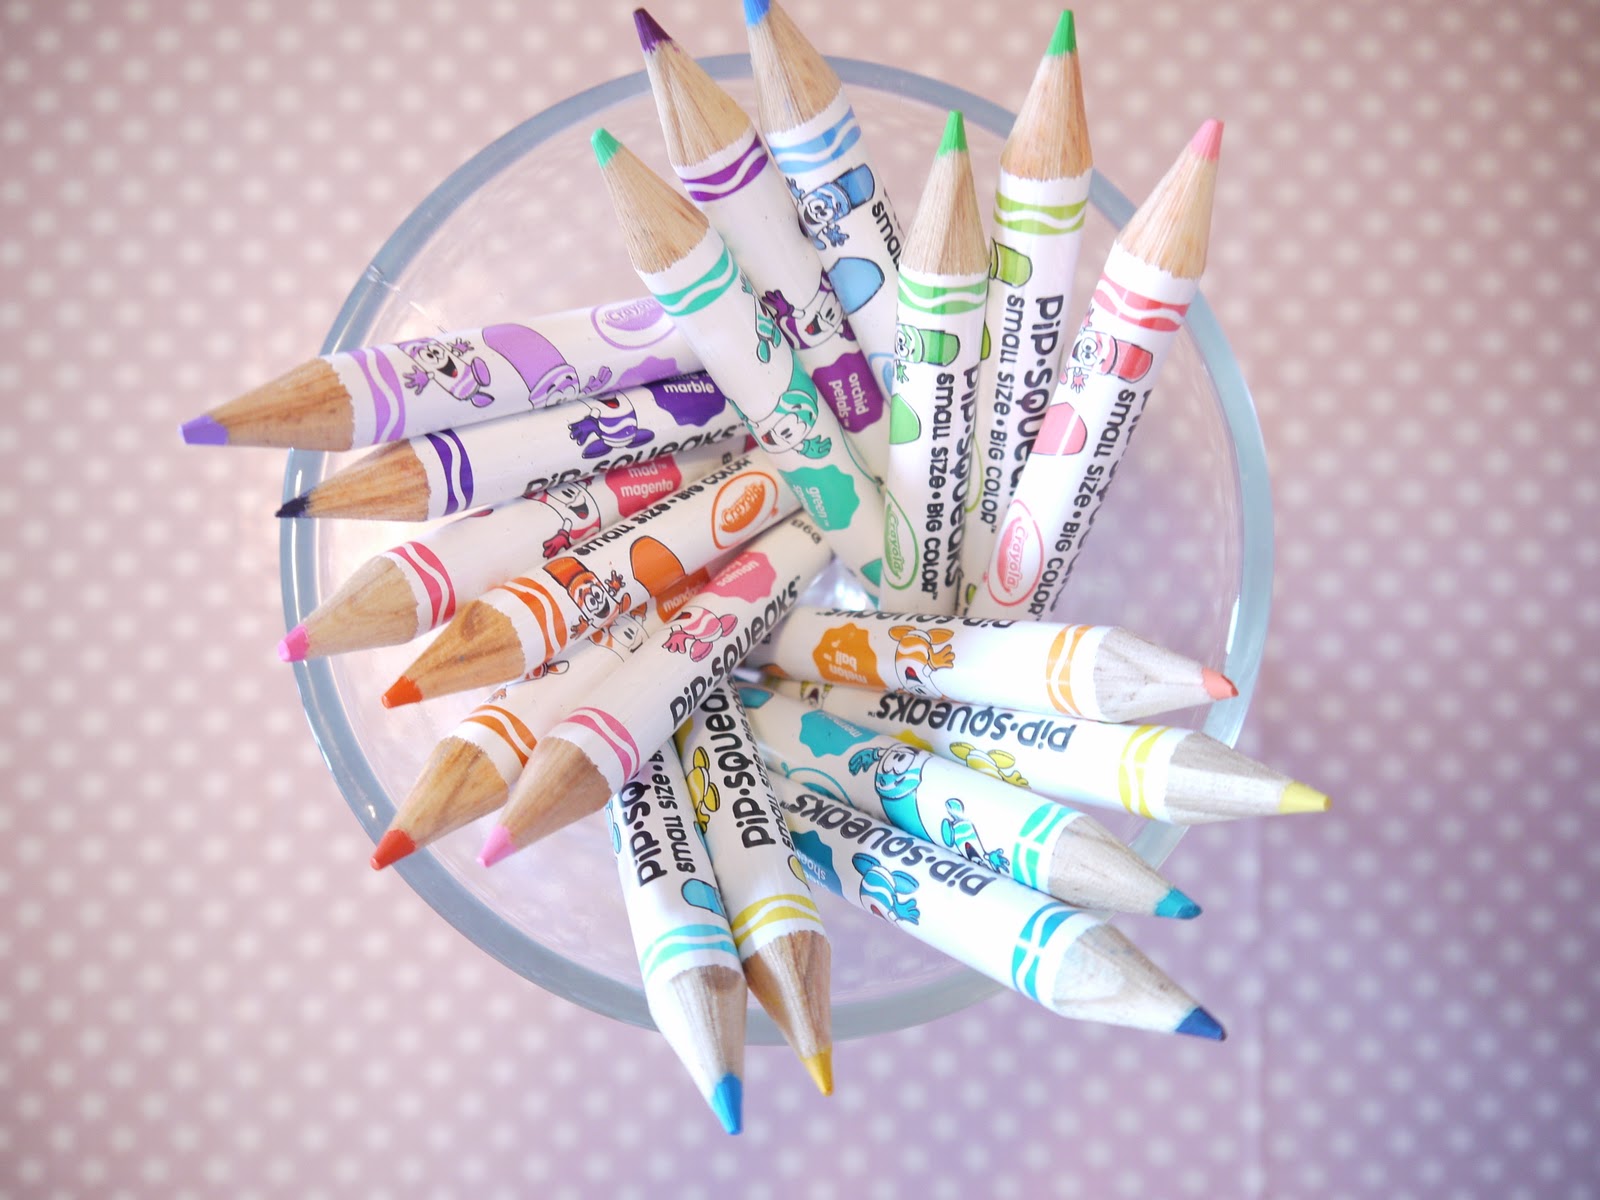
And, while I’m on the topic, might I recommend the little Pip-Squeaks color pencils from Crayola for little hands? We are loving them! And DON’T throw away that silly little pencil sharpener that comes with them – that thing works GREAT!
I was on a stapling roll the day I did all of this, and even covered the little table we use with our play kitchen. It had seen some wear and a cheery blue floral oilcloth was exactly the pick-me-up this little table needed!
How great is that?! I loved working with oilcloth! It’s forgivable when you’re working with the staple gun! And it’s durable and wipeable as you’re living with it, which makes it an ideal candidate for covering just about ANYTHING in a home-educating-lived-in-house! And…it comes in so many pretty choices which satisfies my inner need for pretty!

I’ll follow up this post tomorrow with another post on our new tv cabinet turned art center!

See you then!


Great idea and so pretty! I have a little kid table I was thinking about painting, but this oilcloth seems like a better idea since I'll probably need to paint it every year.
One question though- my littles sometimes draw on paper on their little table. How does the oilcloth do with pencils. I'm thinking it would not work so well
Thanks!
Great idea. And a great solution for the tops of little tables that little people have “personalized”!
Sharon,
About the pencils on the oilcloth – we use them frequently! The marks wipe up when a stray pencil mark lands on the oilcloth. I imagine a sharp pencil would put a hole in the oilcloth if given enough motivation, but regular writing and even preschooler-push-super-hard-on-the-pencil-writing-on-paper hasn't been a problem for us yet.
And…even if I have to recover in new oilcloth every year or so…it's STILL a better deal than painting (for me) once you figure in the time spent, the brushes and paint purchase, etc. It took me about 15 minutes total time to cover each little table.
Hope that helps!
So cheerful! I really like this. I have always admired oilcloth, but I have never purchased anything or made anything from it … I will have to file this idea for the future.
And I assume that keeping the children's art supplies out works well for you? I love how they look in the mason jars! But I would be afraid that they wouldn't put them back and keep them sorted … We are having troubles with that in other parts of our home (toys!), and I really am struggling with how to keep them available … but neat (and easy for them to clean up). We don't even have that much, IMO, but it still gets crazy, especially now that we have a school room and the toys have moved up to the bedrooms … I don't know if this is the best solution, but it's what we have going right now.
Oh, I could cry. I finally found the solution to the impossible to paint Dora table my eldest got for her birthday. It just overwhelms my very moderate tastes in cartoon character items. THANK YOU!!!
thank you for the inspiration!
I have a corner art table that needs a rehaul and this would work just lovely.
I also have a playroom table that needs this.
I was wondering where to get oilcloth and now I know!
I have a craft table that I cover with canvas wallpaper rolls that you can find in wallpaper stores in the discontinued bins for $1.00 – I apply that with tape and then cover with a sheet of clear adhesive contact………lasts for at least a year and can be changed anytime! All because I did not have access to oil cloth. Necessity is the mother of invention??????? smile.
Do you still have the broyhill fontana tv stand?
Yes, I do.