2017-18 Simplified Planner: Reviewing | Planning | Keeping the Day Together
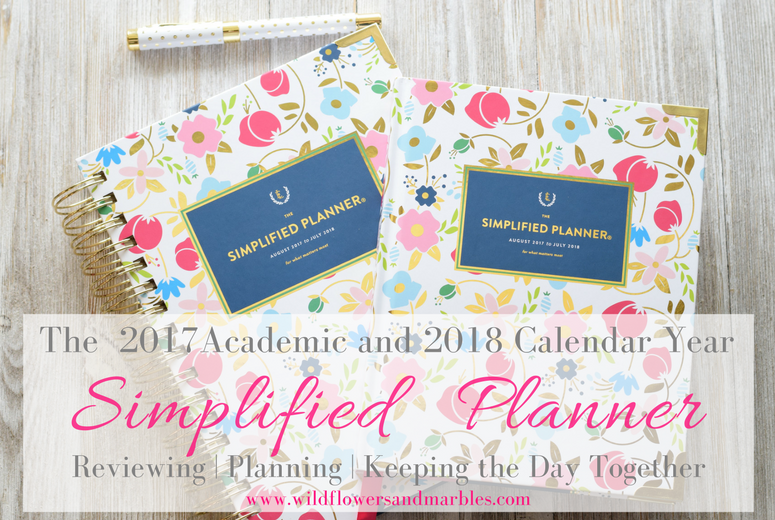
Well, friends, it’s planner season! And that means I have a few planner-posts for you to consider here! Today, I’m going to share a review post for the planner that has recently become a cornerstone for me – the 2018 Emily Ley Simplified Planner. My posts are photo heavy, and this one is no exception. Here’s your invitation to click away now if planner tools aren’t inspiring! However, if you’re looking for details about the 2018 Calendar Year Emily Ley Simplified Planner, I think you’ll find photos and ideas here to consider! I’m so glad to have you along! 🙂
Updated September 6 – this post has been updated with links to reflect the newly released calendar year Emily Ley Simplified Planners as well as the new accessories. If you’re looking for the Academic Planner (pictured throughout this post) you can find them here.

I’ll share about the two formats that Emily offers in her planner – both the Daily Planner and the Weekly Planner – and how I’m using the Daily to keep all the different parts of my life intersecting on one page, and how the Weekly Simplified Planner will work for me this year {hint: it’s going to be portable!)! I’m also going to share a few of the new features and updates that the Simplified Planner has for you to consider this year!
Let’s get started!
Daily Simplified Planner
This year, I’m using a 2017/18 Academic Simplified Planner in the Daily Edition. I’m still using my weekly Erin Condren planner as a weekly overview at my desk.
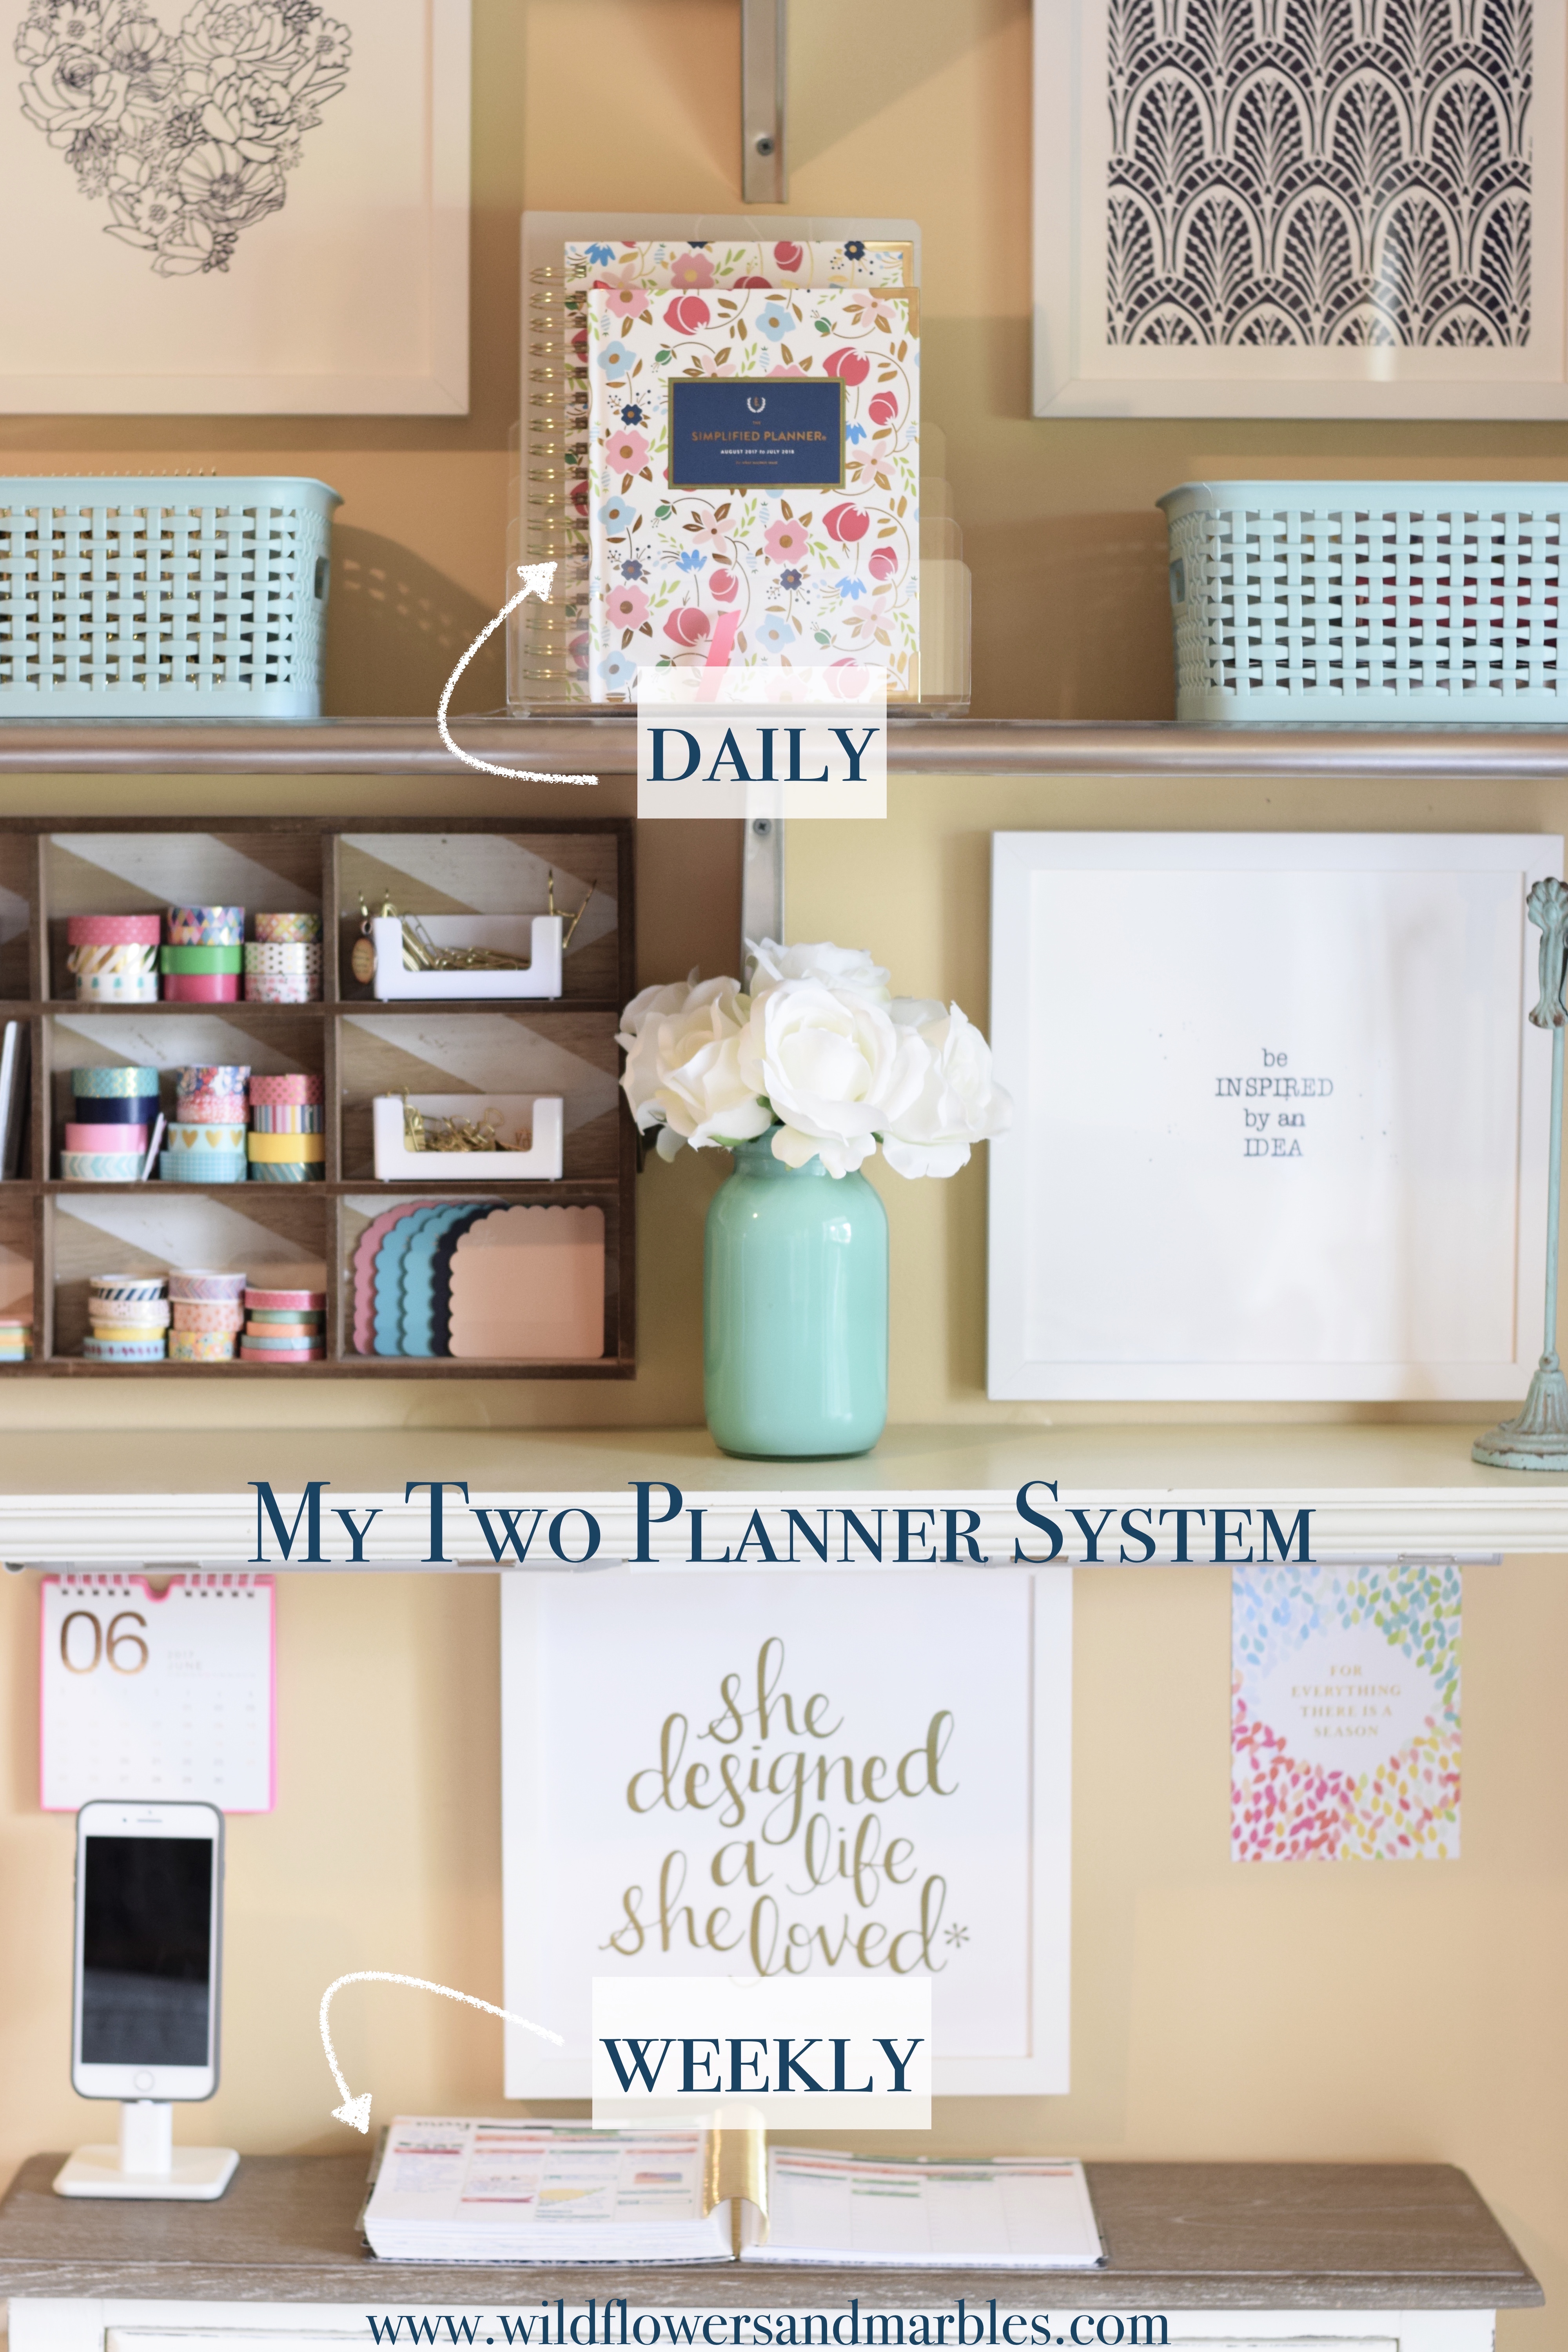
I love having the weekly overview in my Erin Condren Life Planner, so I’ve transitioned to a 2-planner system – using the Daily at my desk, and the weekly near my desk to check in with. It’s working so well for me – the best of both planners worlds!
I love reading reviews of planners, especially if I’m considering whether or not it will work for me – but I want to see how it might integrate into the fabric of someone’s life – where they use it, how they use it, what it will look like. And because that’s what I find inspiring and helpful, that’s what I’m going to try to show you!

The Academic Daily Planner starts in August, so I can’t show you how I’m planning in this exact planner (because we haven’t gotten to August yet), but I can show you how I plan in my current daily planner (below), and you can read more of my thoughts and how I transitioned from a weekly planner into this daily planner in this blog post.

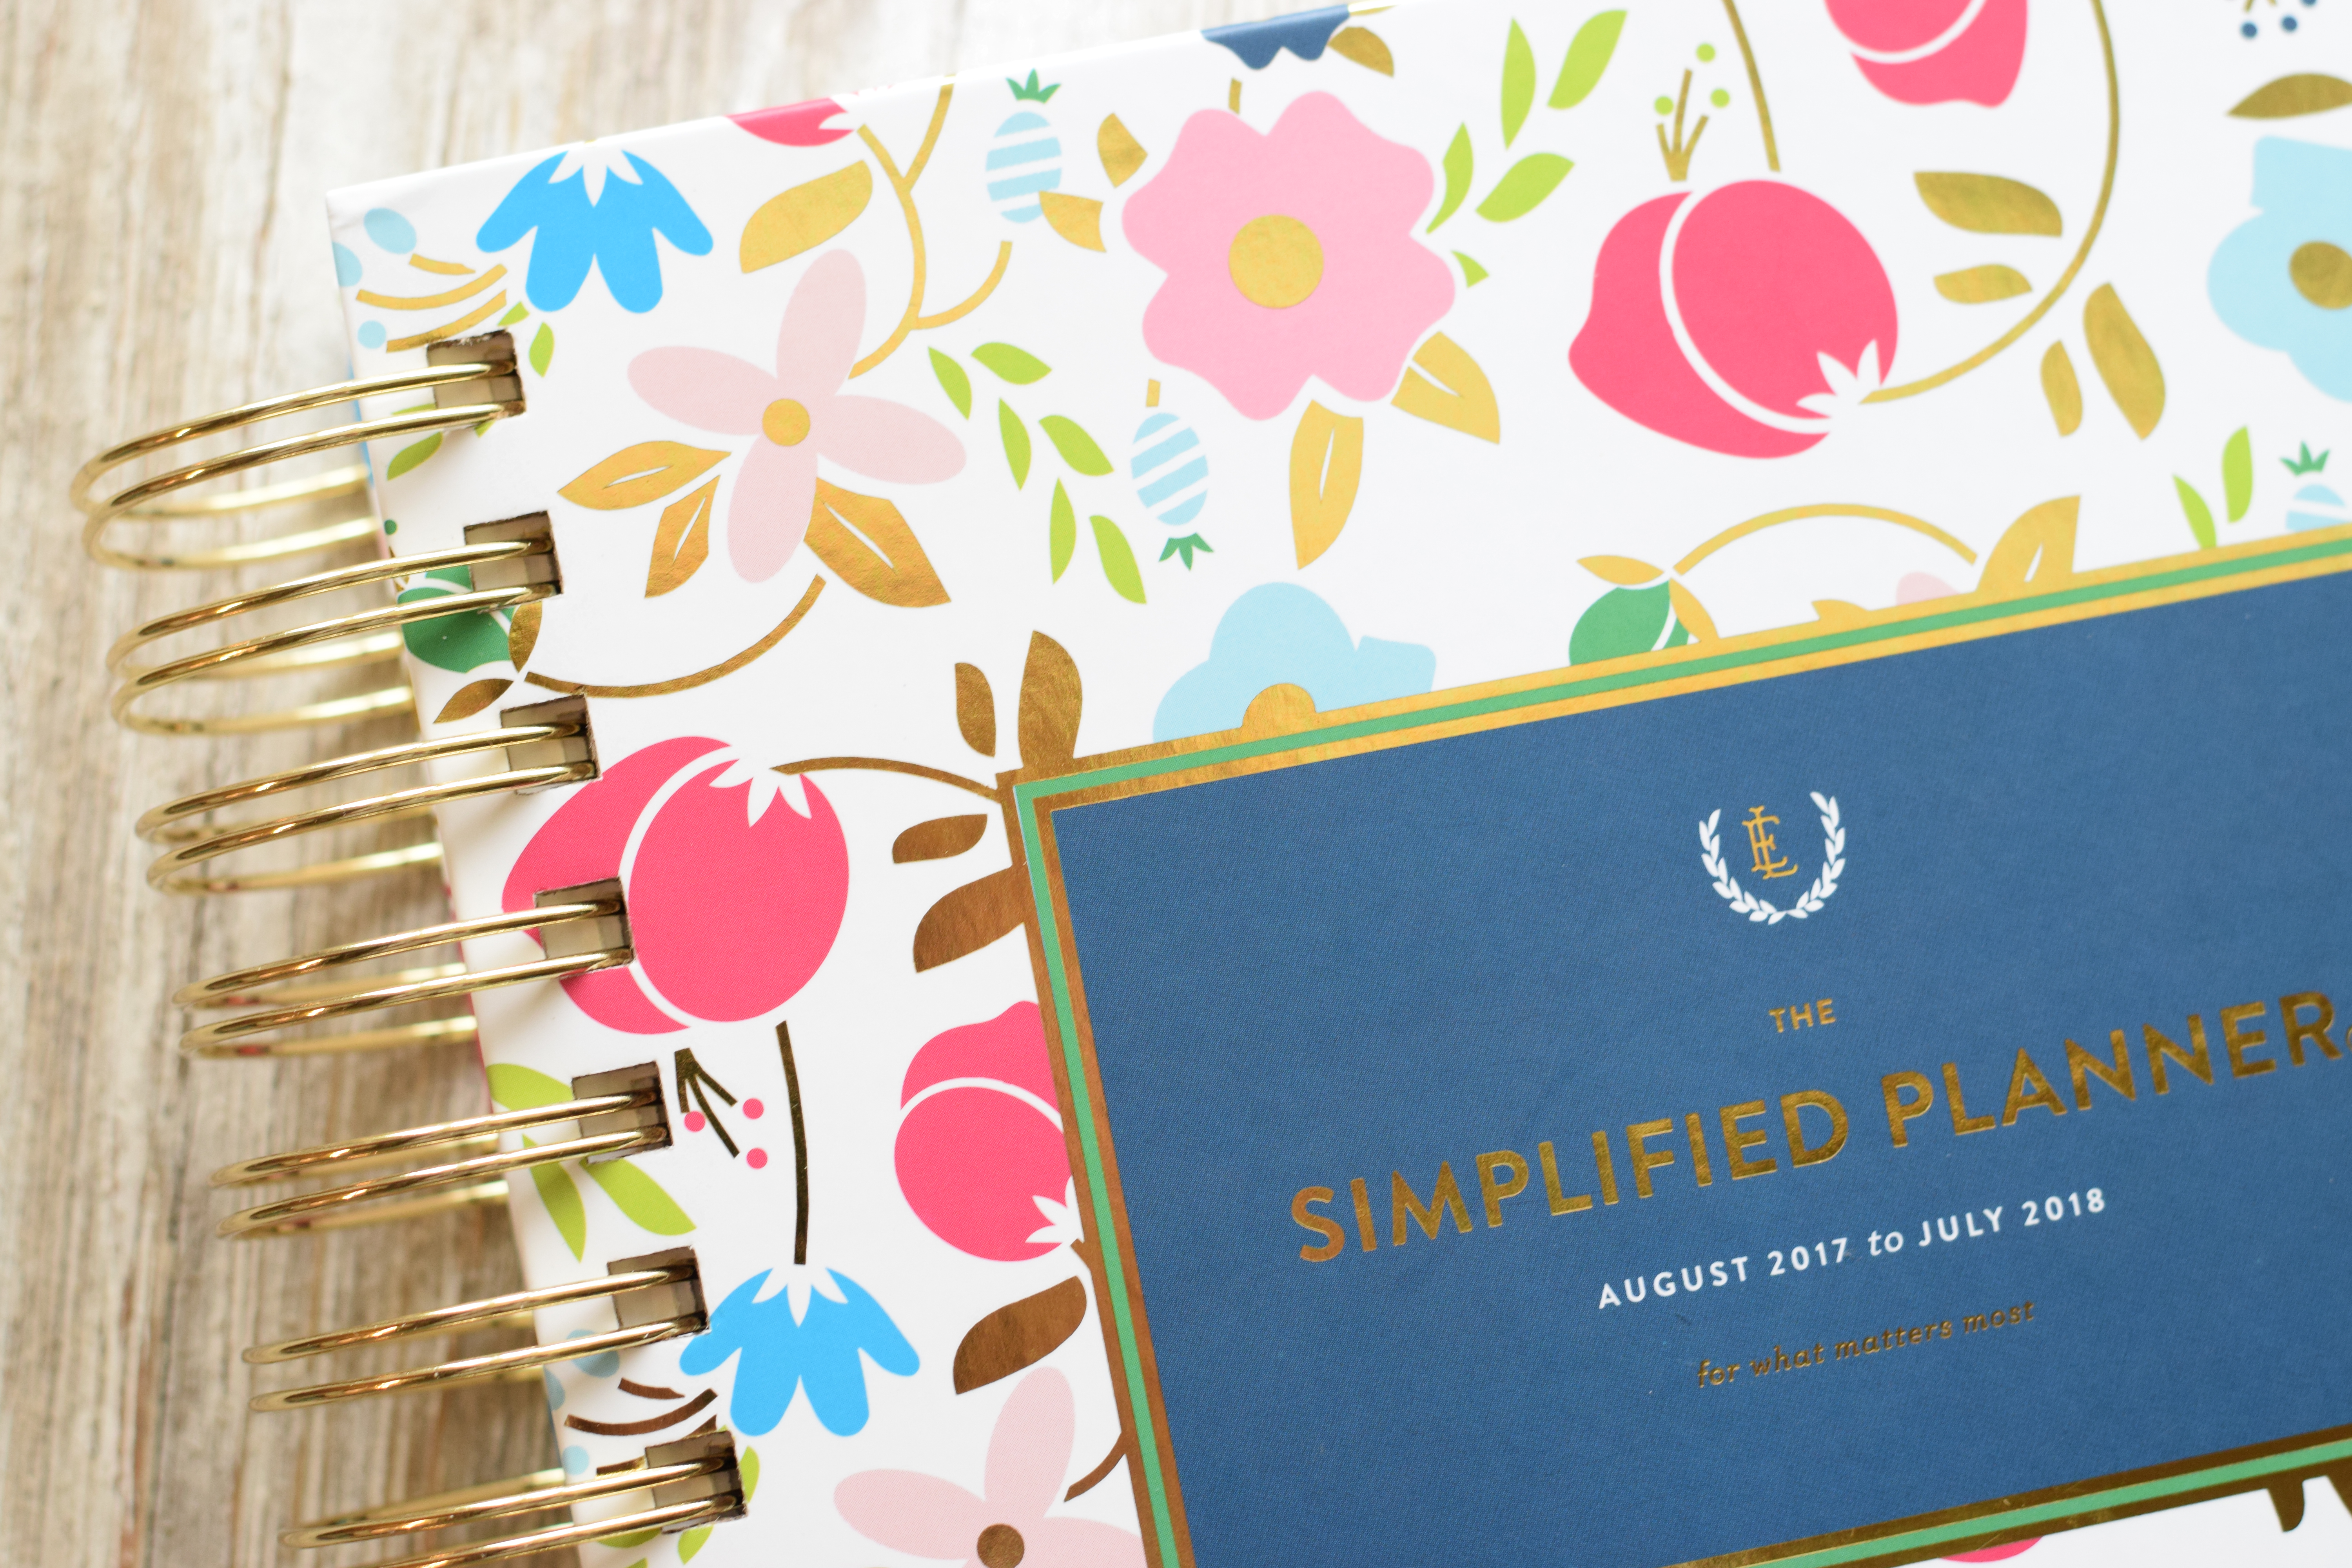
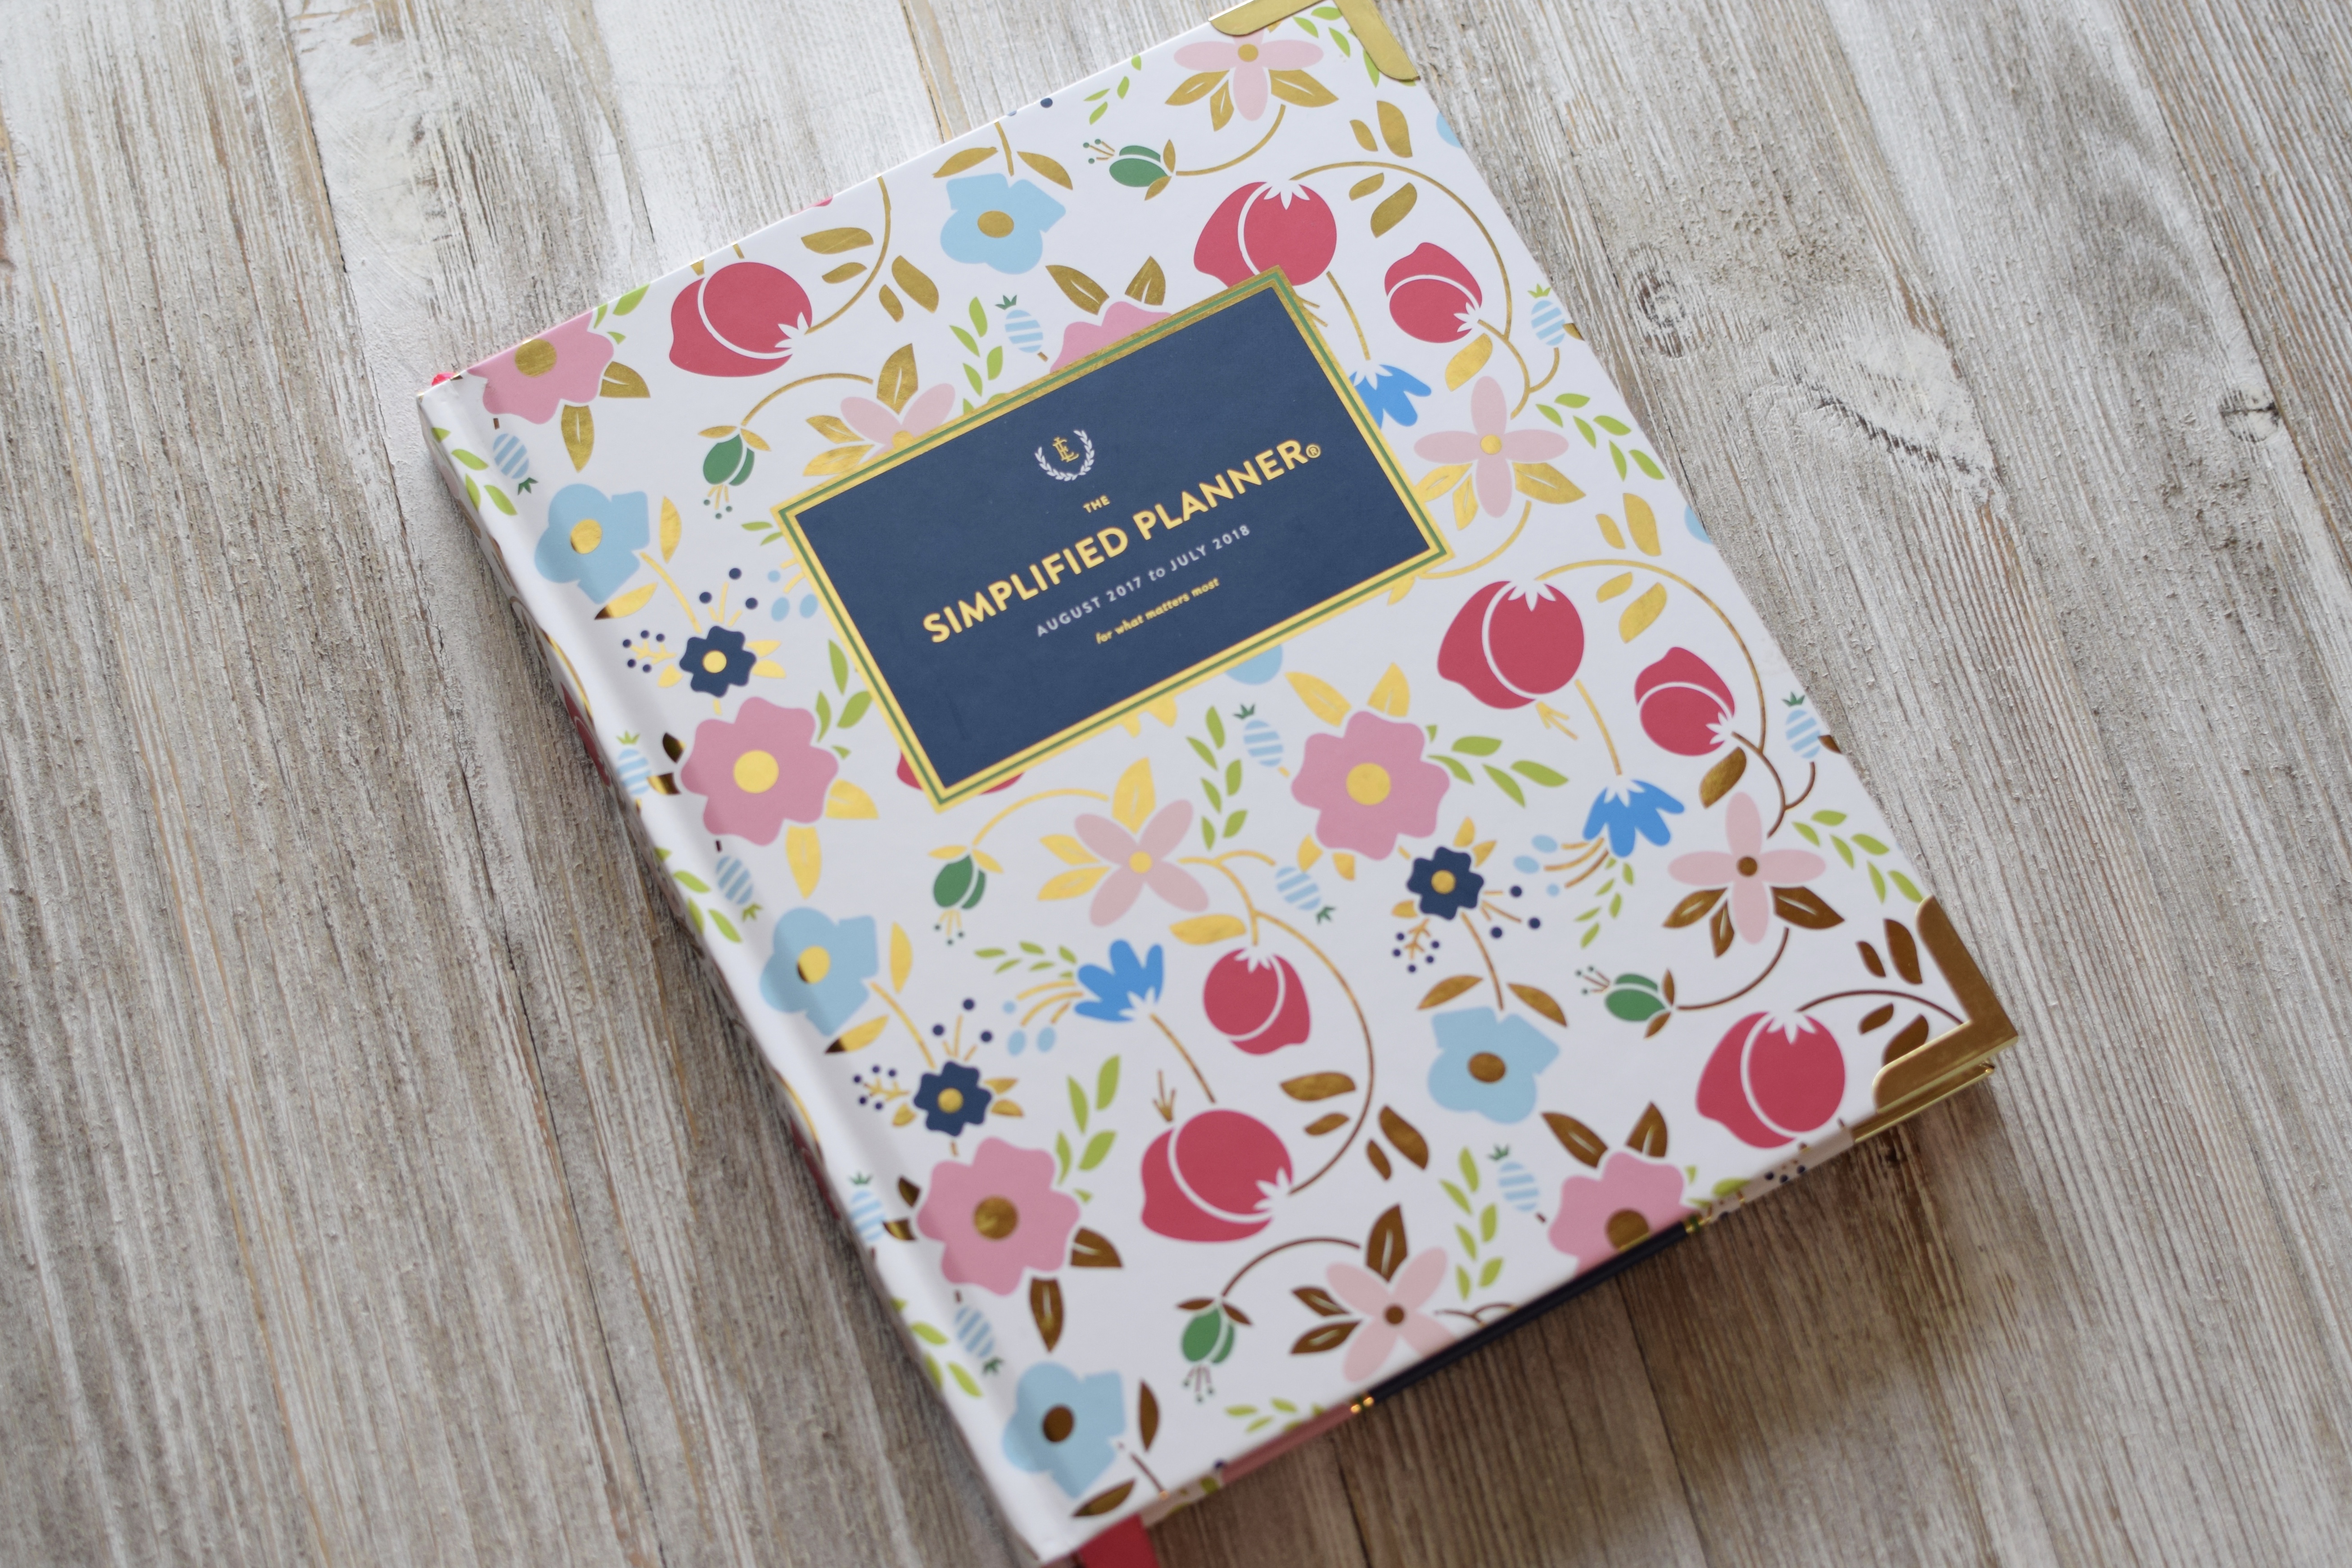
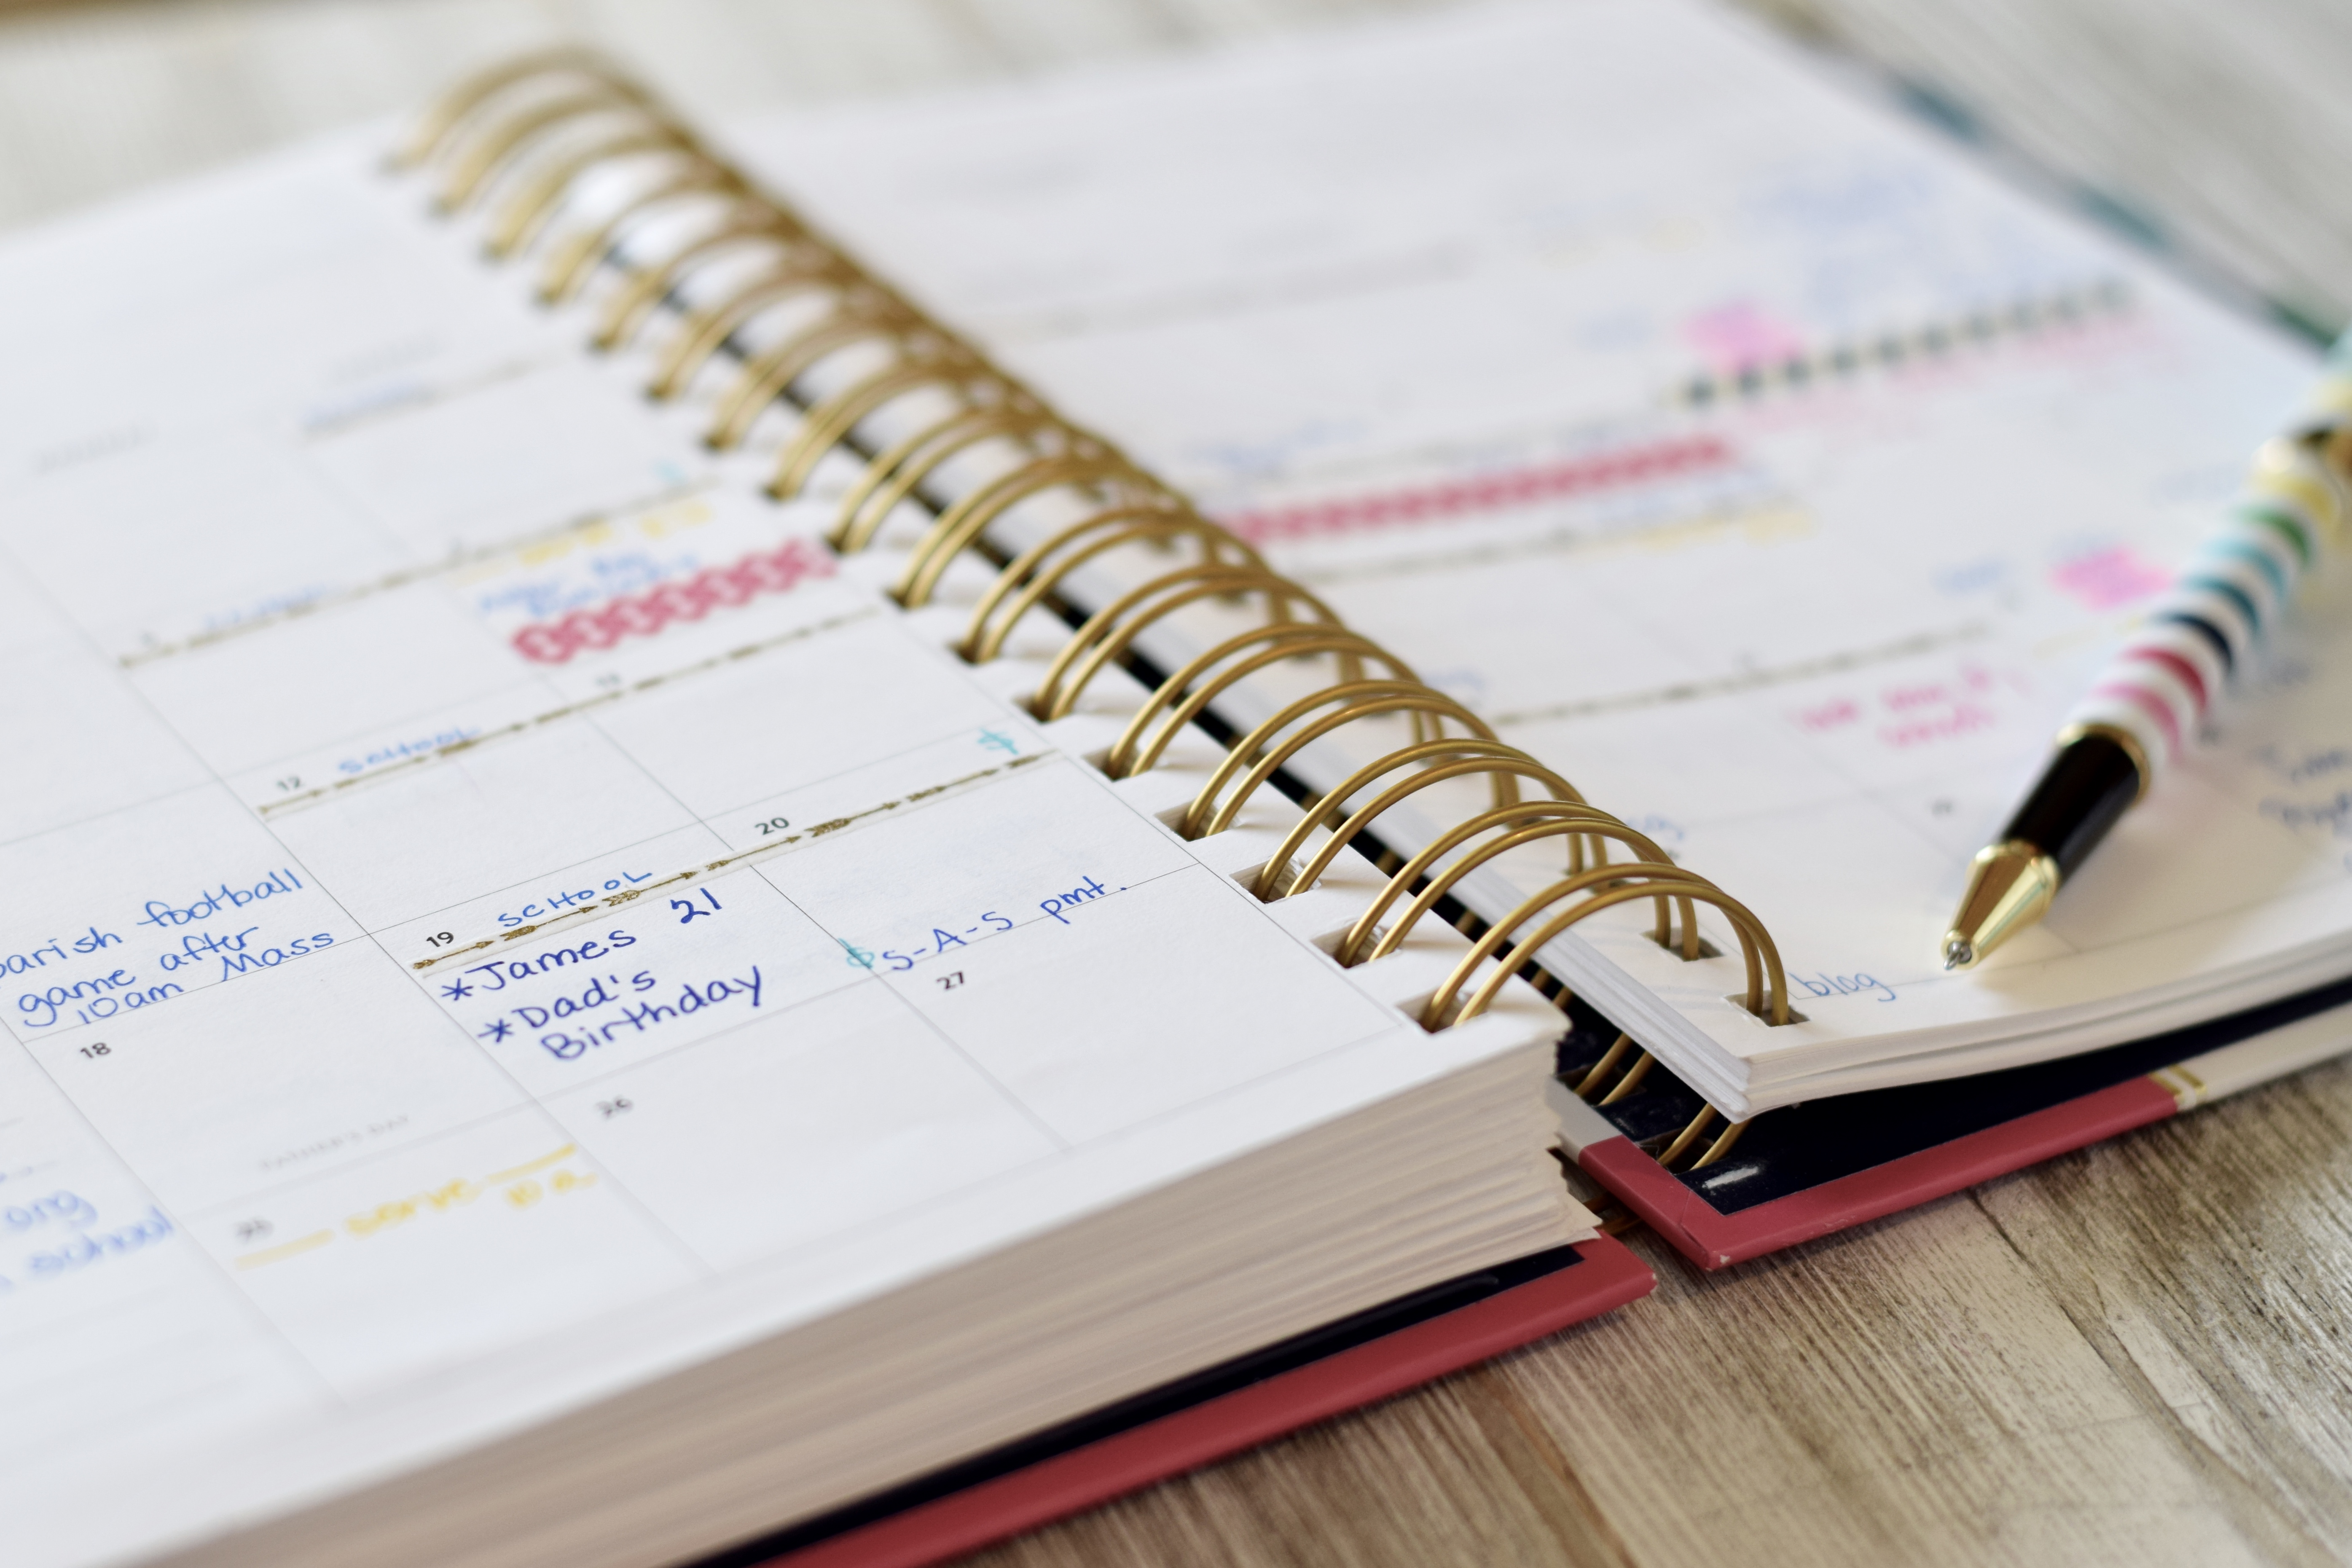
Before we go inside this Daily Planner, I have to point out a big change from previous years’ planners: the gold coil! It’s absolutely beautiful and it’s a bright gold, not the matte and somewhat muted gold coil of previous years. Practically speaking, it’s the same weight and strength of last year’s planner, which is important because every day, I pick up my planner, turn the page, and fold the planner back on itself so that only the current day is visible.
Every day, the coils are worked. Every day, I use my finger to grab the very top coil and lift the entire planner by one ring of coils. (This is abusive. Please do not report me to the planner police for abuse of my planner coils. I’m seeking help, but at this time, I may be beyond intervention. I lift by the coils.) And so. Thus. The coils. Yes. Important to me. LOL!
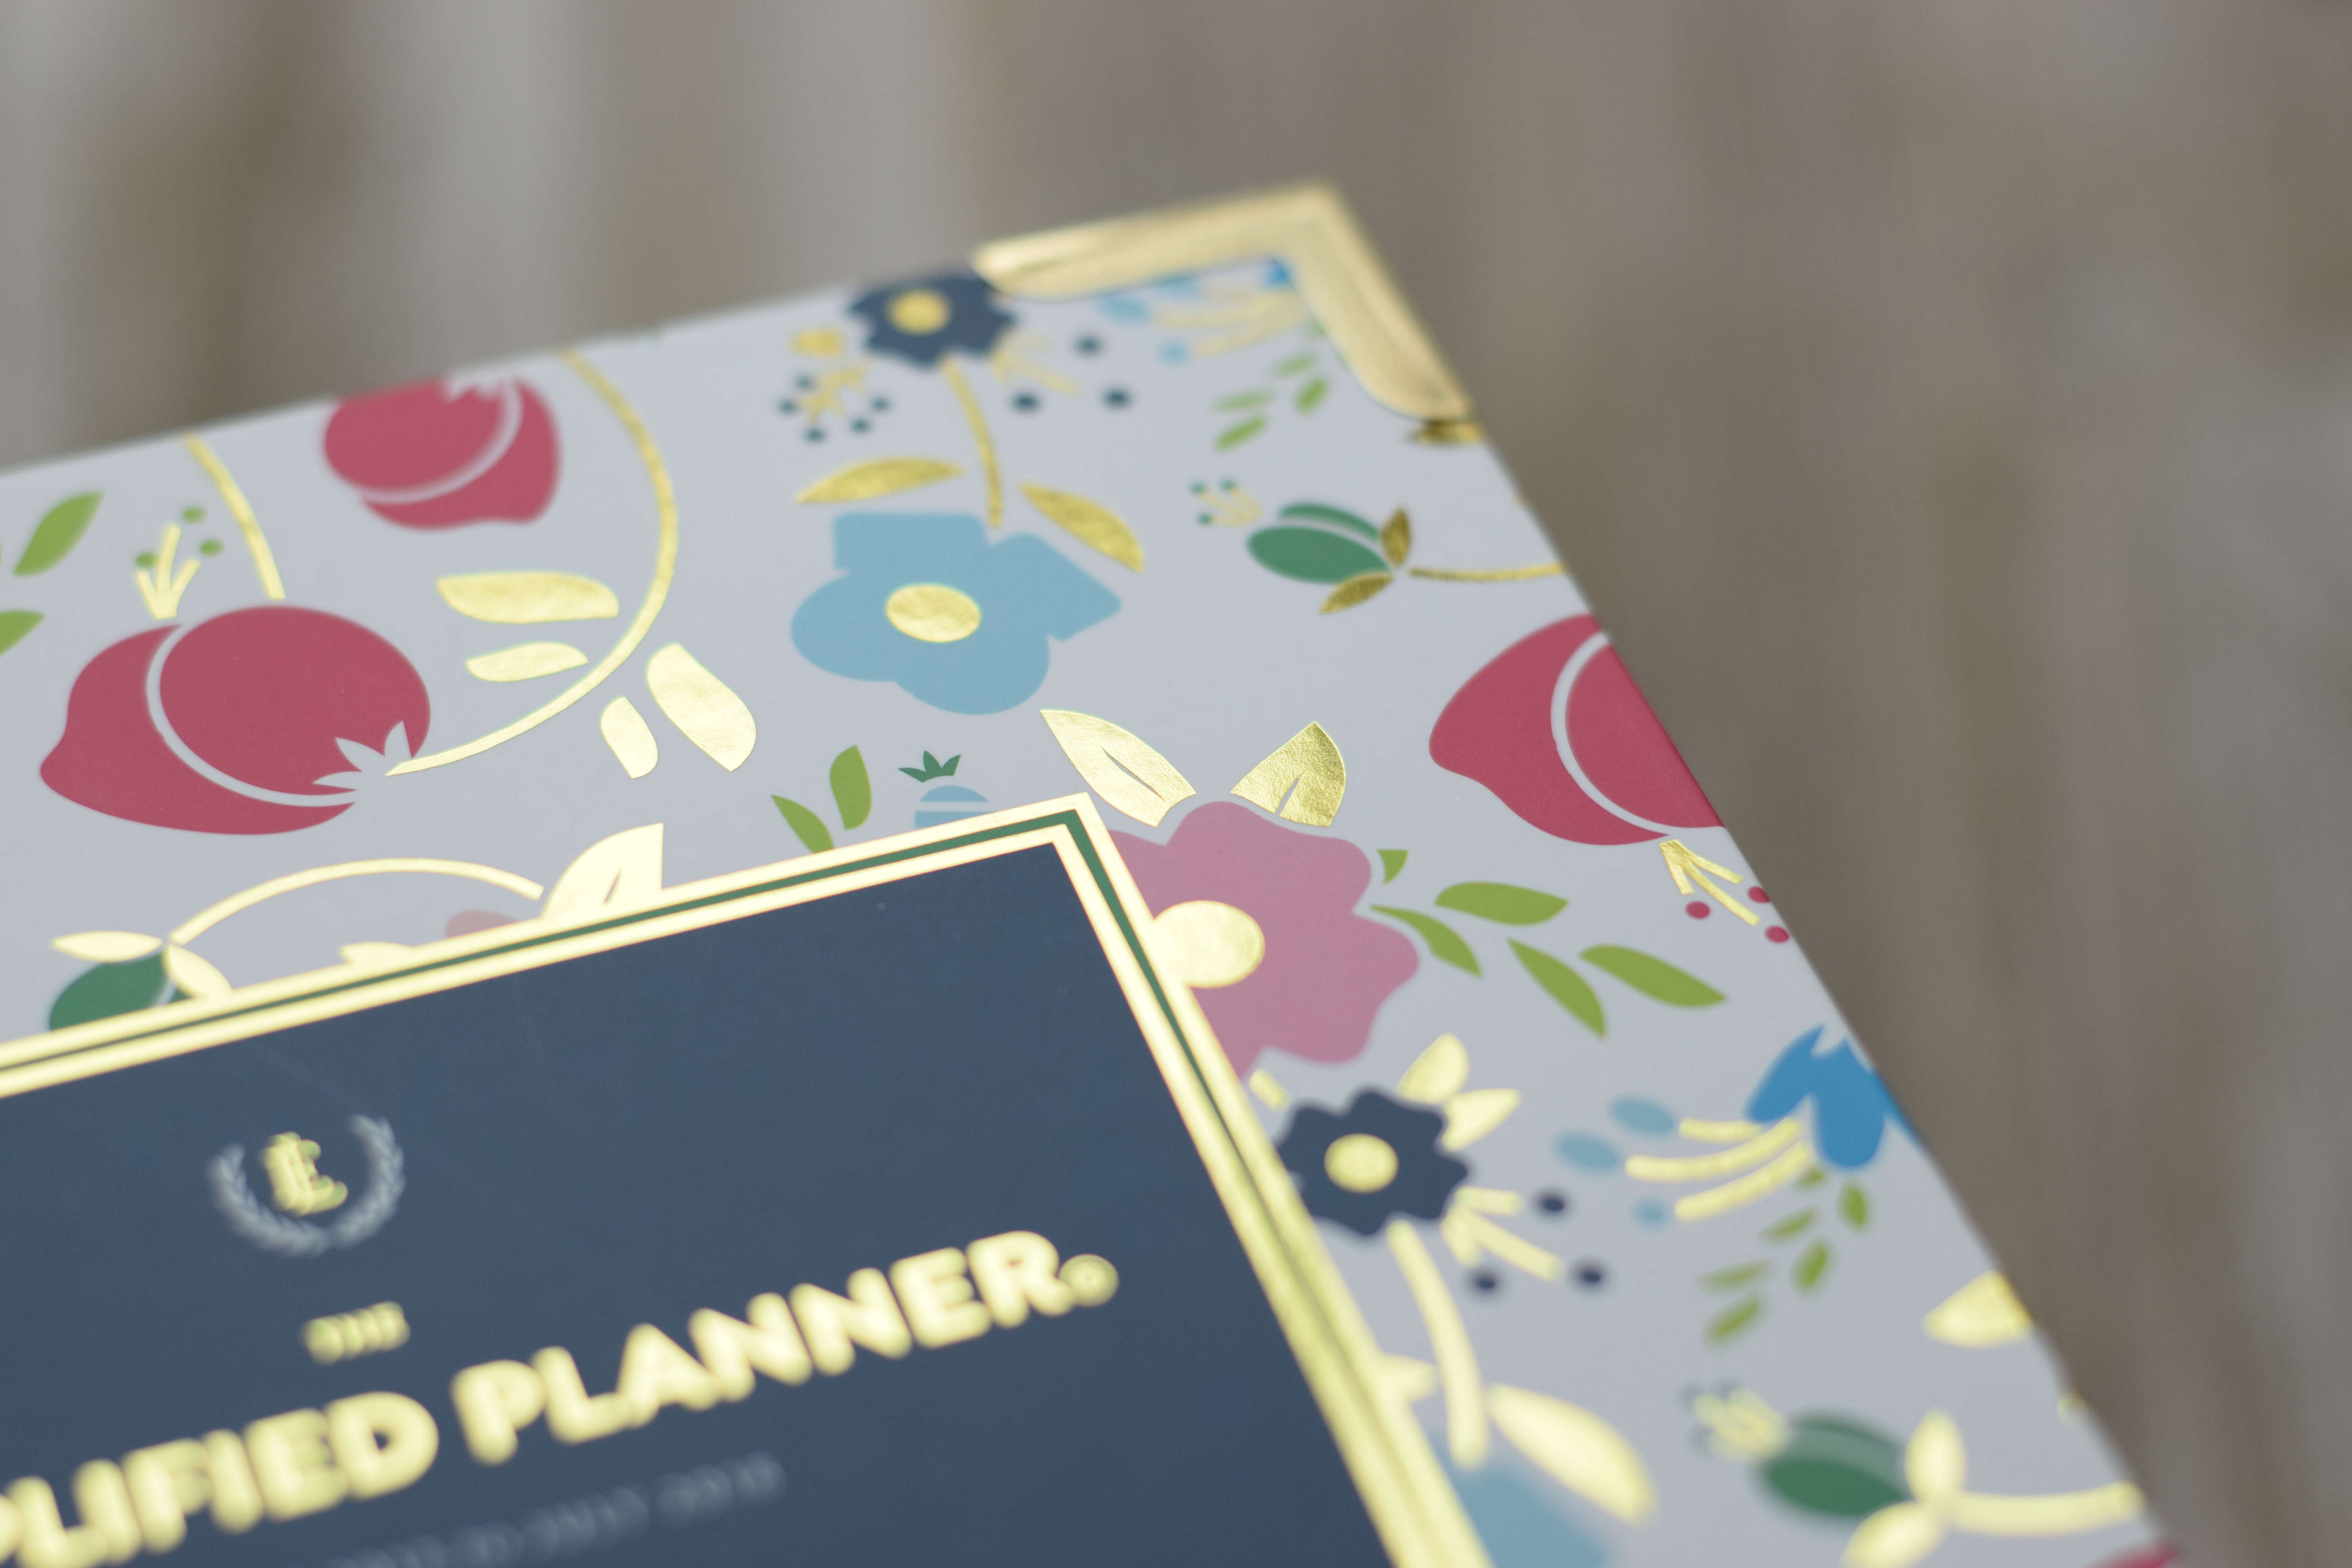
The bright gold coil is a big change, especially in terms of the look of the planner. And the coil now matches the beautiful gold corner protectors and the gold foiling on the covers!

The layout inside is very similar to last year’s Simplified Planner – same cover page, same tabs – overall simple, lovely and inviting. If you’re considering this planner it’s likely because you need a paper container that is simple and intuitive to use for planning and setting goals and listing lists, and this planner is perfect for all of those things!

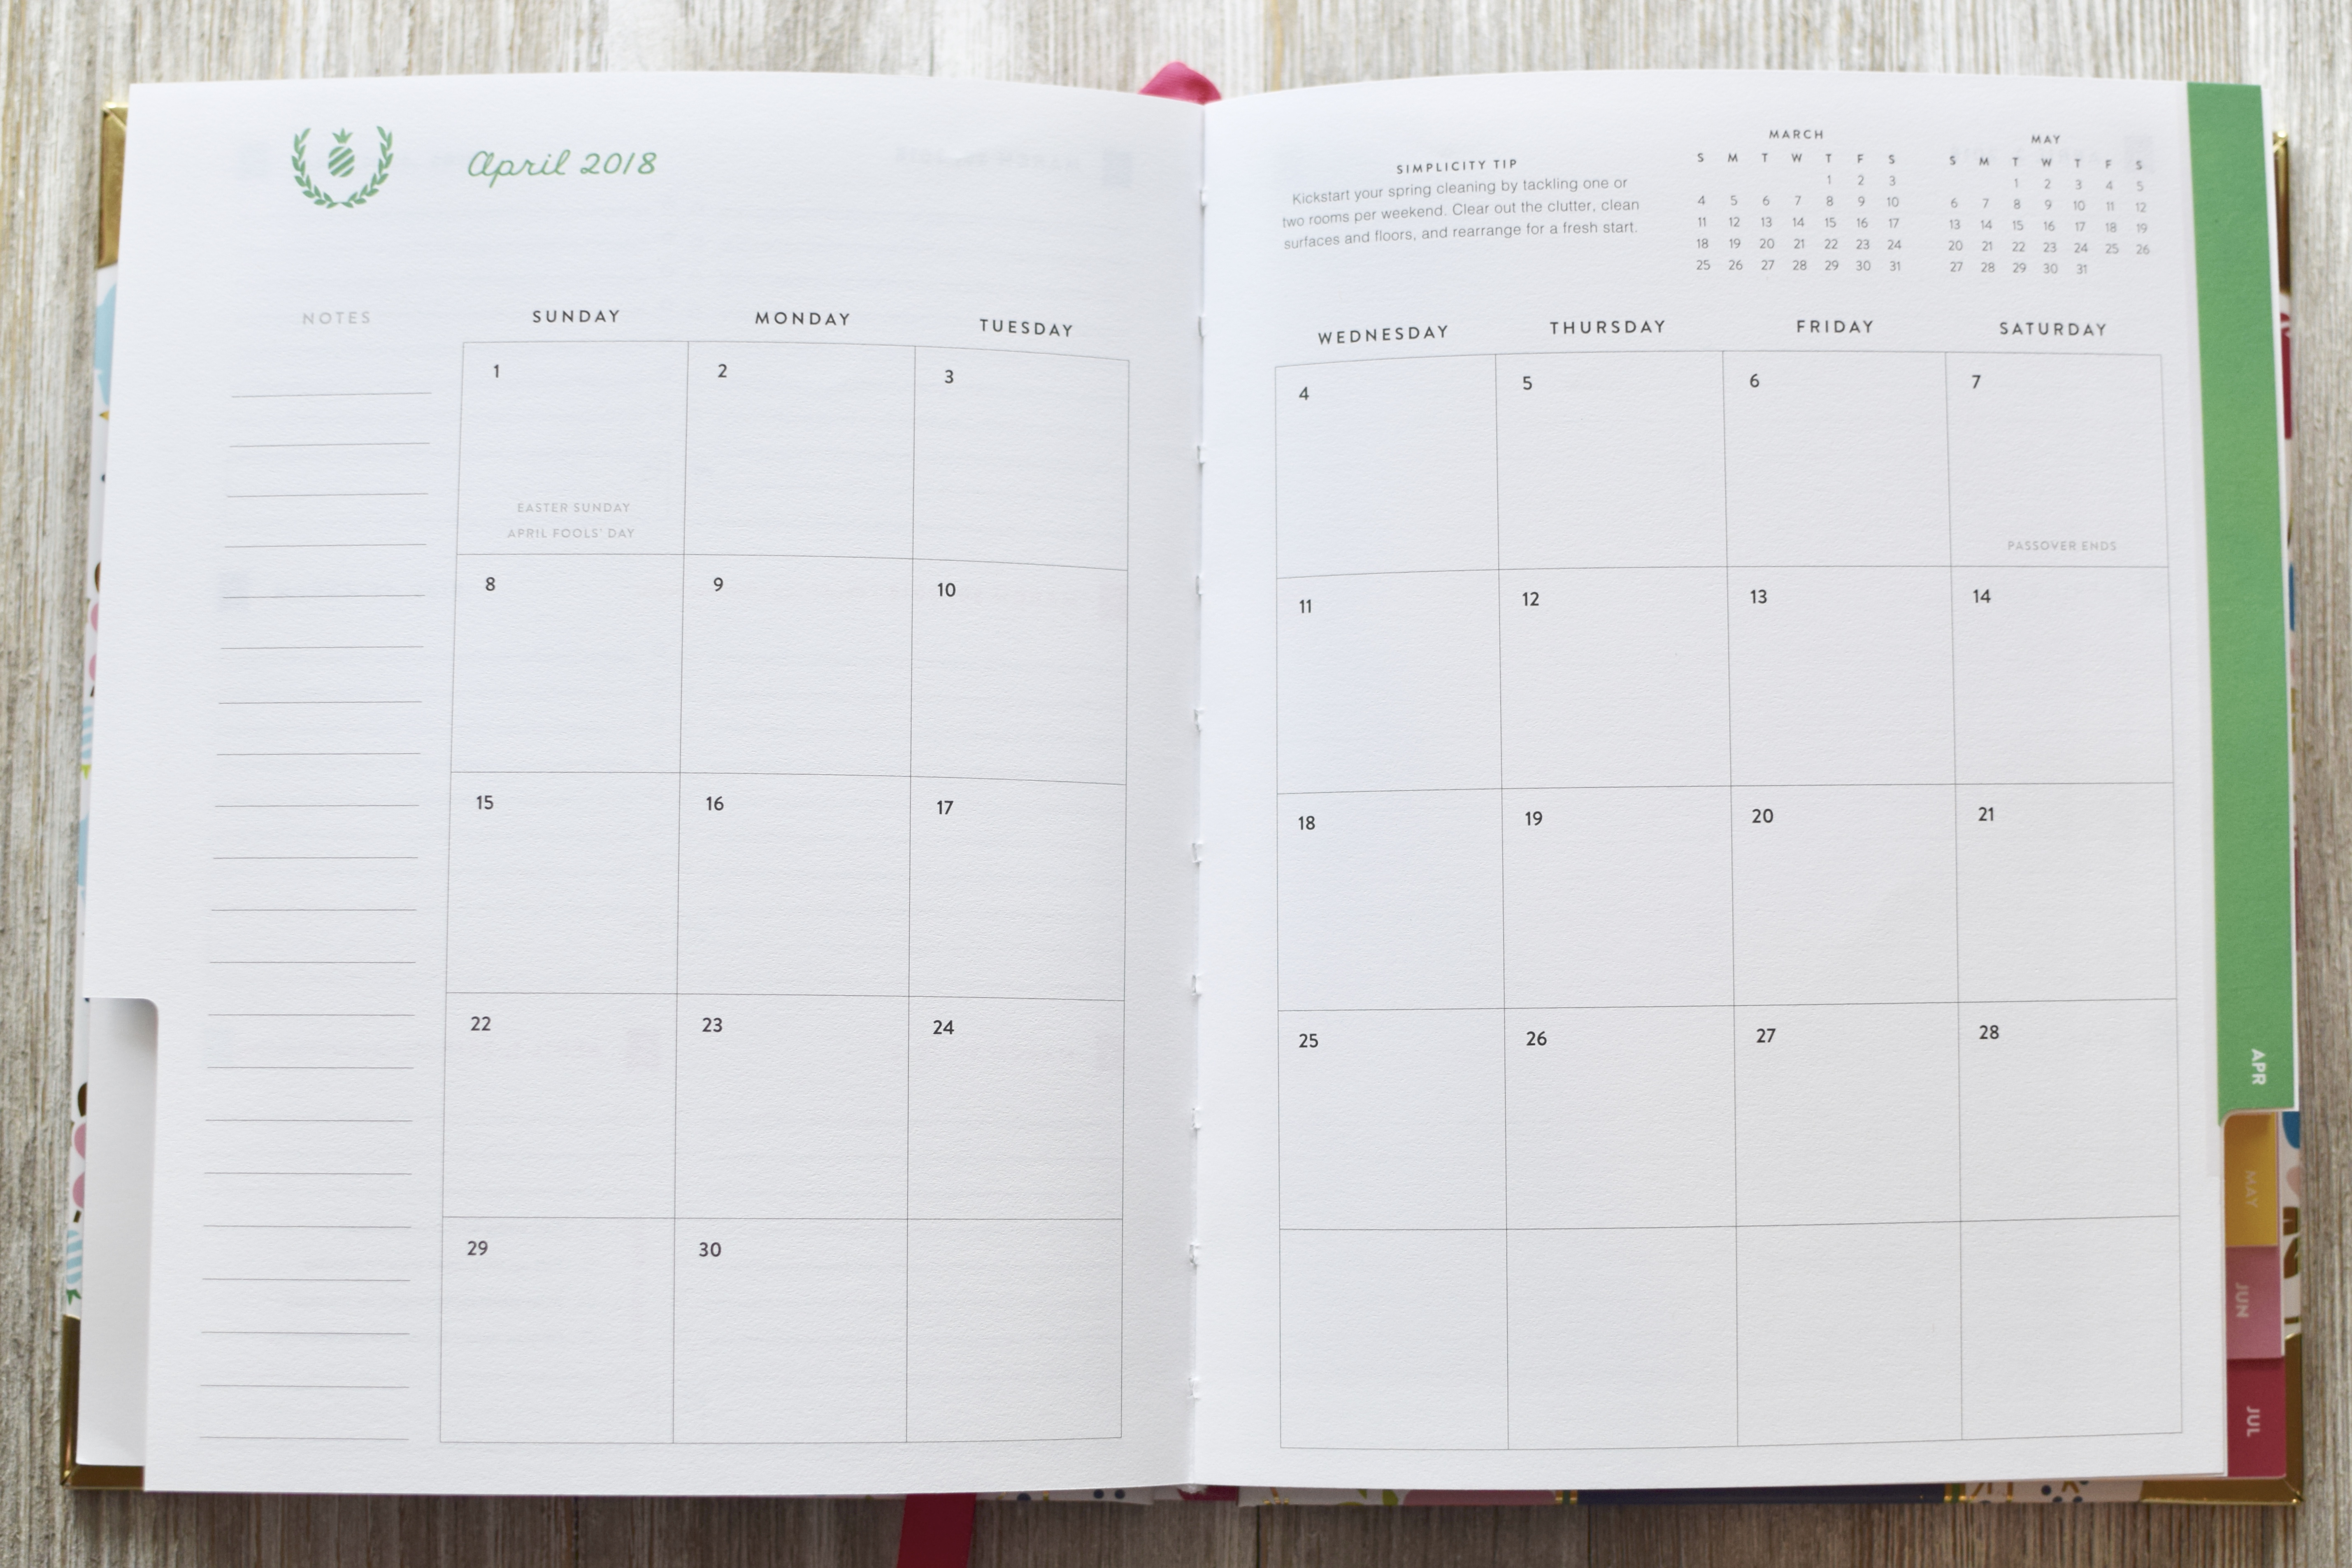
The monthly view is so remarkably similar to last year’s planner that you probably couldn’t spot the difference unless you zoom way into my picture. Formerly, the monthly view contained an inspiring quote. This year’s monthly spread features a simplicity tip rather than the quote. I love this! These little “breadcrumbs to simplicity” can be so helpful! They are simple enough that you could complete them on a weekend in a month – nothing overwhelming – just doable!
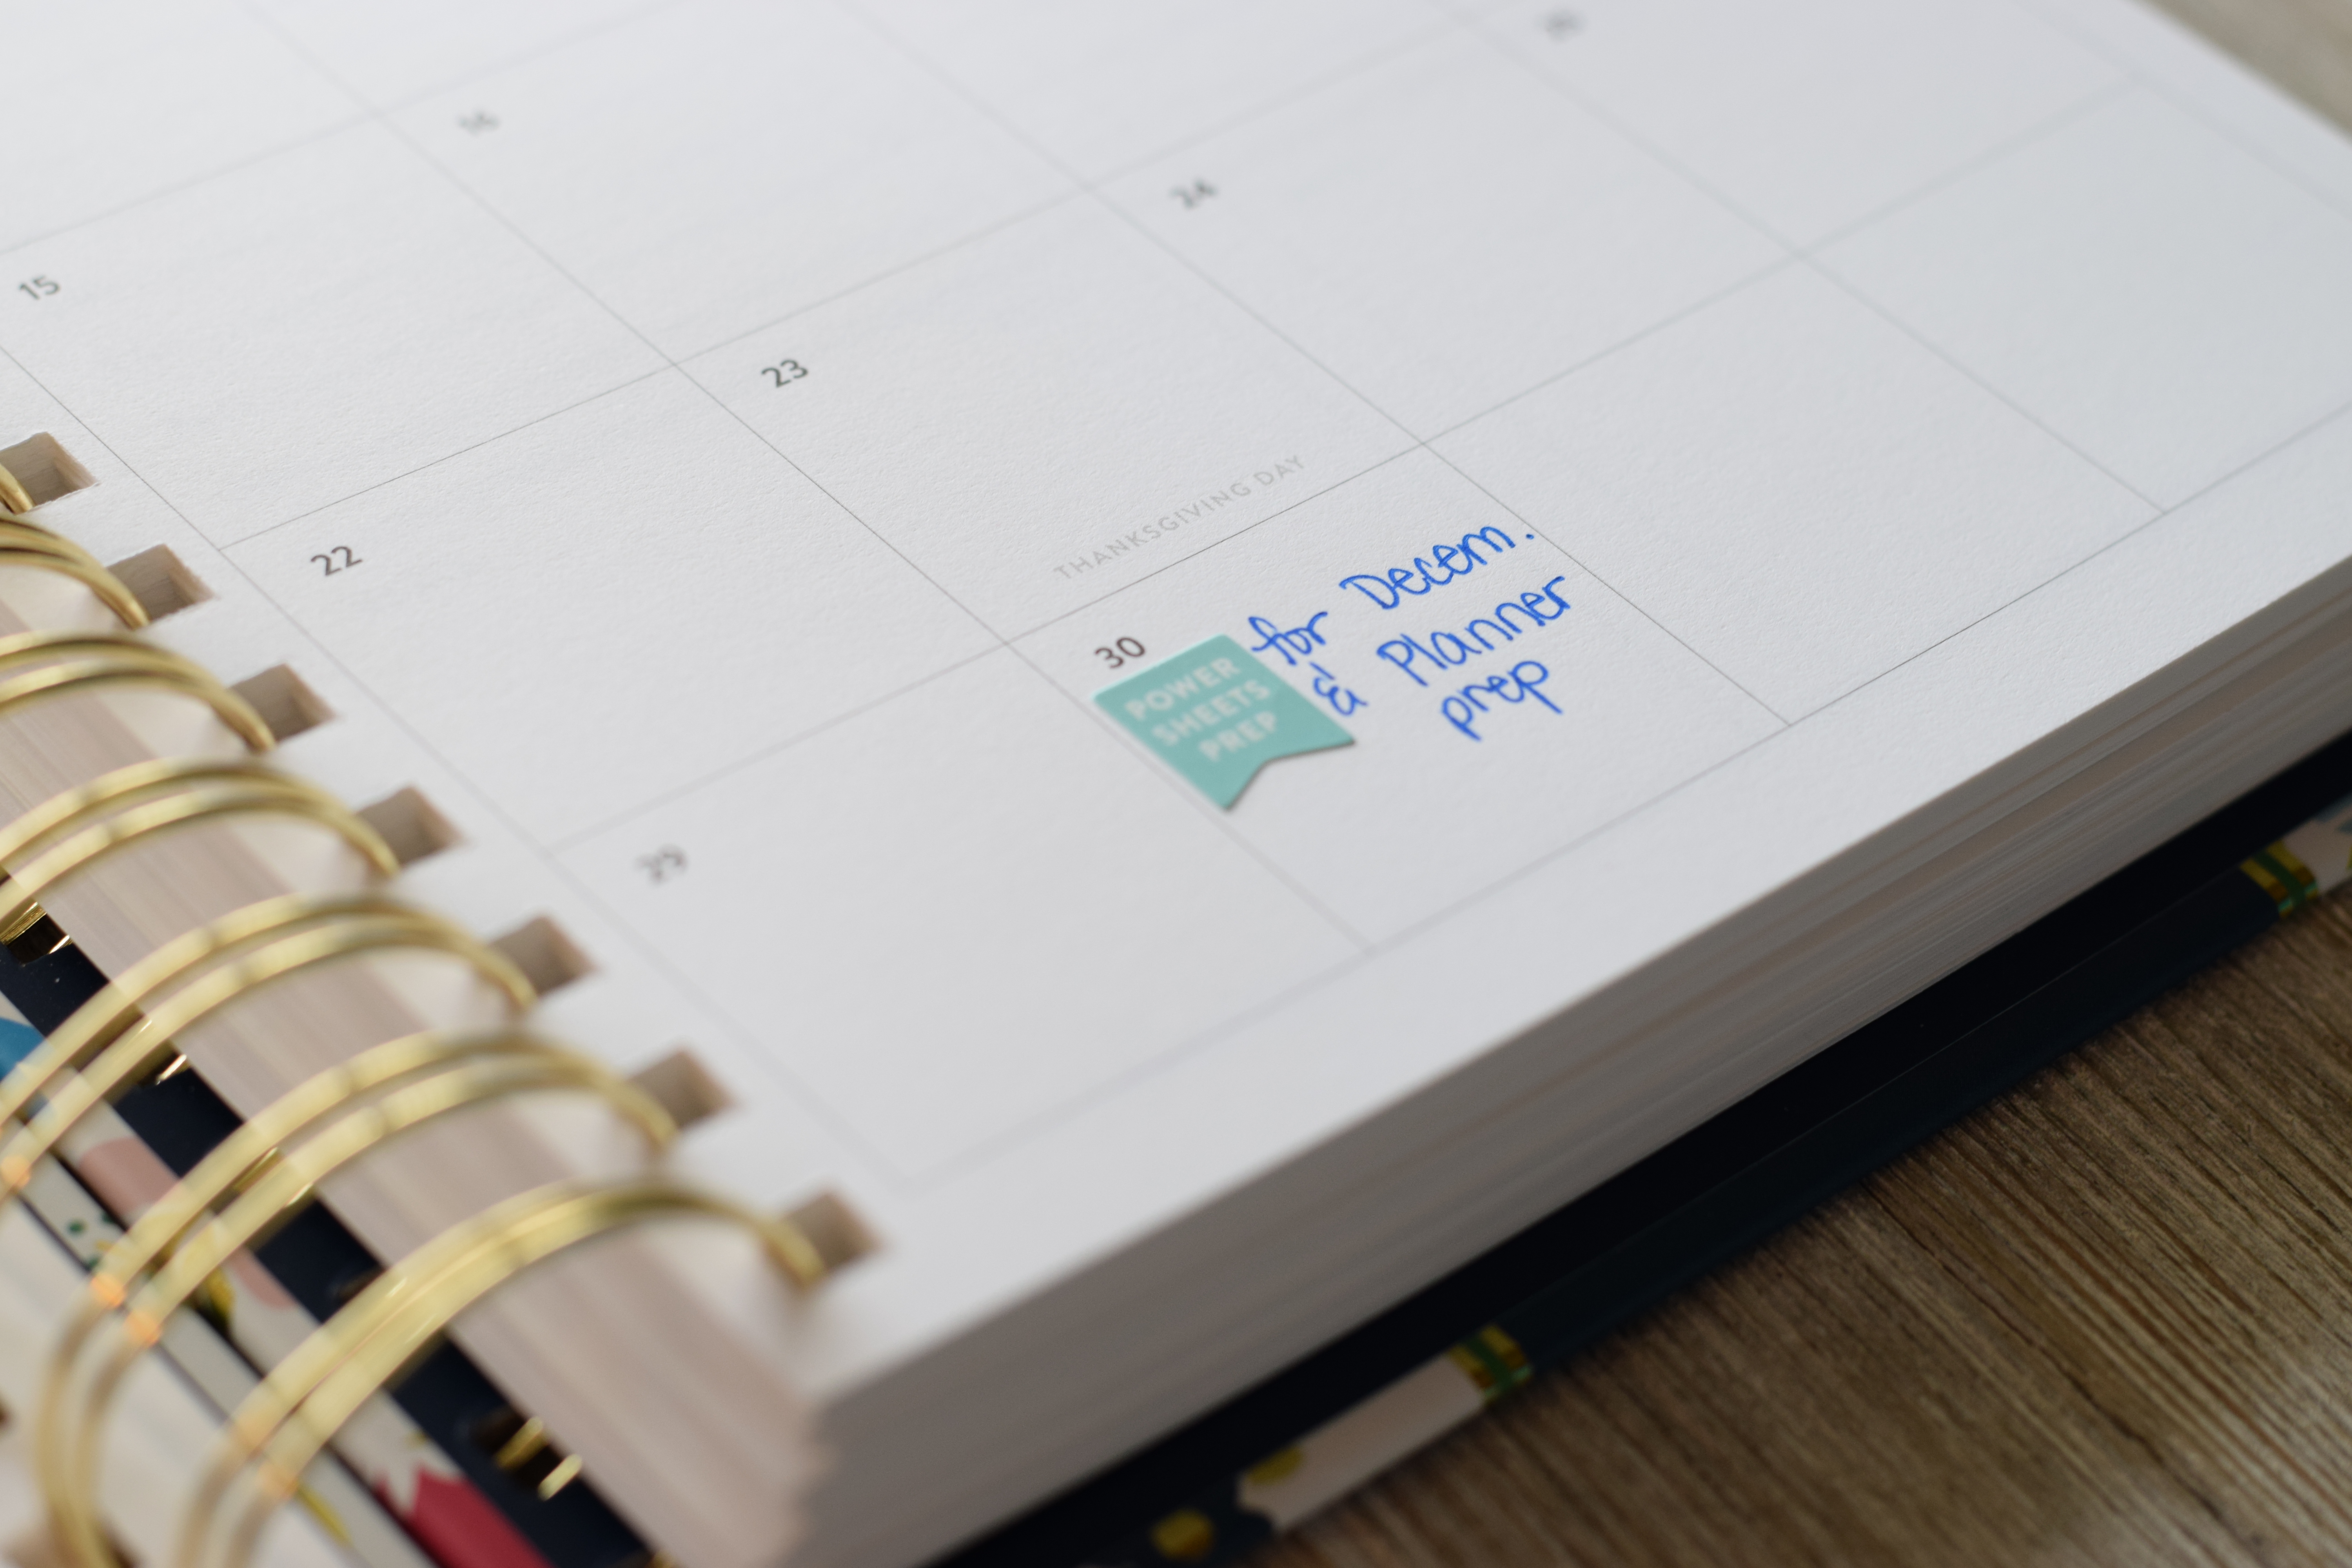
When I prep my planner for the year, I add in recurring events that keep me focused and moving forward – like my monthly Power Sheets prep. (I’ll have to share more later if you’d like to hear about my Power Sheets – they’ve been an amazing tool for me this year! Leave me a comment if you’re interested in a review!)
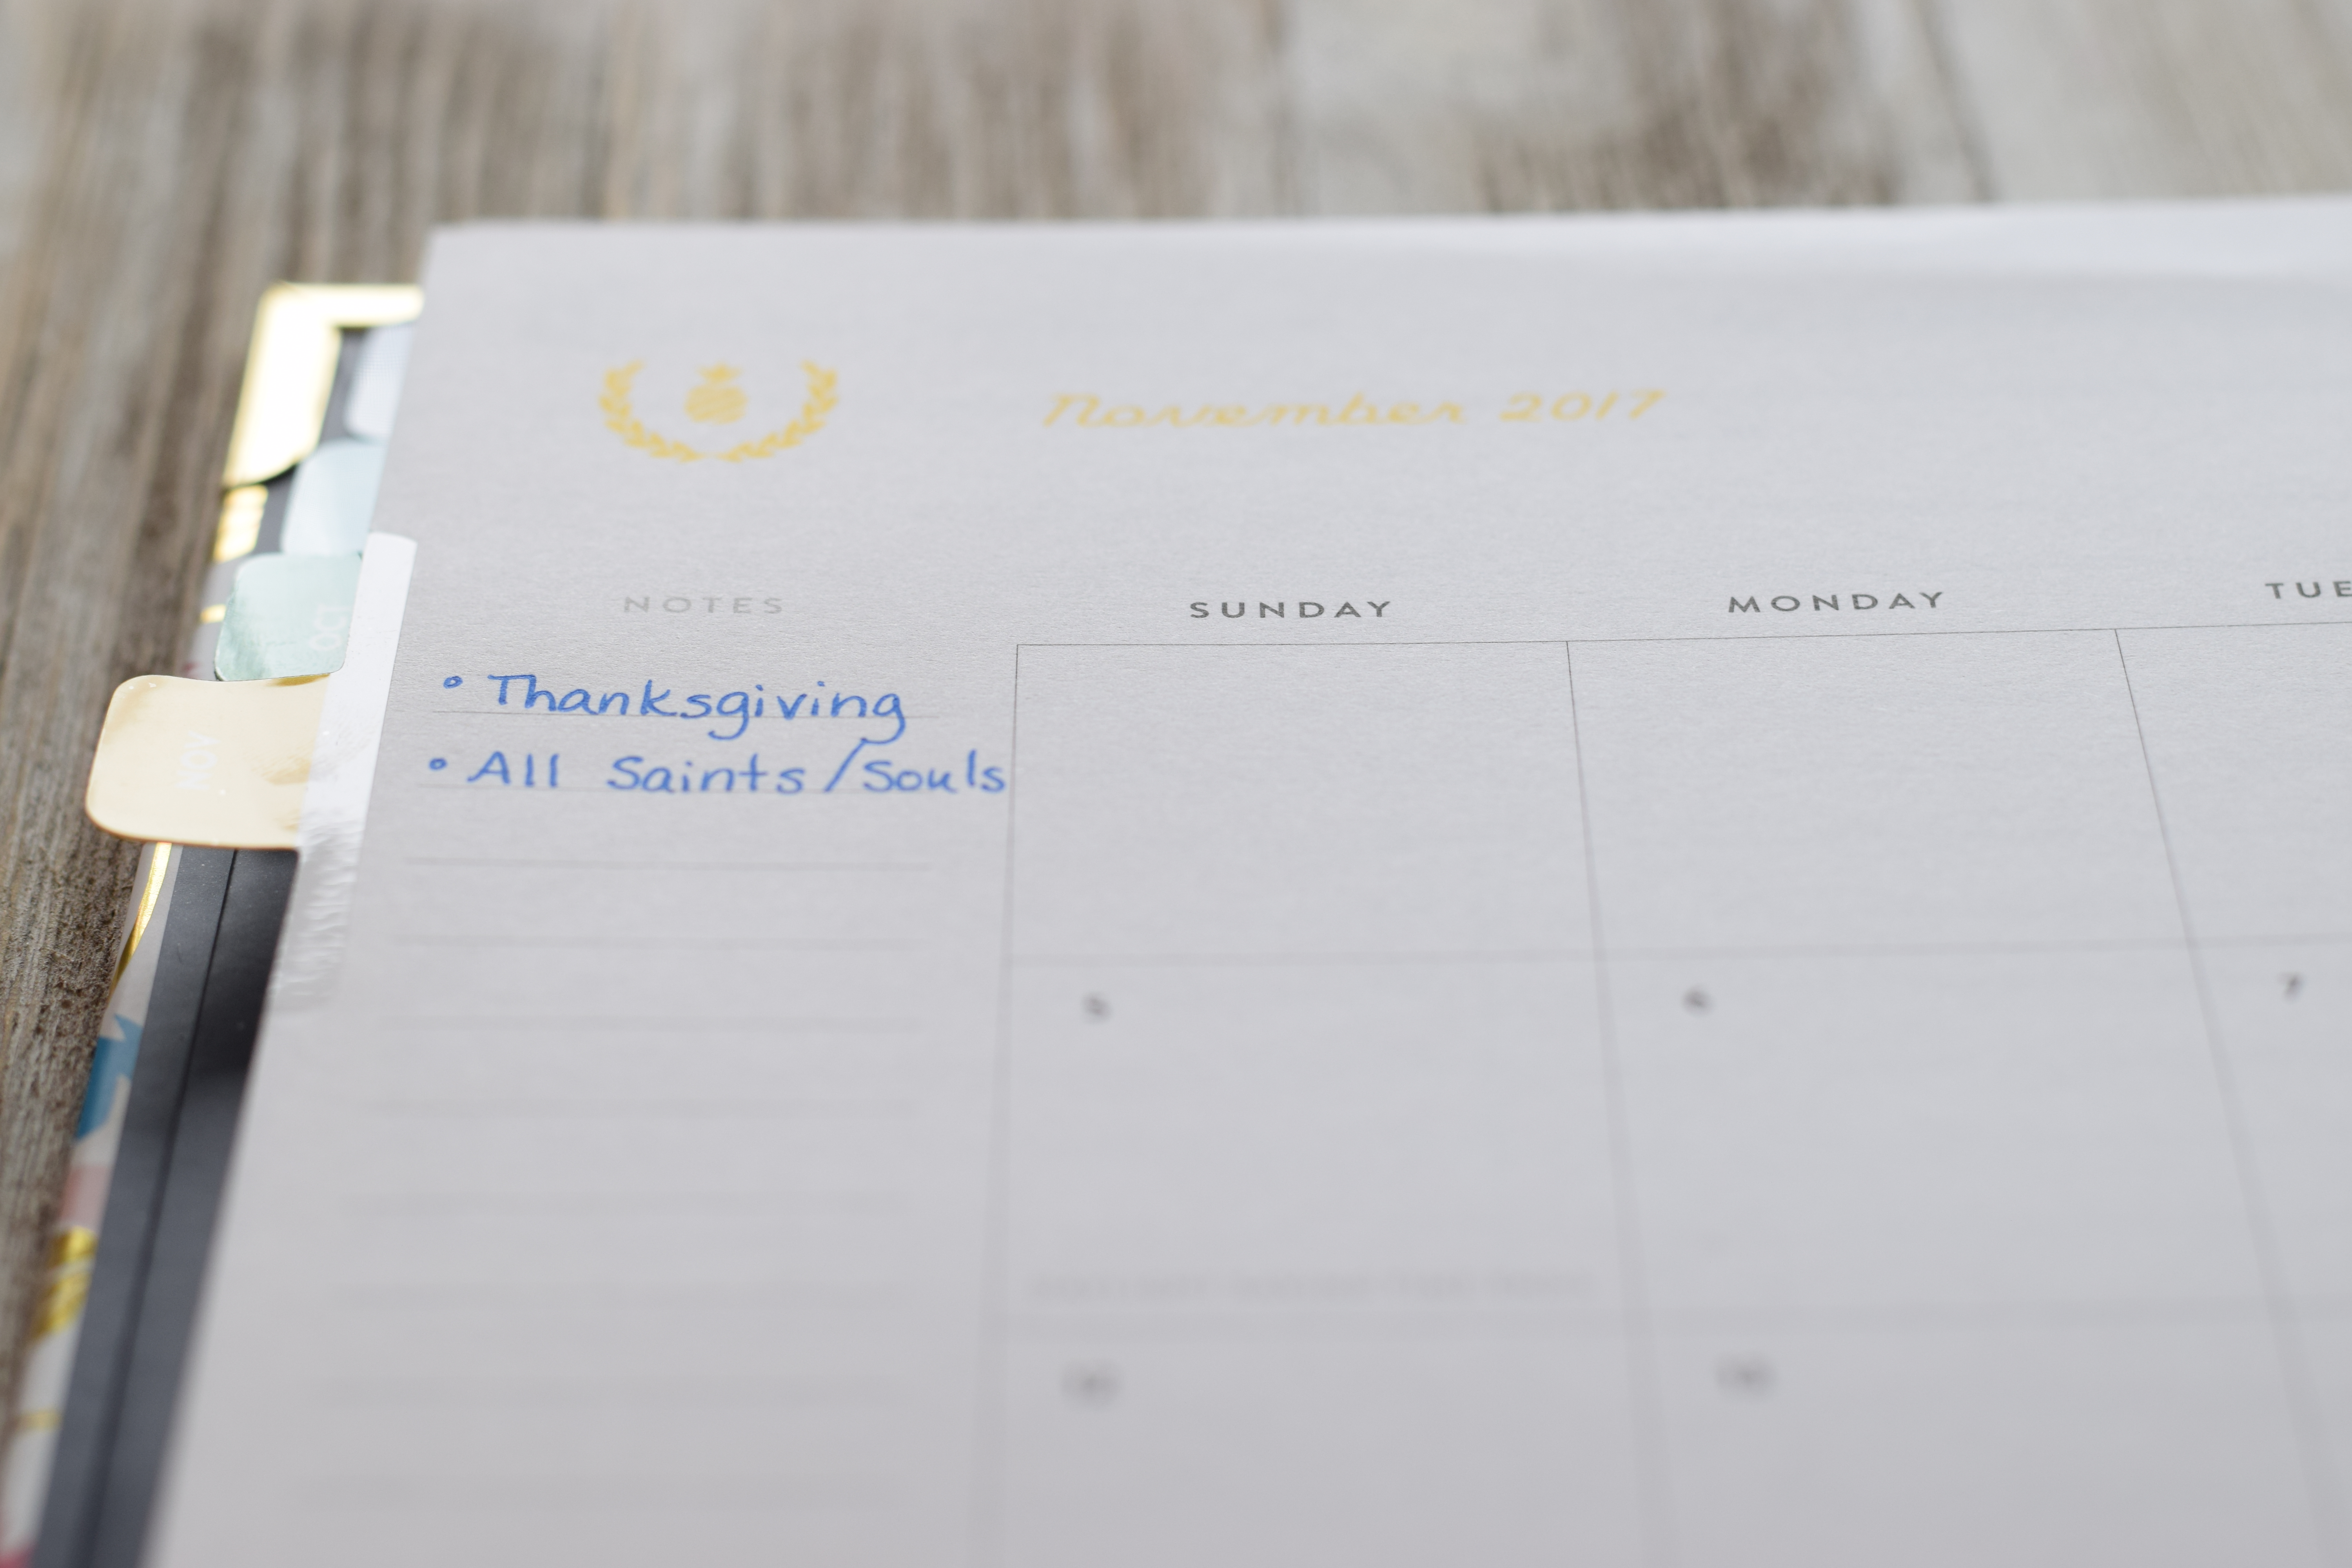
I use this monthly view to lay out the liturgical year, events upcoming, and the overlapping events in our month, noting birthdays and anniversaries on the sidebar. I prep some of this before I start a new planner, but the big monthly planning happens as I receive texts and emails and notifications…and normal events pop up on my radar. I instantly drop them into my planner. Or I’ll forget!
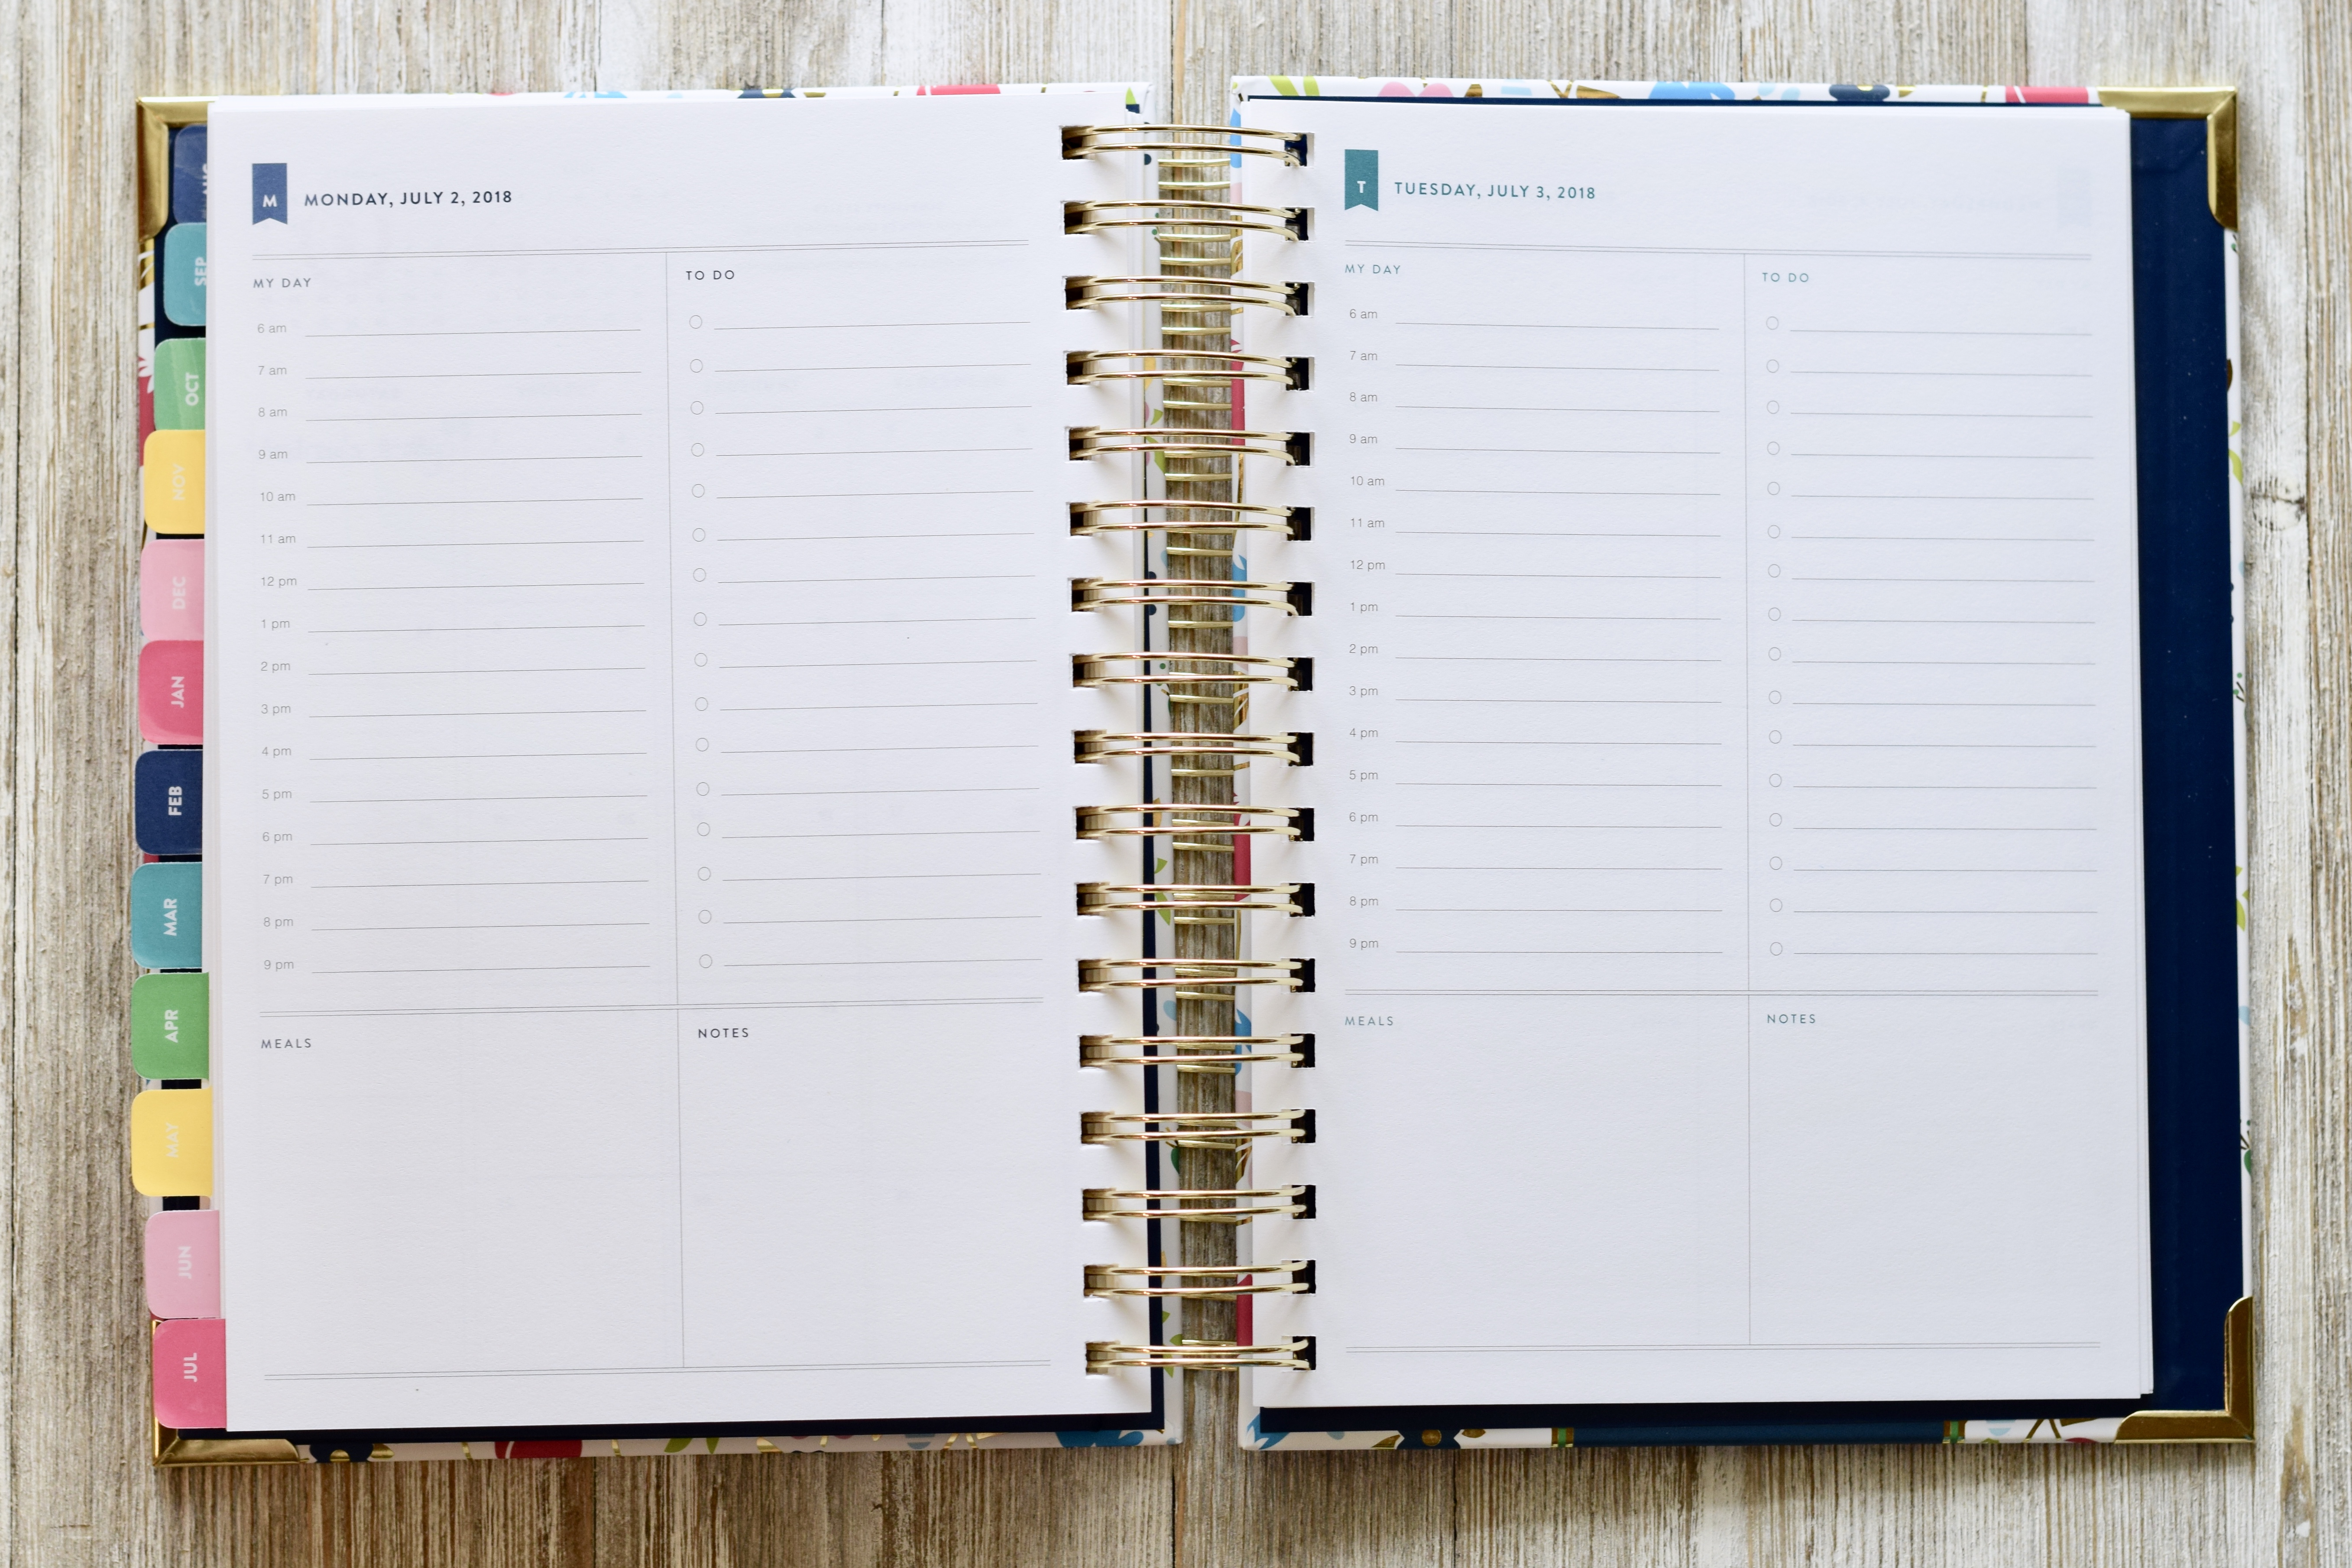
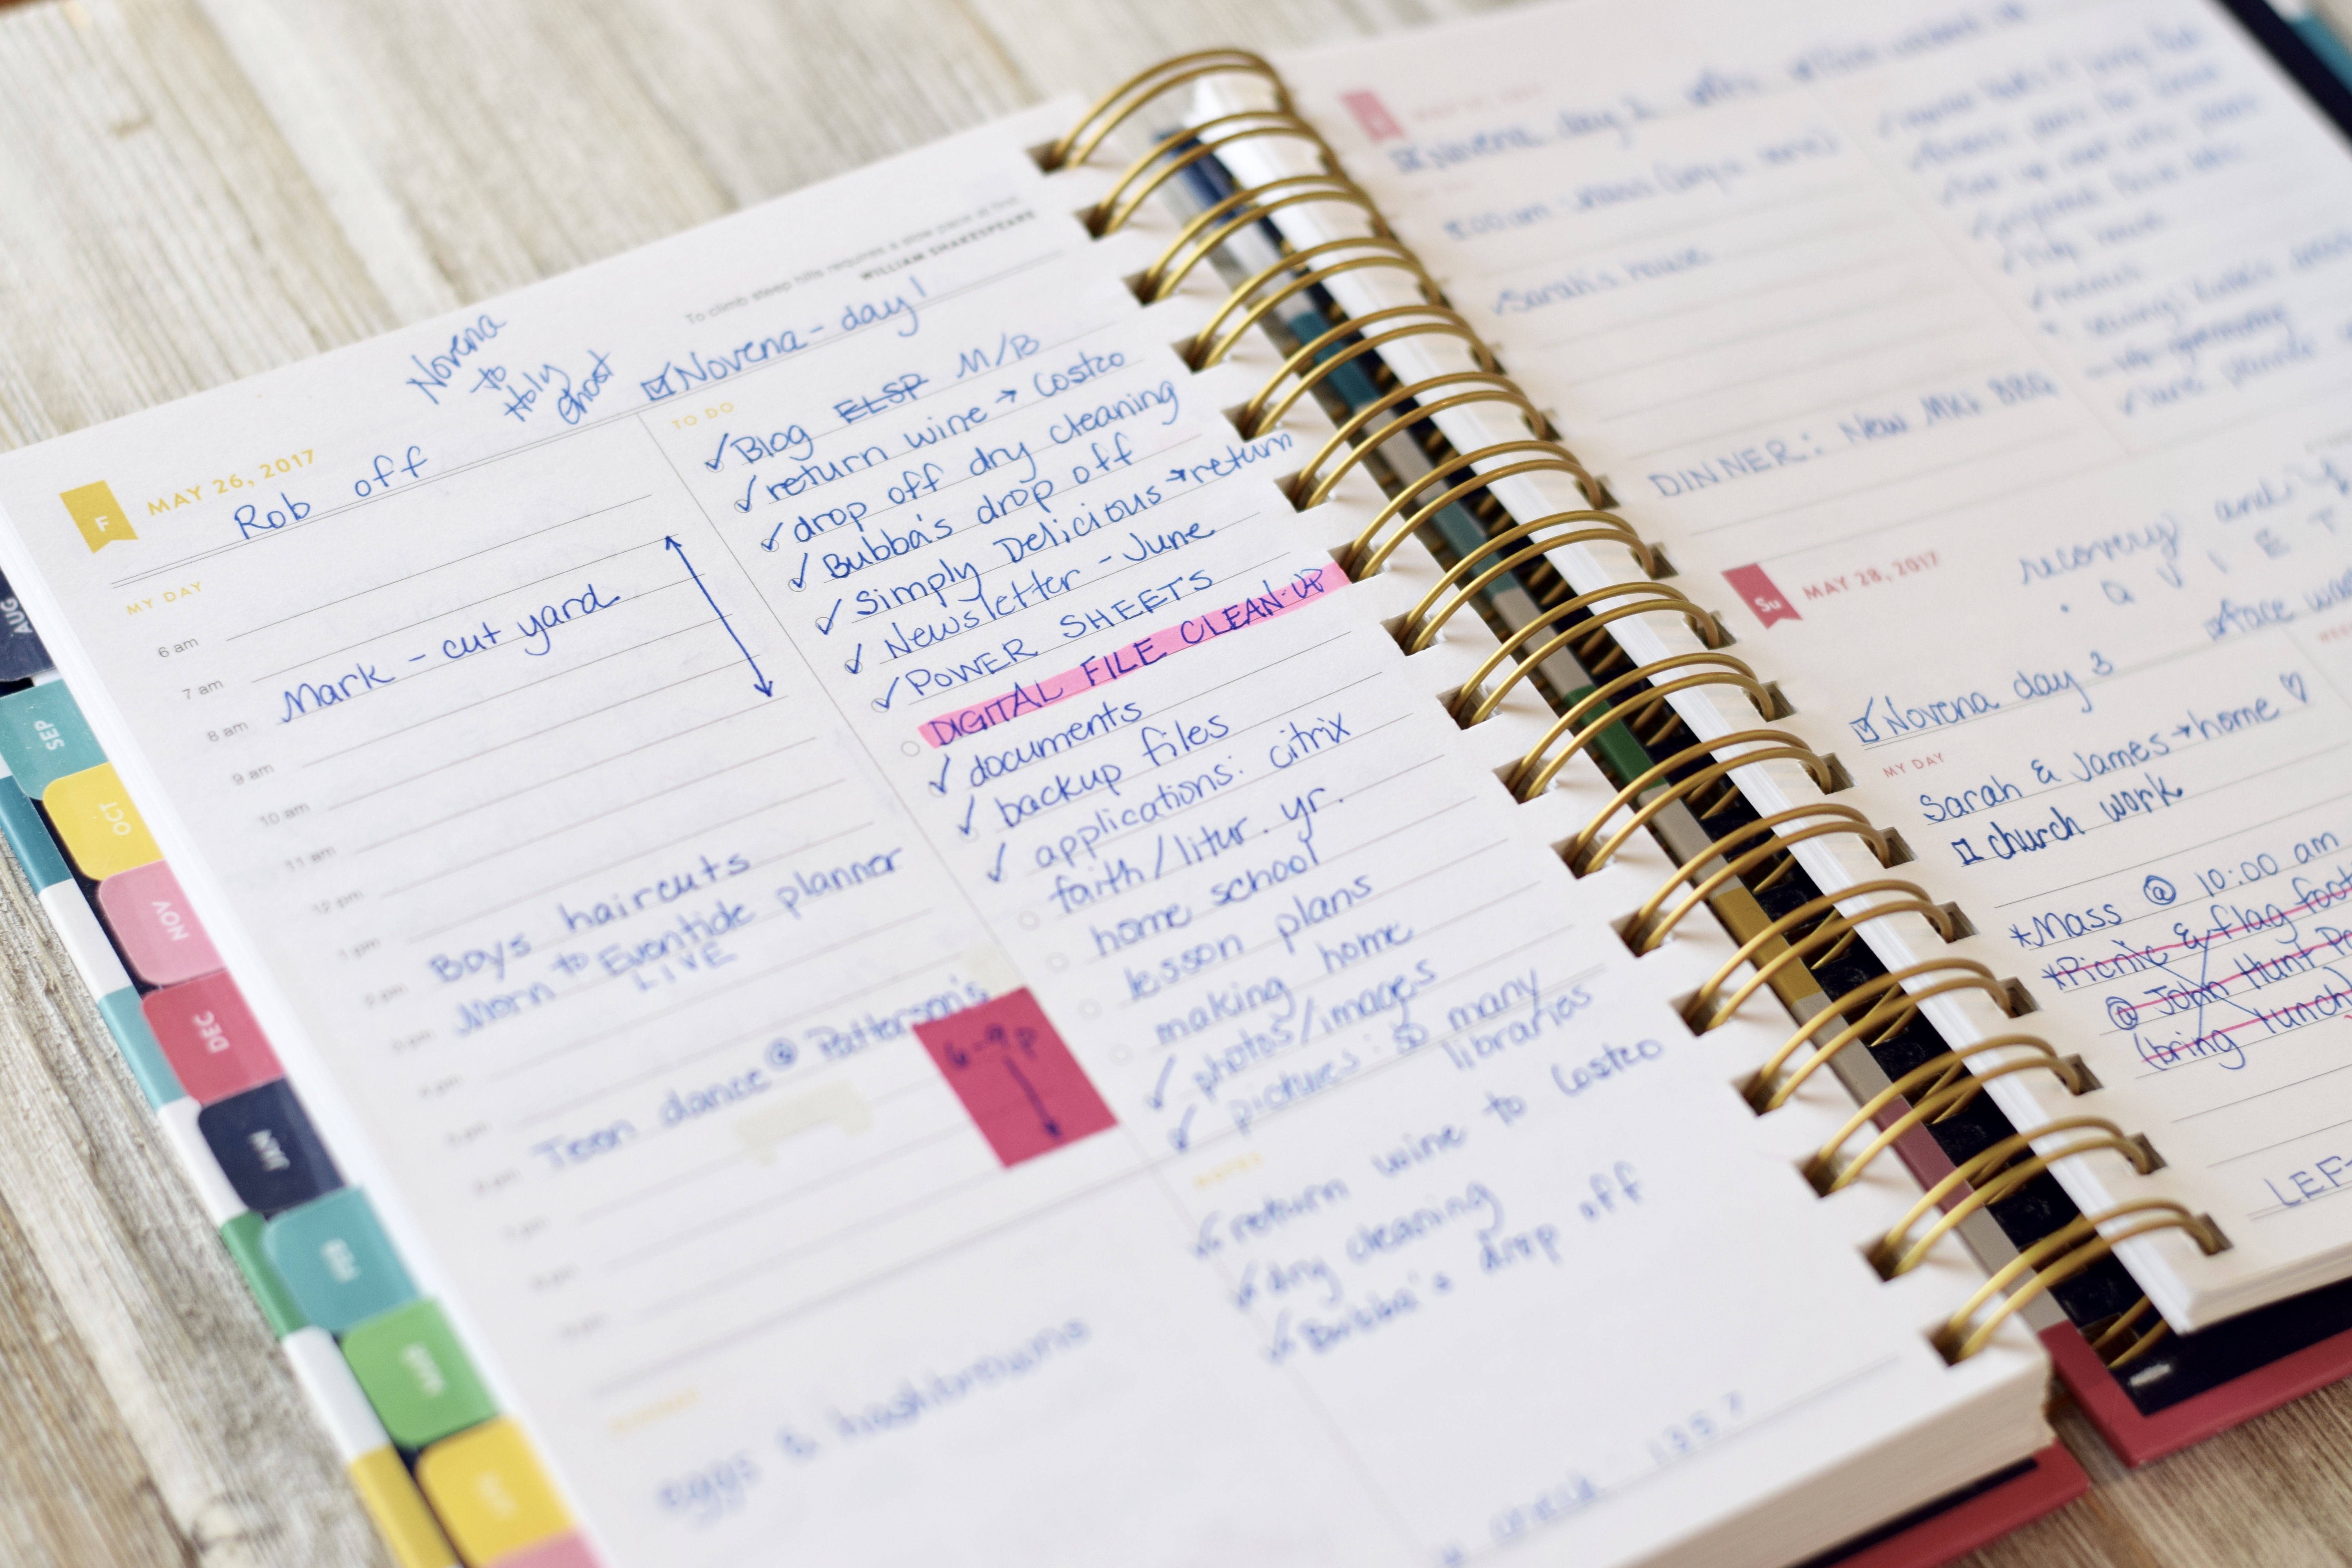
The heart of this planner has always been the daily pages. As I mentioned in my earlier confession about coil lifting paragraph detailing how I fold my planner back on itself, one daily page will show at a time. Of course, you could keep your planner open to two pages, but really, it’s meant to walk you through a day, and this is where this planner shines. It has just enough “containers” on a page to provide a neat place for thoughts, goals, to-dos, appointments, meal plans, and the like to land, but not so many (and not so structured) that you don’t know where to start. Really. Just pick up a pen and go! That’s what I do.
This planner almost begs for you to write in it – regardless of your day, your lists, your handwriting. It welcomes all of it. And when the day is one of THOSE DAYS – guess what? Go ahead. Be done with it. Pick up your planner by the top coil and flip the page. Turn it over. The next day is waiting for you, all fresh and new with no mistakes in it! (You caught the Anne of Green Gables reference, didn’t you? Bonus points if you did!)
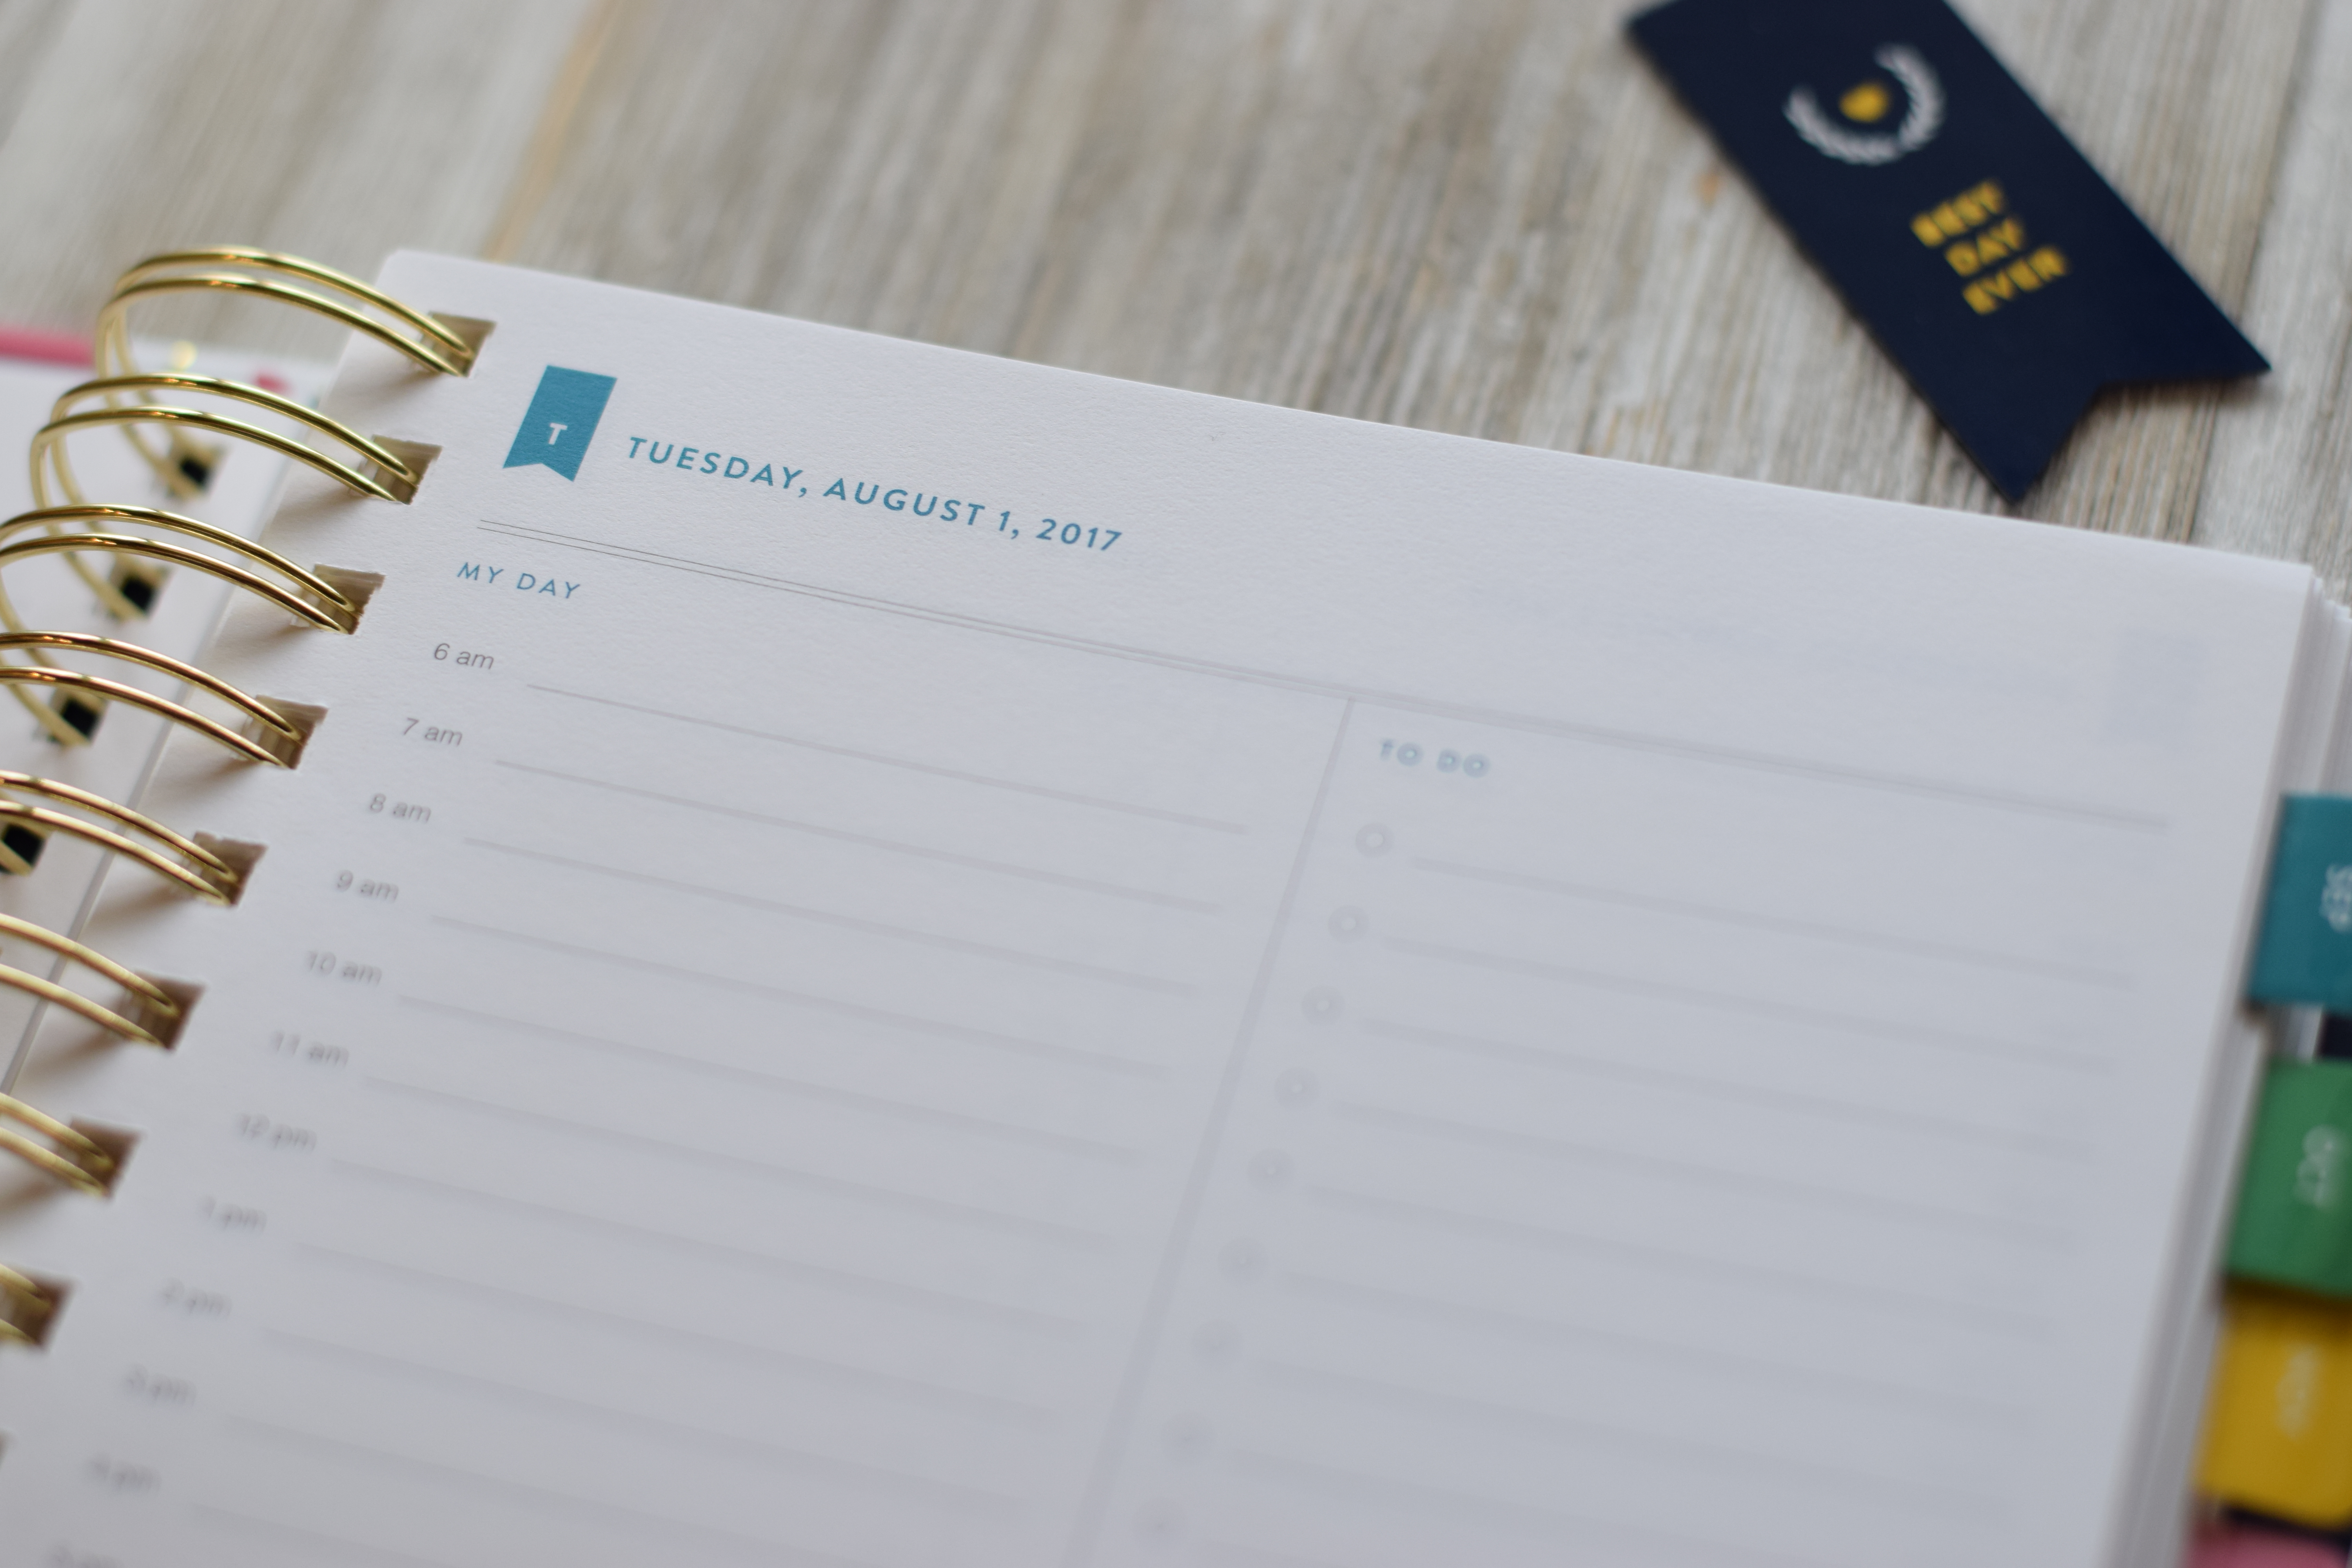
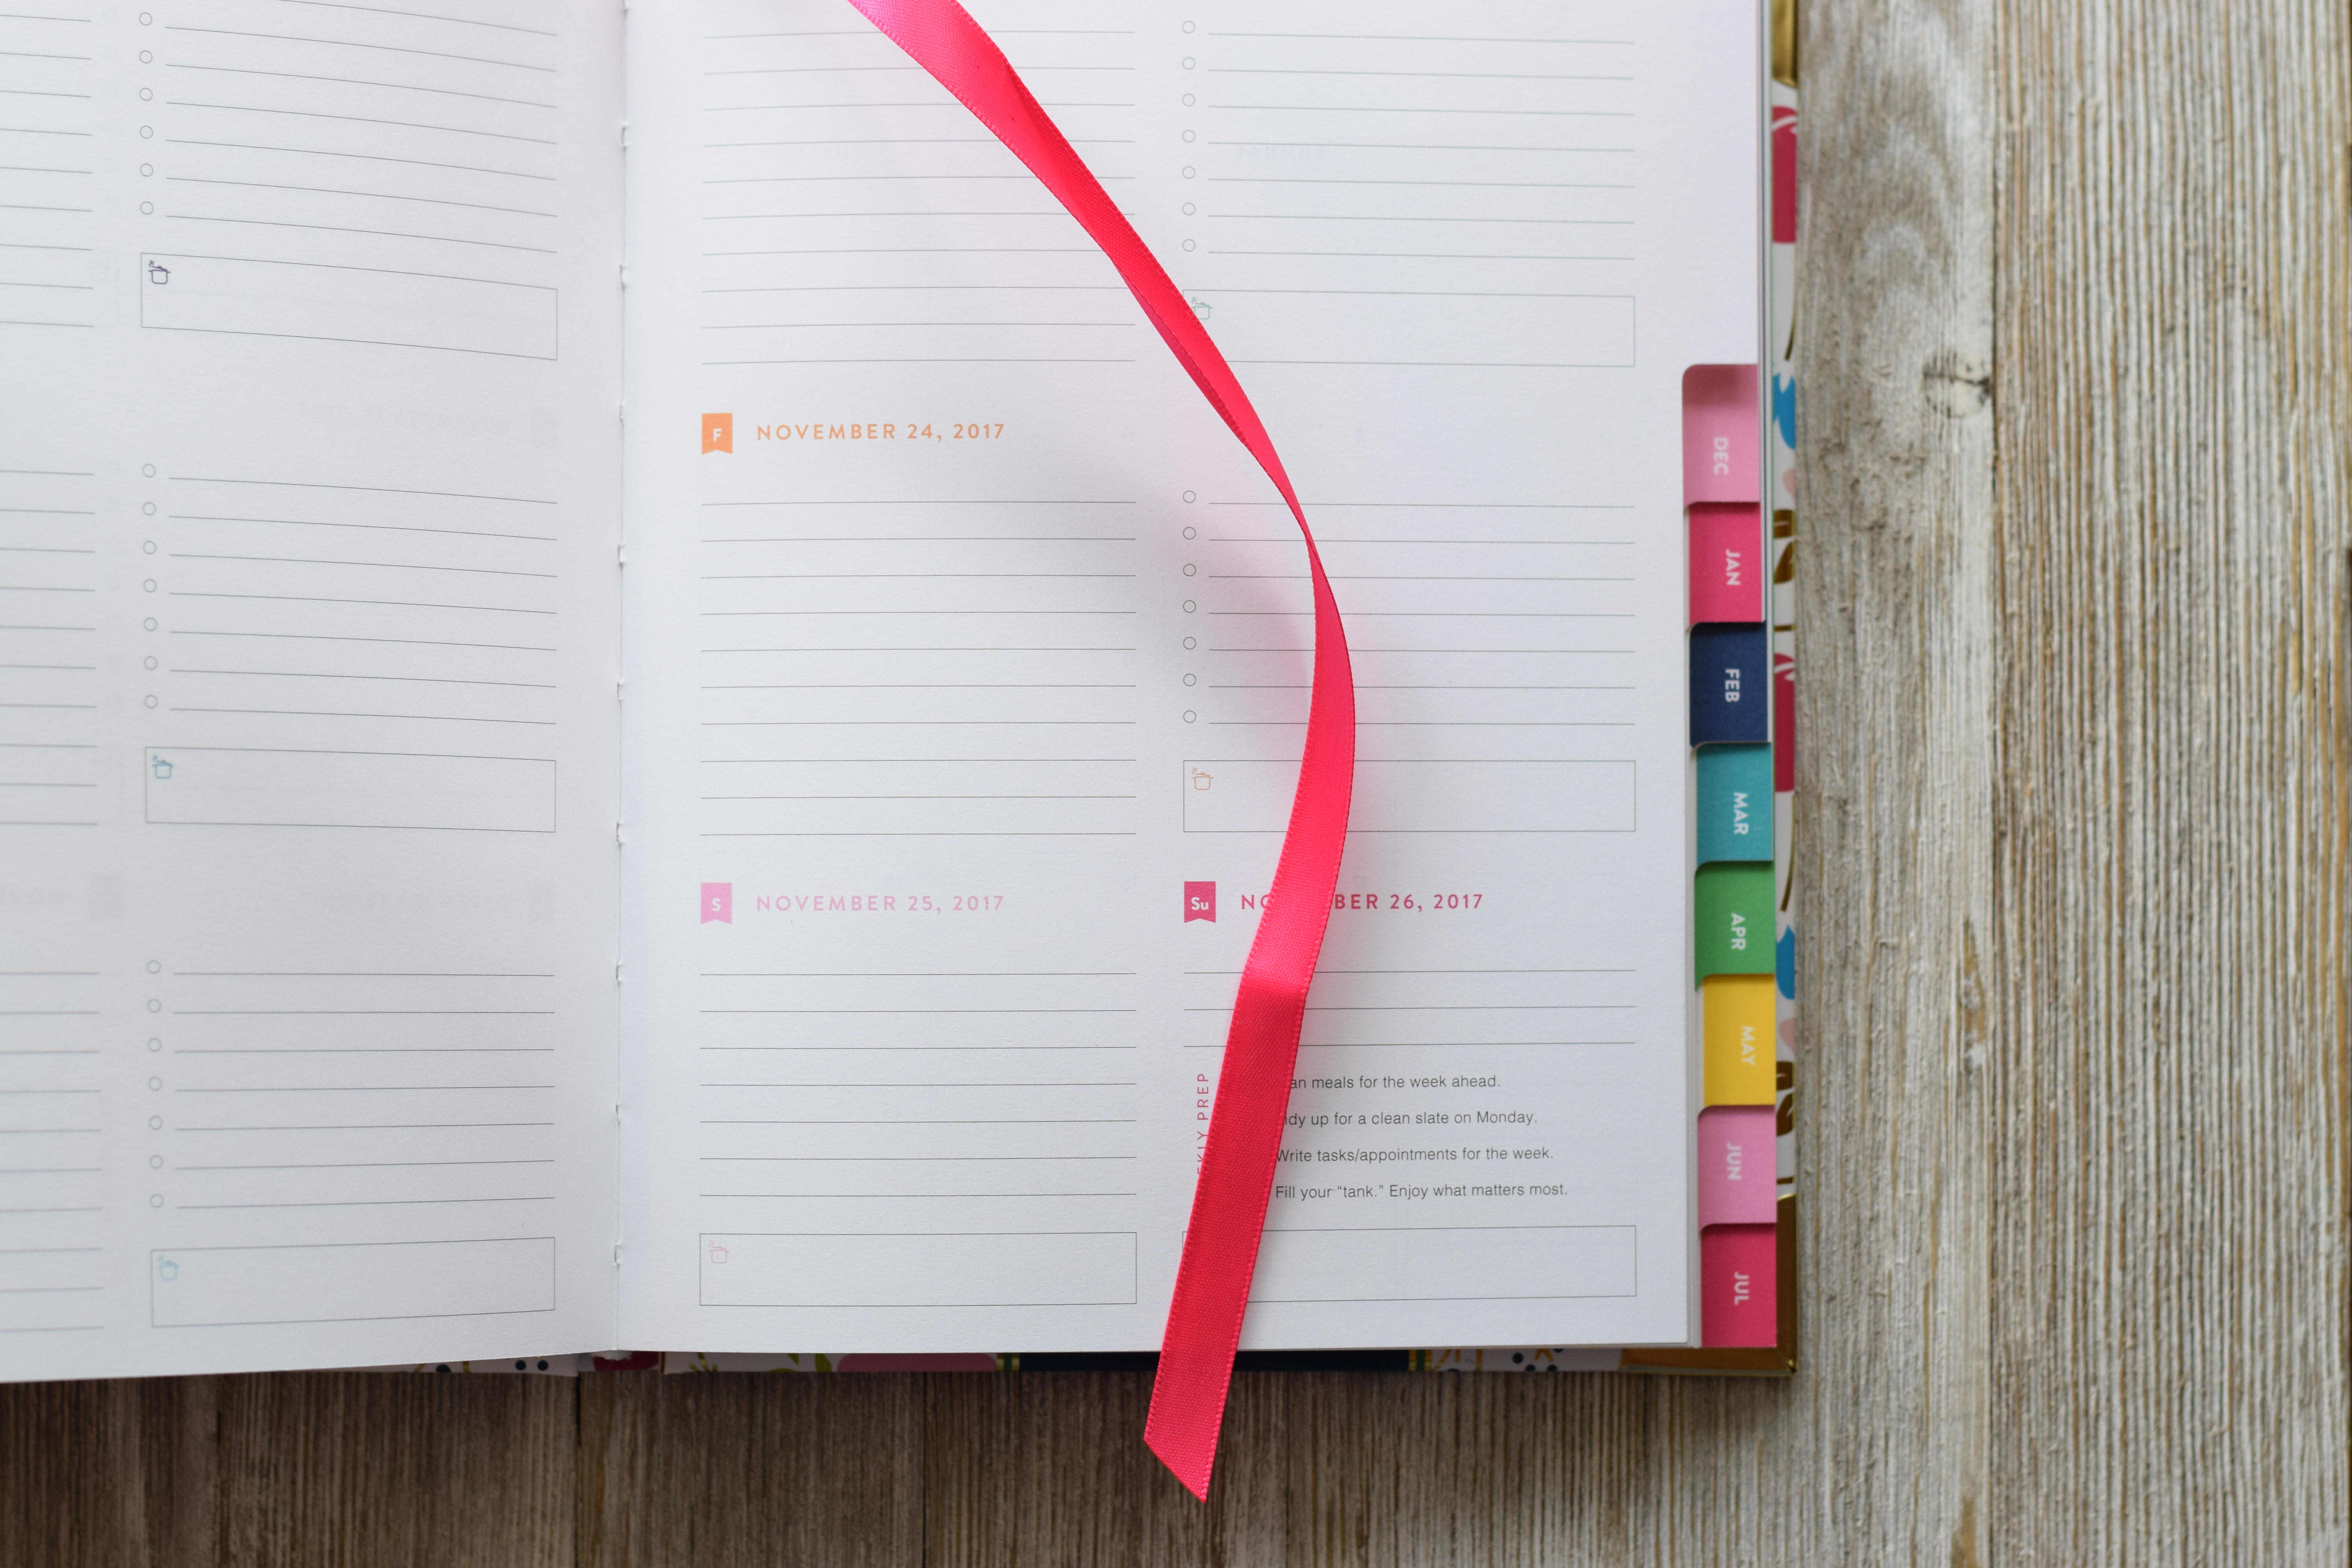
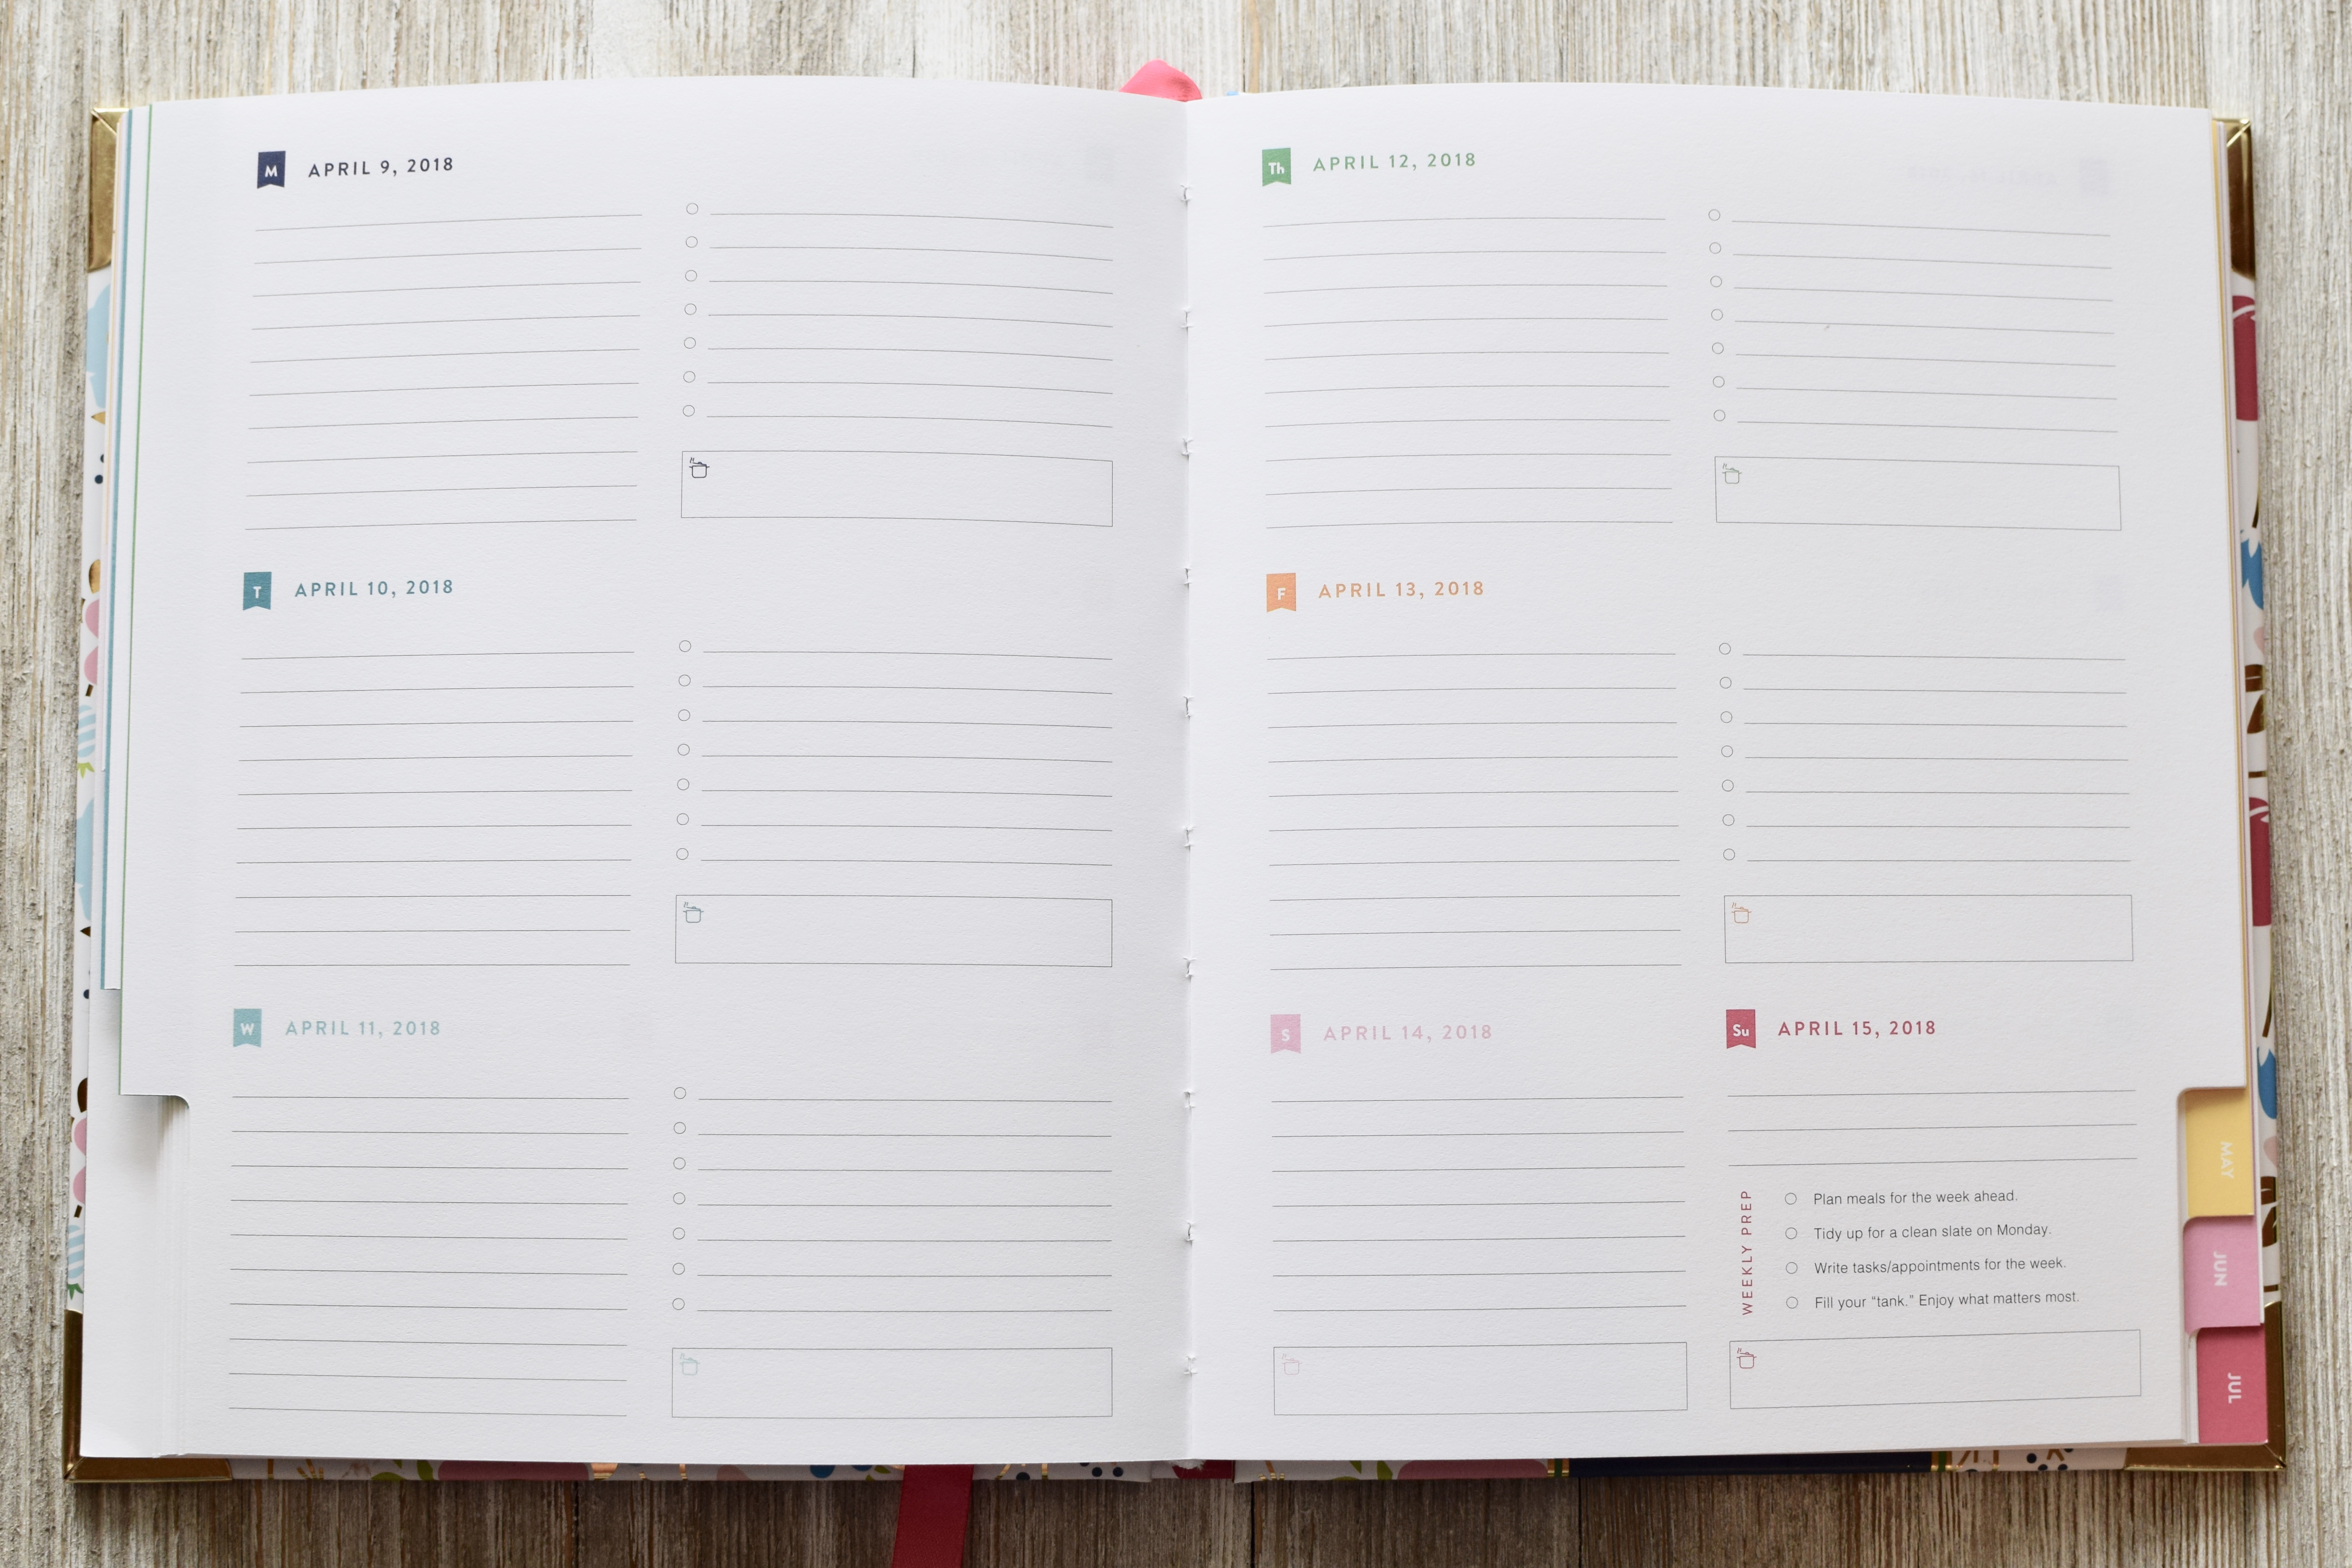
- The header for each day is noted in a different color for each day. It’s simple and there is a generous amount of room up there, which I love!! I use that space to note the liturgical day, special daily goals I’ve set for myself, my husband’s day’s off, or any other all-day-worth-noting event. In prior planners, this space held a printed quote in this area, but this year, the planner was streamlined and I am grateful for the extra space and simplicity in the header area. (Please note – the image above is the new 2017 Simplified Planner; the image below is my current 2016 Simplified Planner – you’ll be able to see the difference in the header space by comparing the two photos.)

- There are two main columns on each daily page. The left column has times (in whole hours) from 6 am – 9 pm. The right column is a bulleted checklist. How much do I love both of these columns? Everyone has appointments – whether you’re using this for work and have appointments all day, or whether you have an appointment every now and then. Great. There’s a landing space for that. BUT…I love using this left column to help me map out my day and budget my time. After all, time is a gift to steward! I layer pen colors and kids’ names and homeschool times and themes. I layer project time or clean up time, or prep time. I block out date-night-at-home and garden days. Make an appointment with yourself! Don’t feel limited to only listing doctor/dentist appointments here – use it to help you build good time management habits. Writing things down on paper always helps me visualize my time and where it’s going. Layer your day on paper and you’ll be able to tell pretty quickly where you’re overspent and underspent. AND…one more thing…what if you just need more listing space? I officially give you permission to ignore the times and just use this column to list your grocery list, your kids’ spring closet needs, the books you’re reading, the challenges you’re facing right now, your prayer list, the directions for roasting the leg of lamb. The point is, the simplicity of this planner allows you to use it in ways that aren’t necessarily obvious at first glance.
- The bulleted check mark column on the right seems obvious, and what more could I say that hasn’t been said. Except. Except to say that I particularly love having space for a generous list here. My lists are long, and I like being able to write particular steps of a goal down (place wine in fridge, ensure wine glasses are clean, pick up chocolate and cheeses at store and label “for mom only,” choose schmaltzy movie……….but I digress). It’s a great place for listing! ‘Nuf said.

There are two smaller sections at the bottom of the page – MEALS & NOTES. Meals is an update (last year the planner said, “dinner”) and there is ample space to plan out your whole day of meals if you like – breakfast, lunch, dinner. Or, you can use this space to note meal planning as well as workouts and exercise events (like lunging for the wine at the end of the day). Plenty of room for it!
The Notes section is invaluable, and yet, I can’t tell you that I use it for specific things. I’ve got my planner open to the month of May and I’m just going to start listing the things that have landed in the Notes section of my planner…
- my son’s work schedule for a day
- a list of clothes I need to iron for an upcoming dressy event
- a personal admonishment to make an actual decision about something I’ve been avoiding
- a reminder to ask my husband about something ridiculous…usually the decision (see above) that I’ve been avoiding
- a list for my husband to complete <– oh yes! I know many of you will be eager to duplicate this!! You’re welcome!
- grocery list or phone number
- a list of items I need to remember to bring with me for errands
- the different cars in our family going to different events and which child is riding in which car (I kid you not. That is actually listed on my planner in the notes section for May 19!)
And so on. The point of flipping through the month of May in my planner and sharing the various things I have listed in the Notes section is really just to show you that I’m always dropping something in there, I always seem to need a place for some little bit of information to land. And I love that there is always that little space waiting and available.
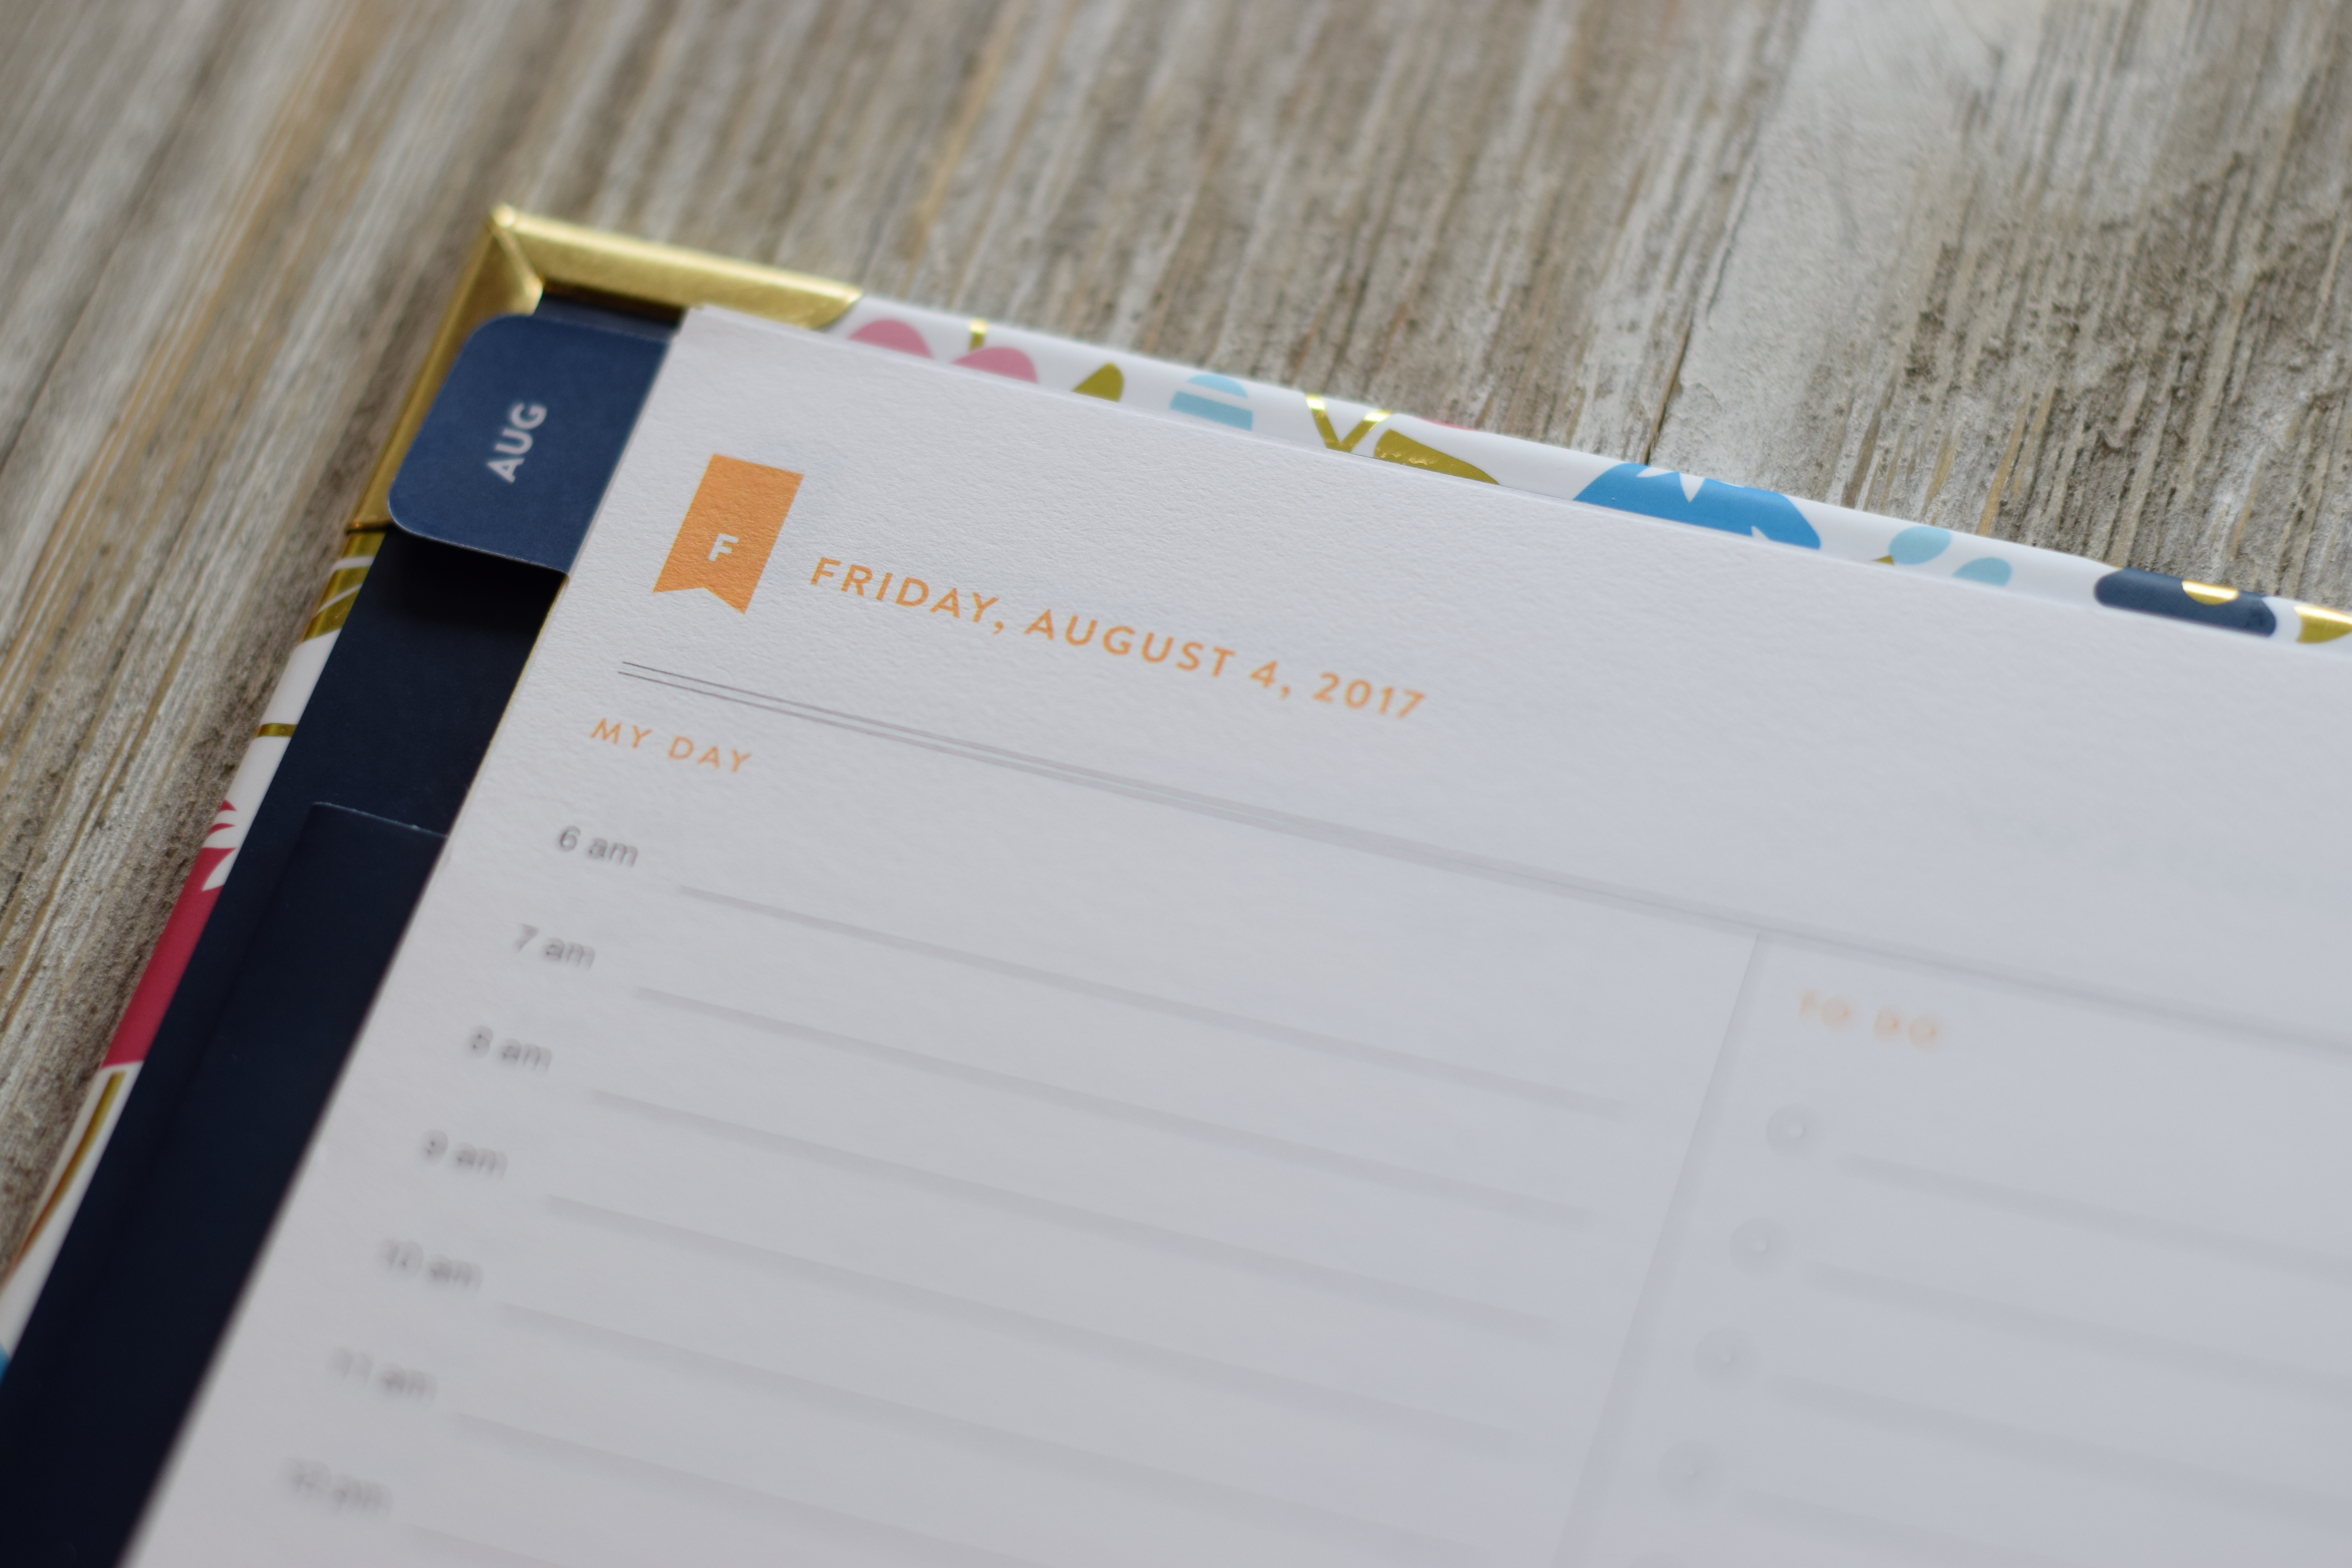
I did want to show you a color change from last year. Remember when I mentioned that each header section listed the day and date, each in its own unique color? Every Monday is navy, Tuesday is a dark turquoise, Wednesday is lighter turquoise, Thursday is kelly green, and Friday used to be yellow, but it is now a melon-orange color that is much more vibrant and shows up better. Small change, but it’s a good one.
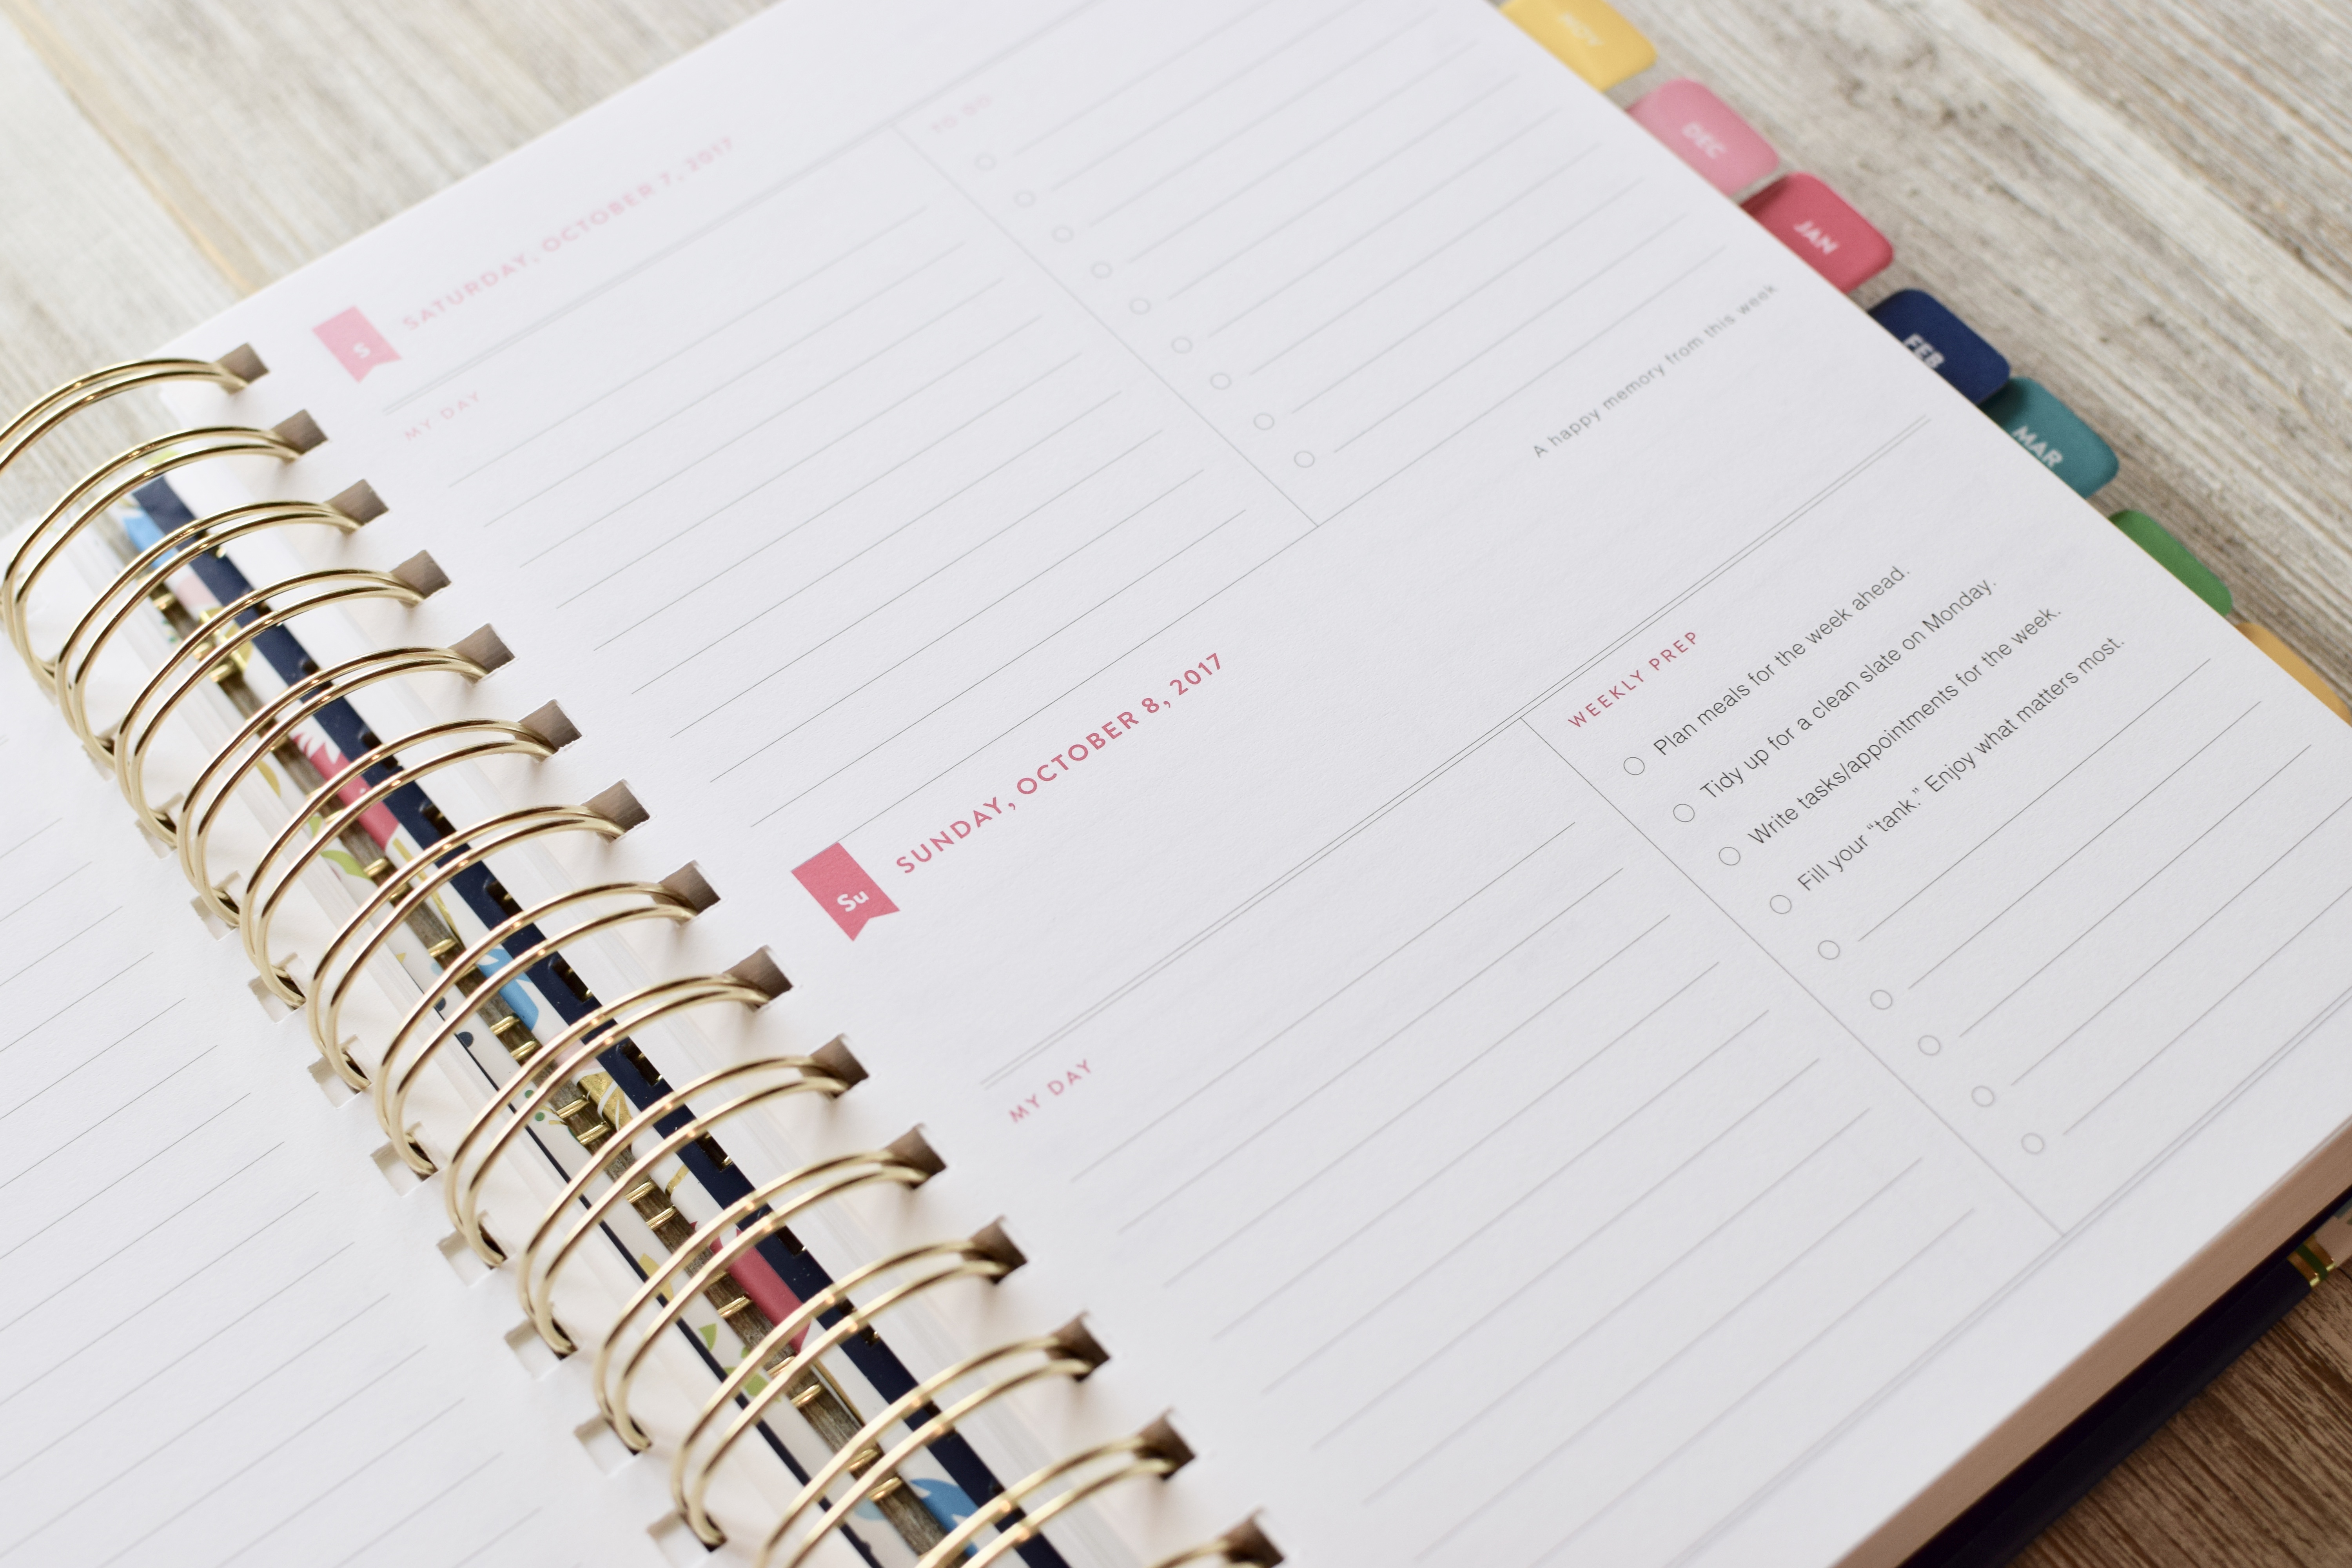
It’s worth noting that the weekend pages include Saturday and Sunday combined on one page.
The weekly prep (listed on Sunday) is really helpful for me. Through the week, I list a lot of tasks and if I work hard, I can complete most. If I don’t complete something, I write a little arrow next to the task. When I get to my Sunday prep, I look back through my week and any items with an arrow that I didn’t complete, I bring forward and list them right here. This helps me roll those tasks forward in my planning rather than the incomplete tasks just getting lost in the mix.
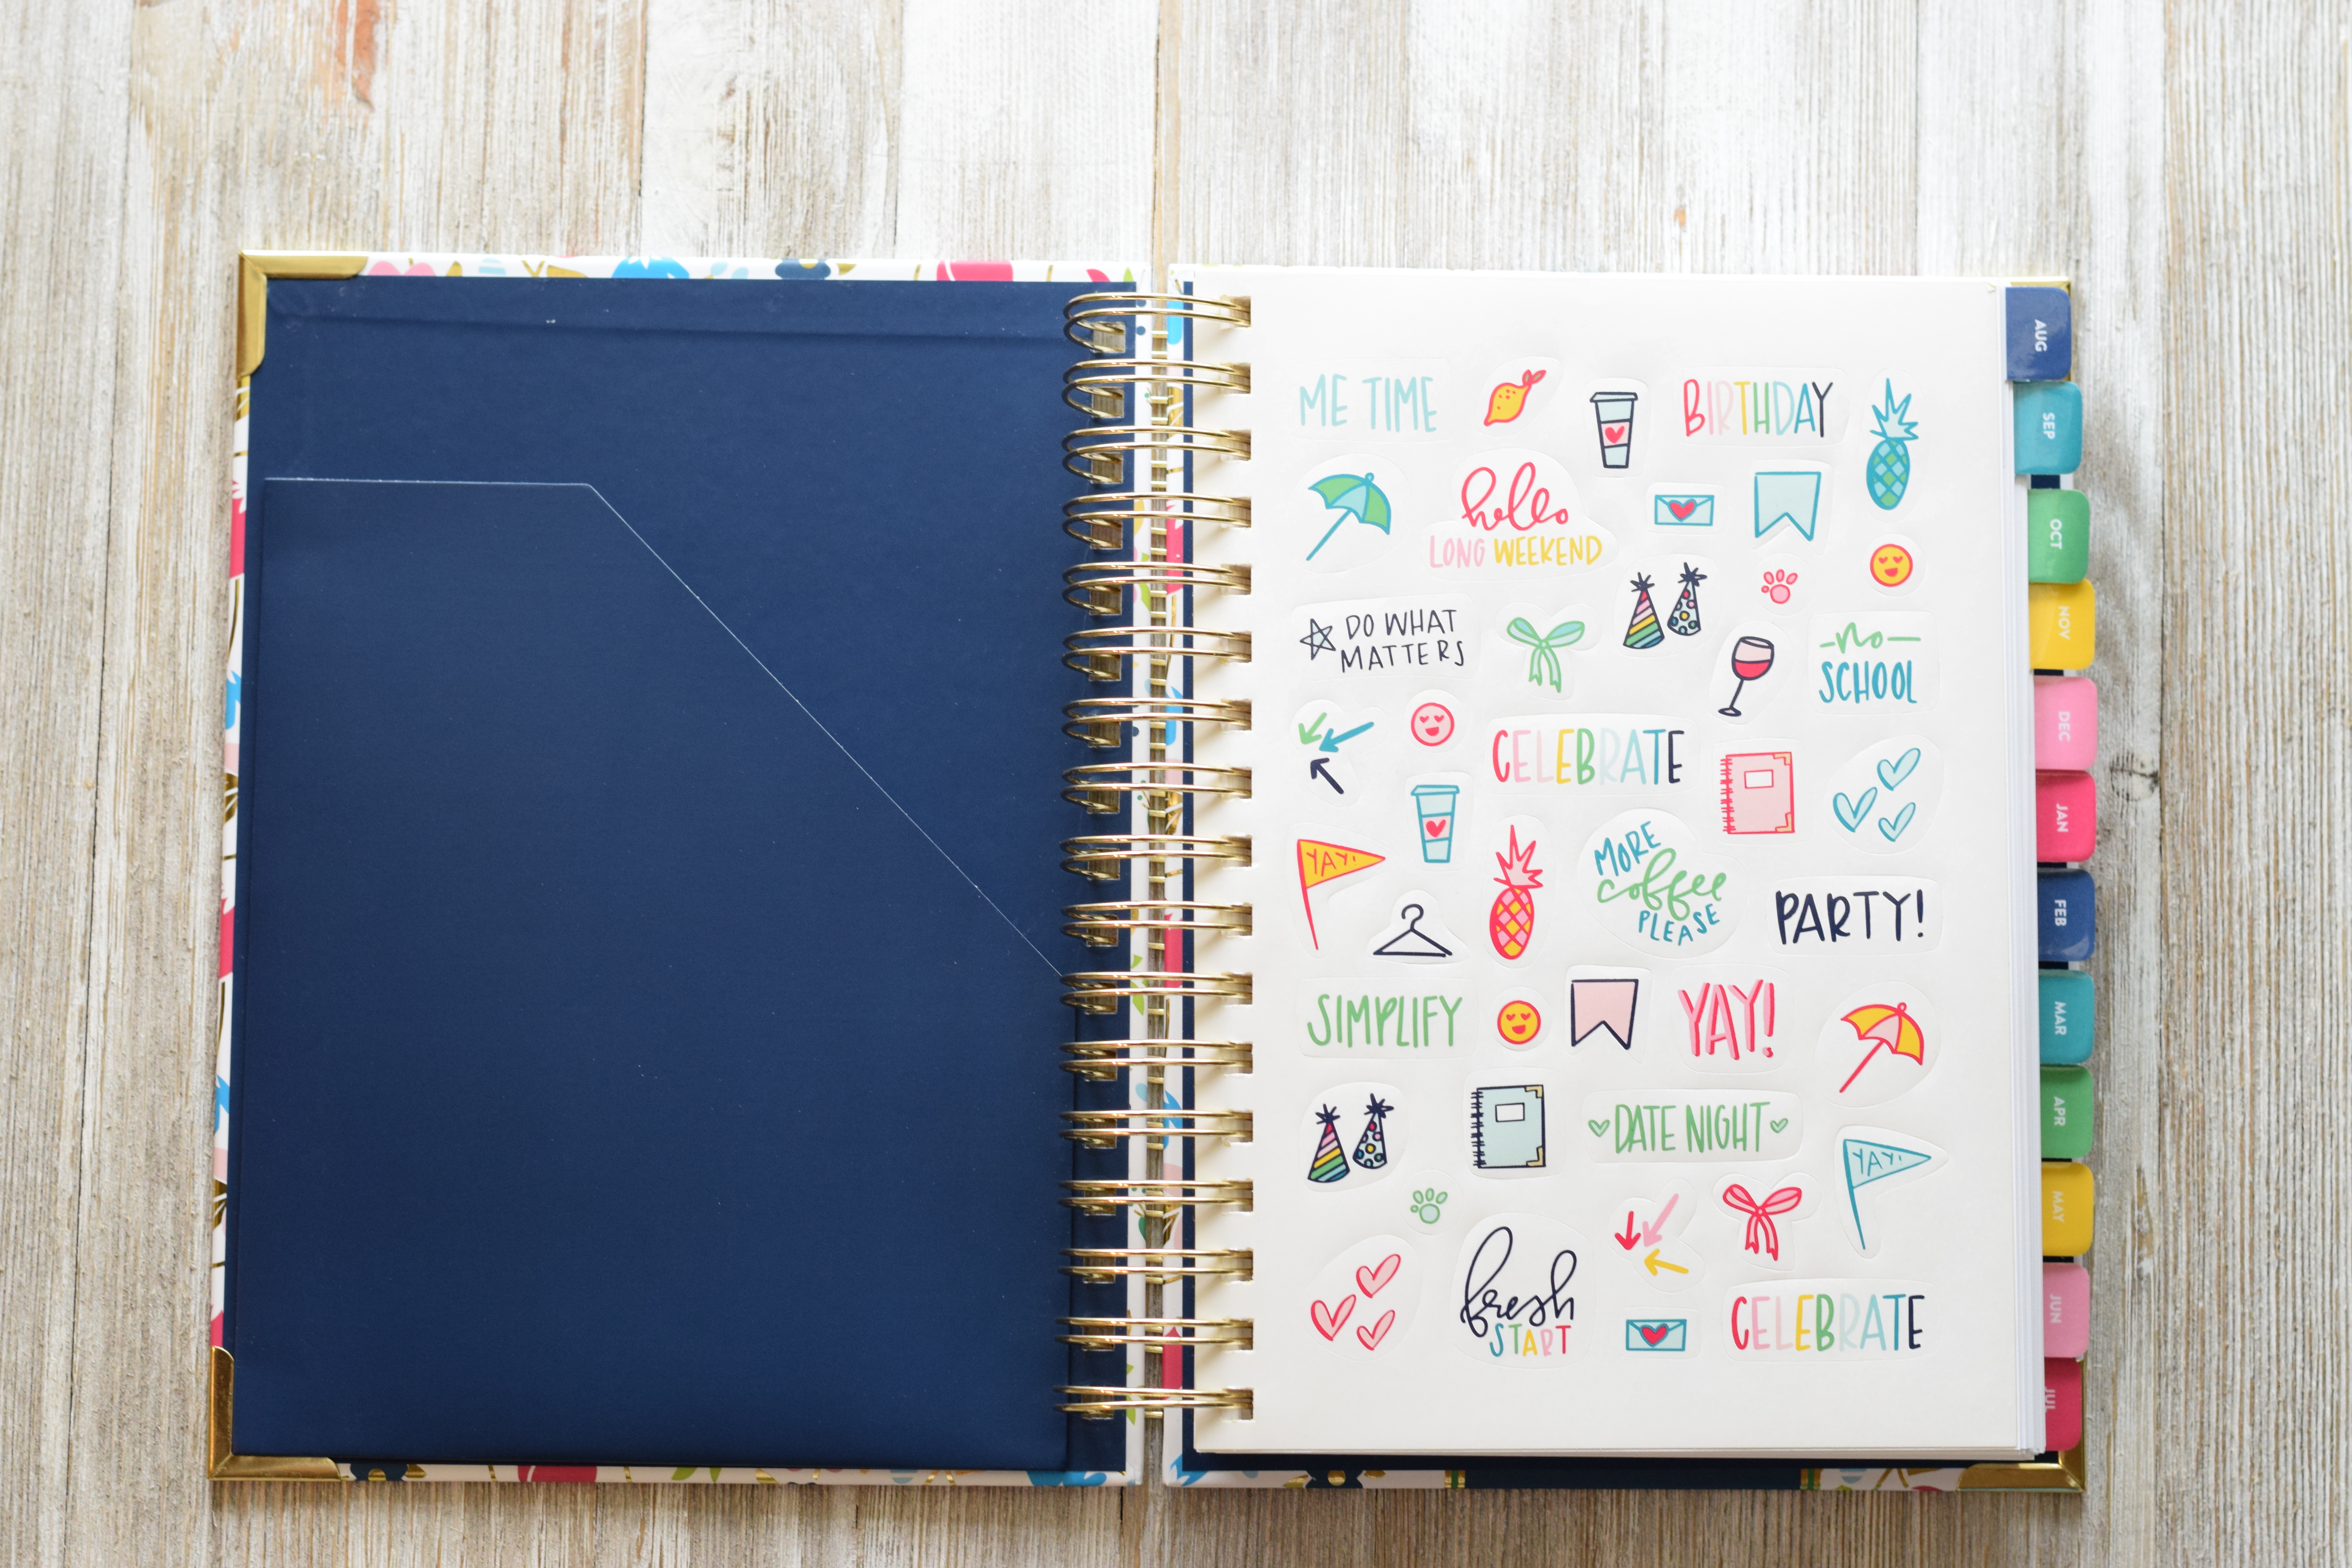
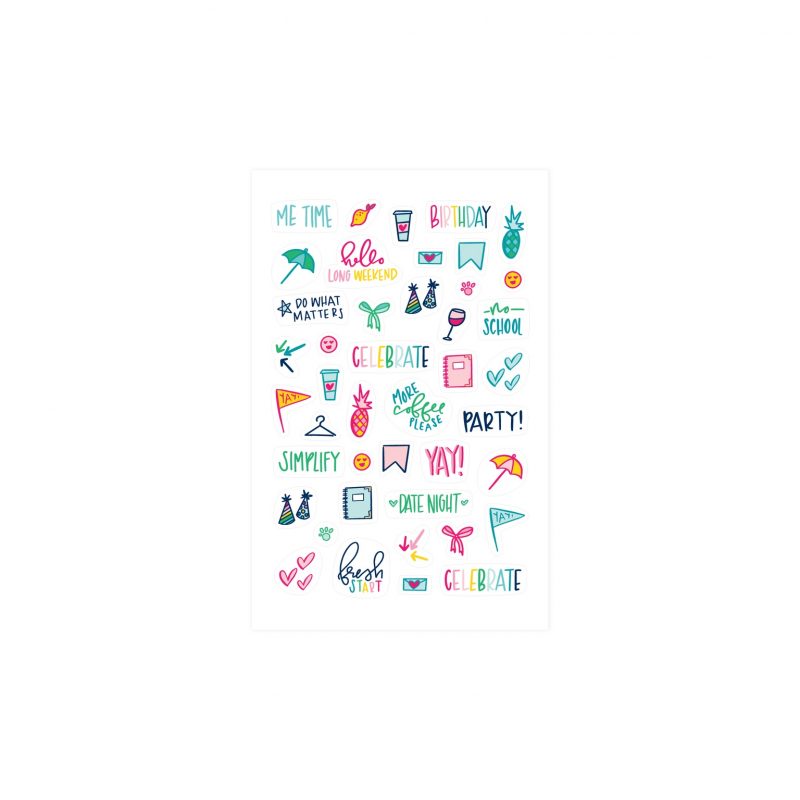
Another new feature this year is the addition of a page of stickers coiled into the front of each planner. These are so fun! And you can purchase extra sheets of the colorful doodles sticker set to use throughout your planner!
And that’s it for the Daily Simplified Planner!
What if you don’t need that much planning space. What if you’d like a weekly option?
Weekly Simplified Planner
In addition to a Daily Planner, Emily Ley offers a Weekly version of her planner. The same basic style and colors are all present, but it features a weekly spread when the planner is open.
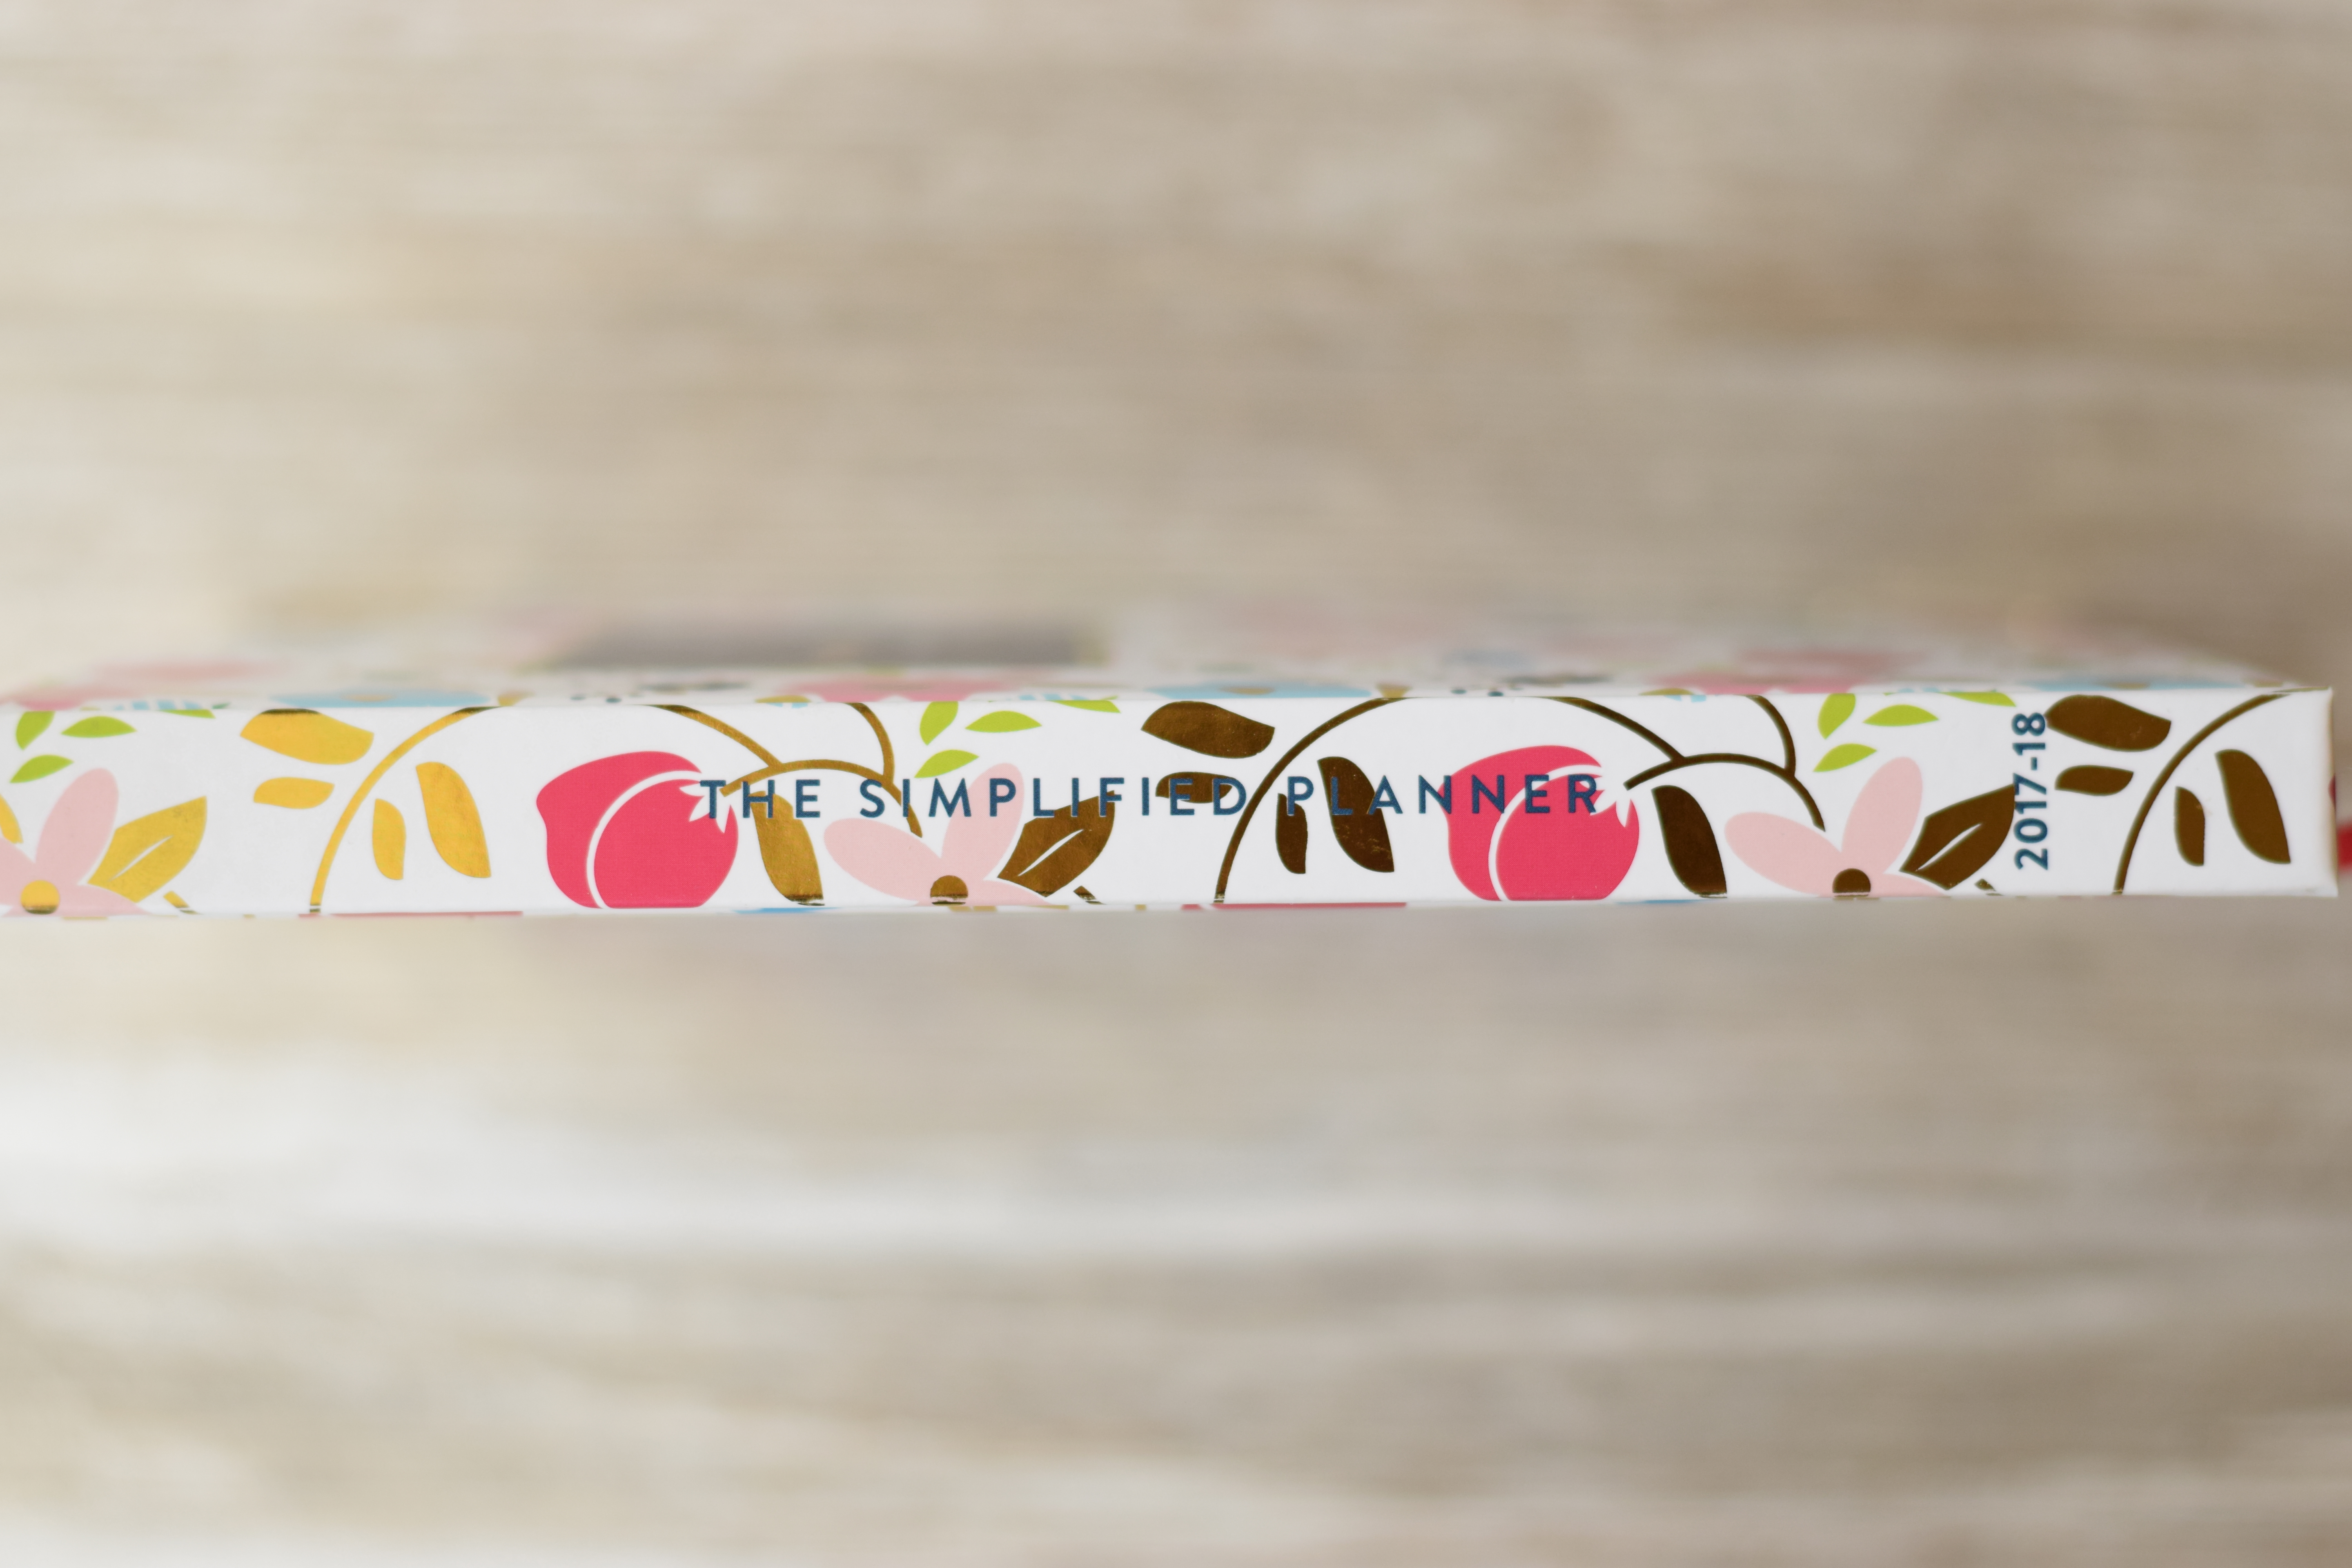
The weekly Simplified Planner is a slimmer hardbound planner and has a sewn binding.
One of the most remarkable features I found when I opened the cover are the tabs for each month – they are all die-cut tabs! Maybe I’m just very easily impressed, but I loved how the tabs were created for this sewn, hardbound planner!
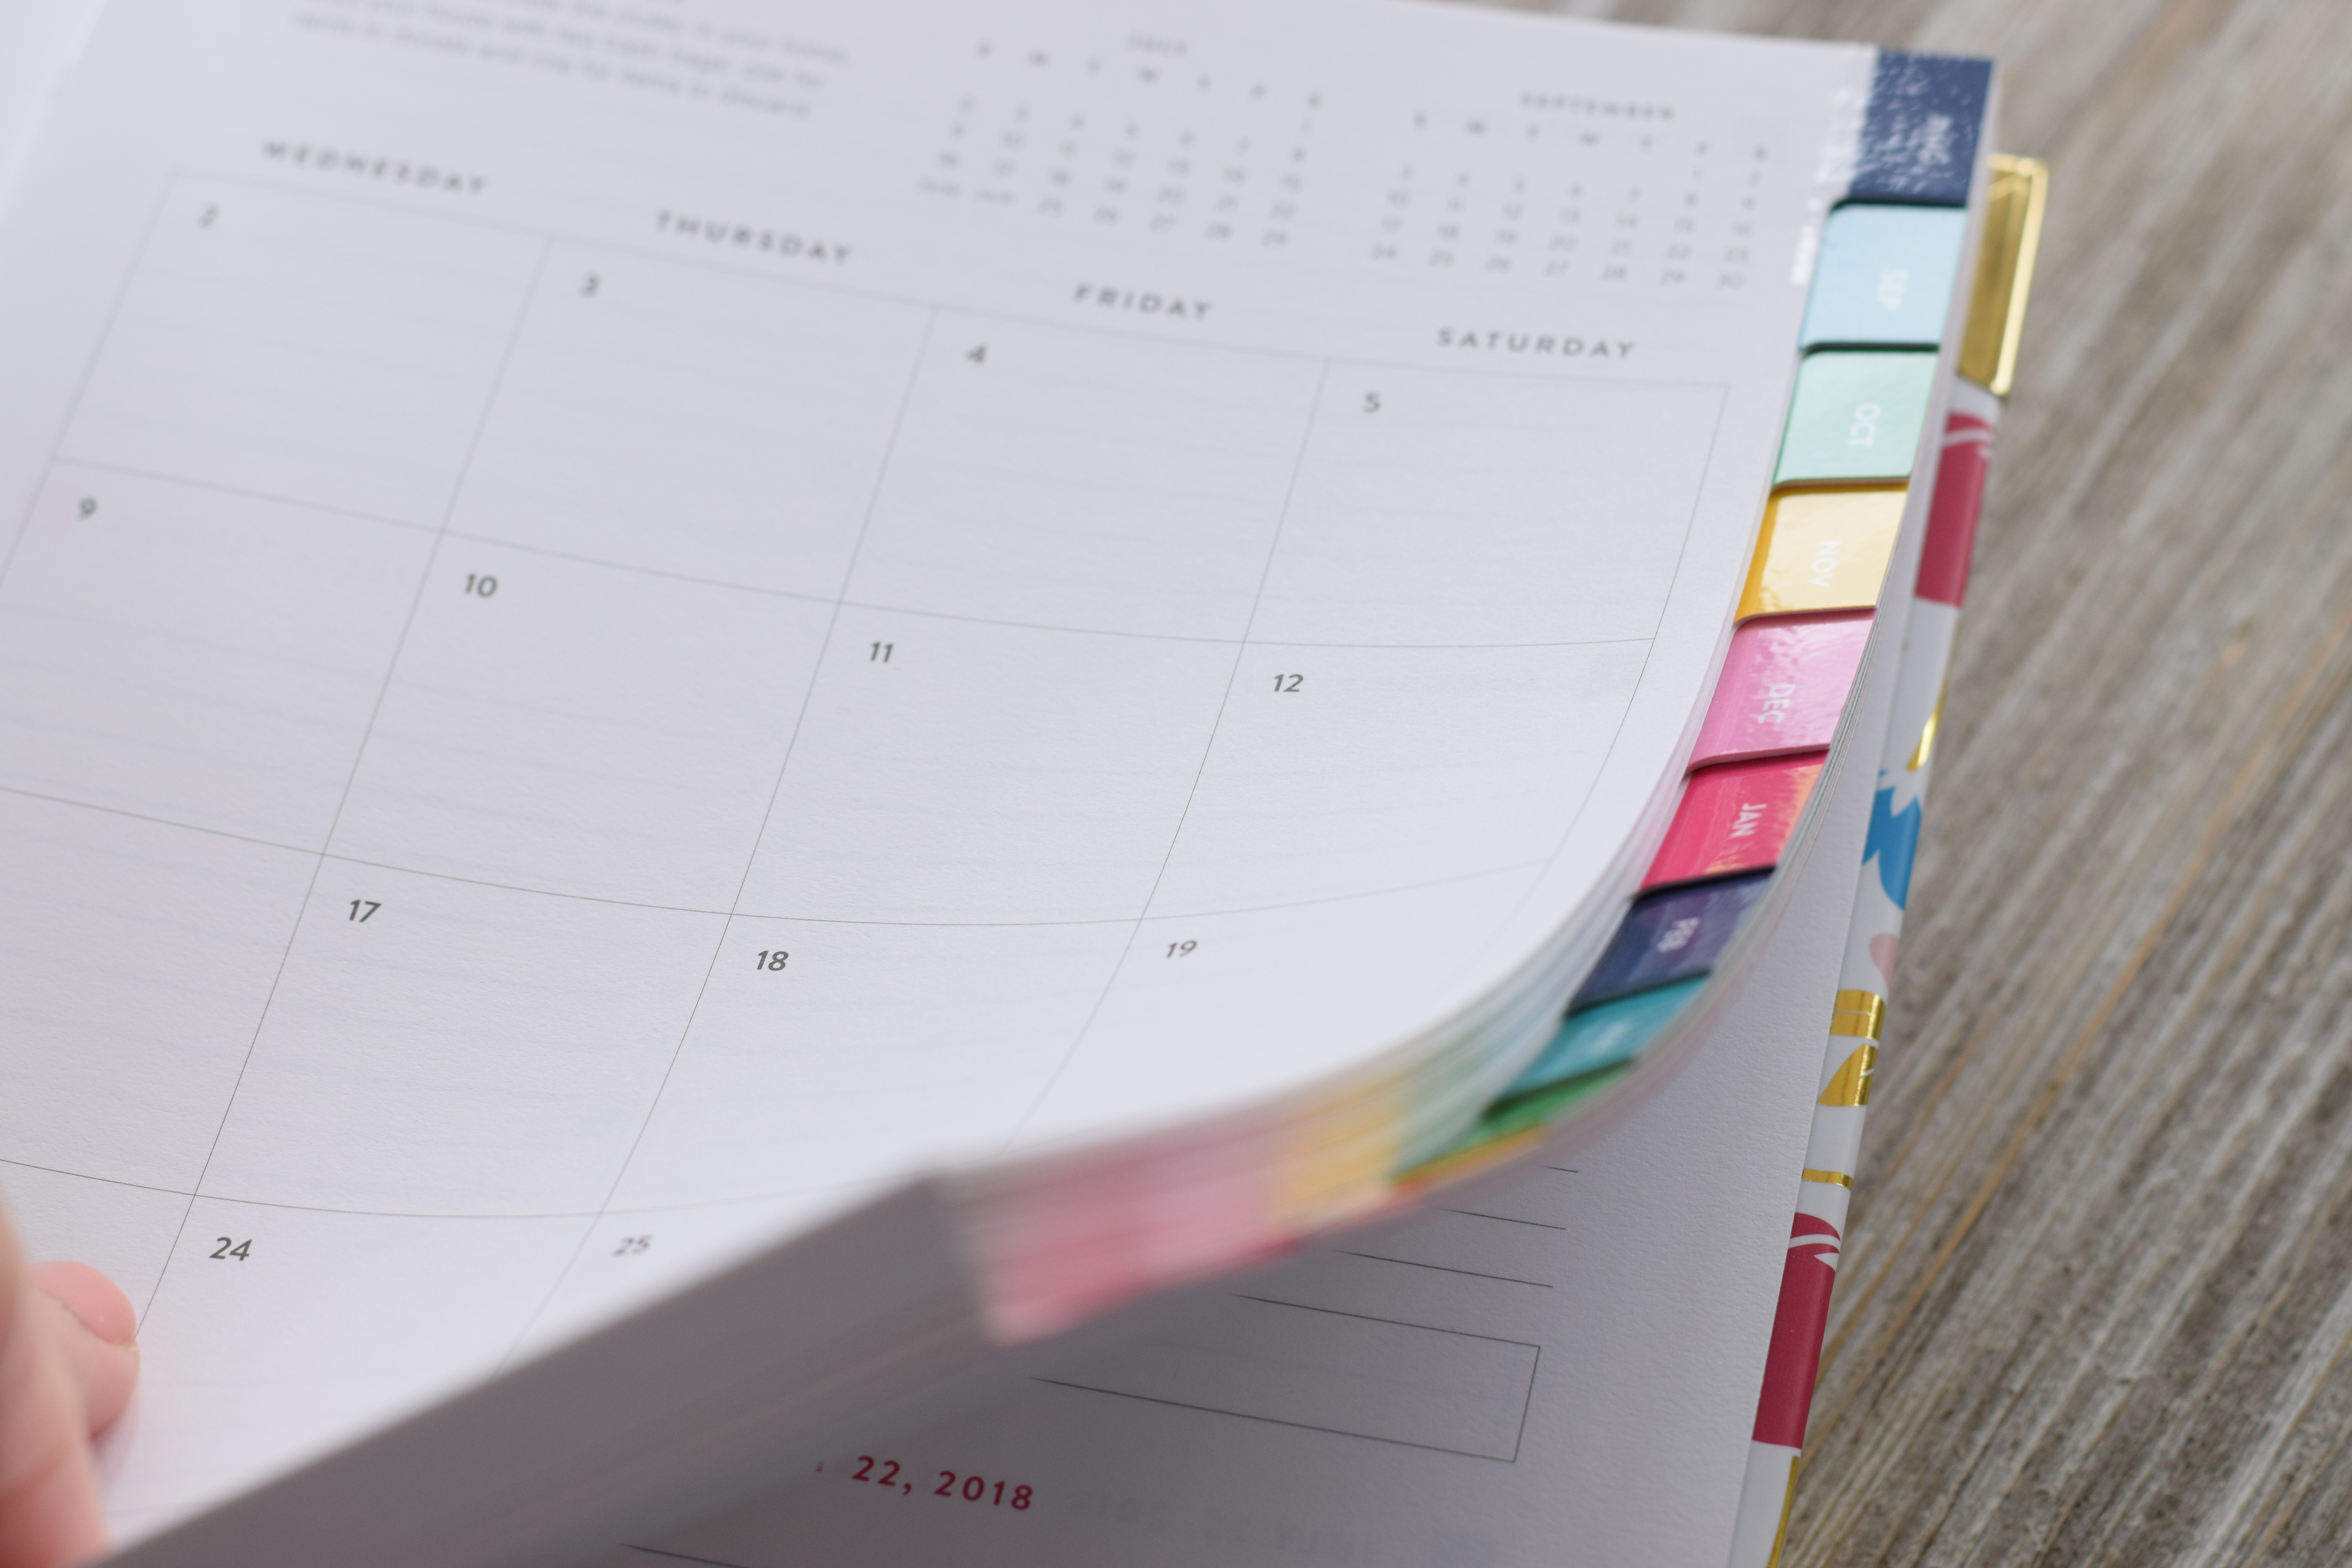
Every tab is cut out of the page and nested behind the protective covers. Open your book and easily flip to March…

…or April. The tabs are laminated and that offers rigidity and protection to that page.

There is a beautiful ribbon sewn into the binding to mark your place in the planner.
And each weekly spread follows the same color scheme and format as the daily – there is just less space so that an entire week can fit on two pages.
Perhaps you don’t need all the listing space of a daily? Or perhaps (like me) you need a second planner for a weekly overview, or as a purse planner/agenda (that’s how I’m going to use mine – as a portable purse planner and budget tracker. I’ll keep appointments on the left column, and list my budget and bills on the right side). It’s slim enough to be very portable, and with the tabs protected by the cover, it will be easy to slide in and out of my bag!

Each day contains a left lined column, a right bulleted checklist column, and a small rectangular space for noting meal plans for that day.

Best of all, this planner lays flat right out of the box. Open it wherever you like, and it will stay open. This is a feature of the special sewn binding, and it’s absolutely necessary for a weekly planner! You want to be able to have your planner stay open so you can see your week-at-a-glance!

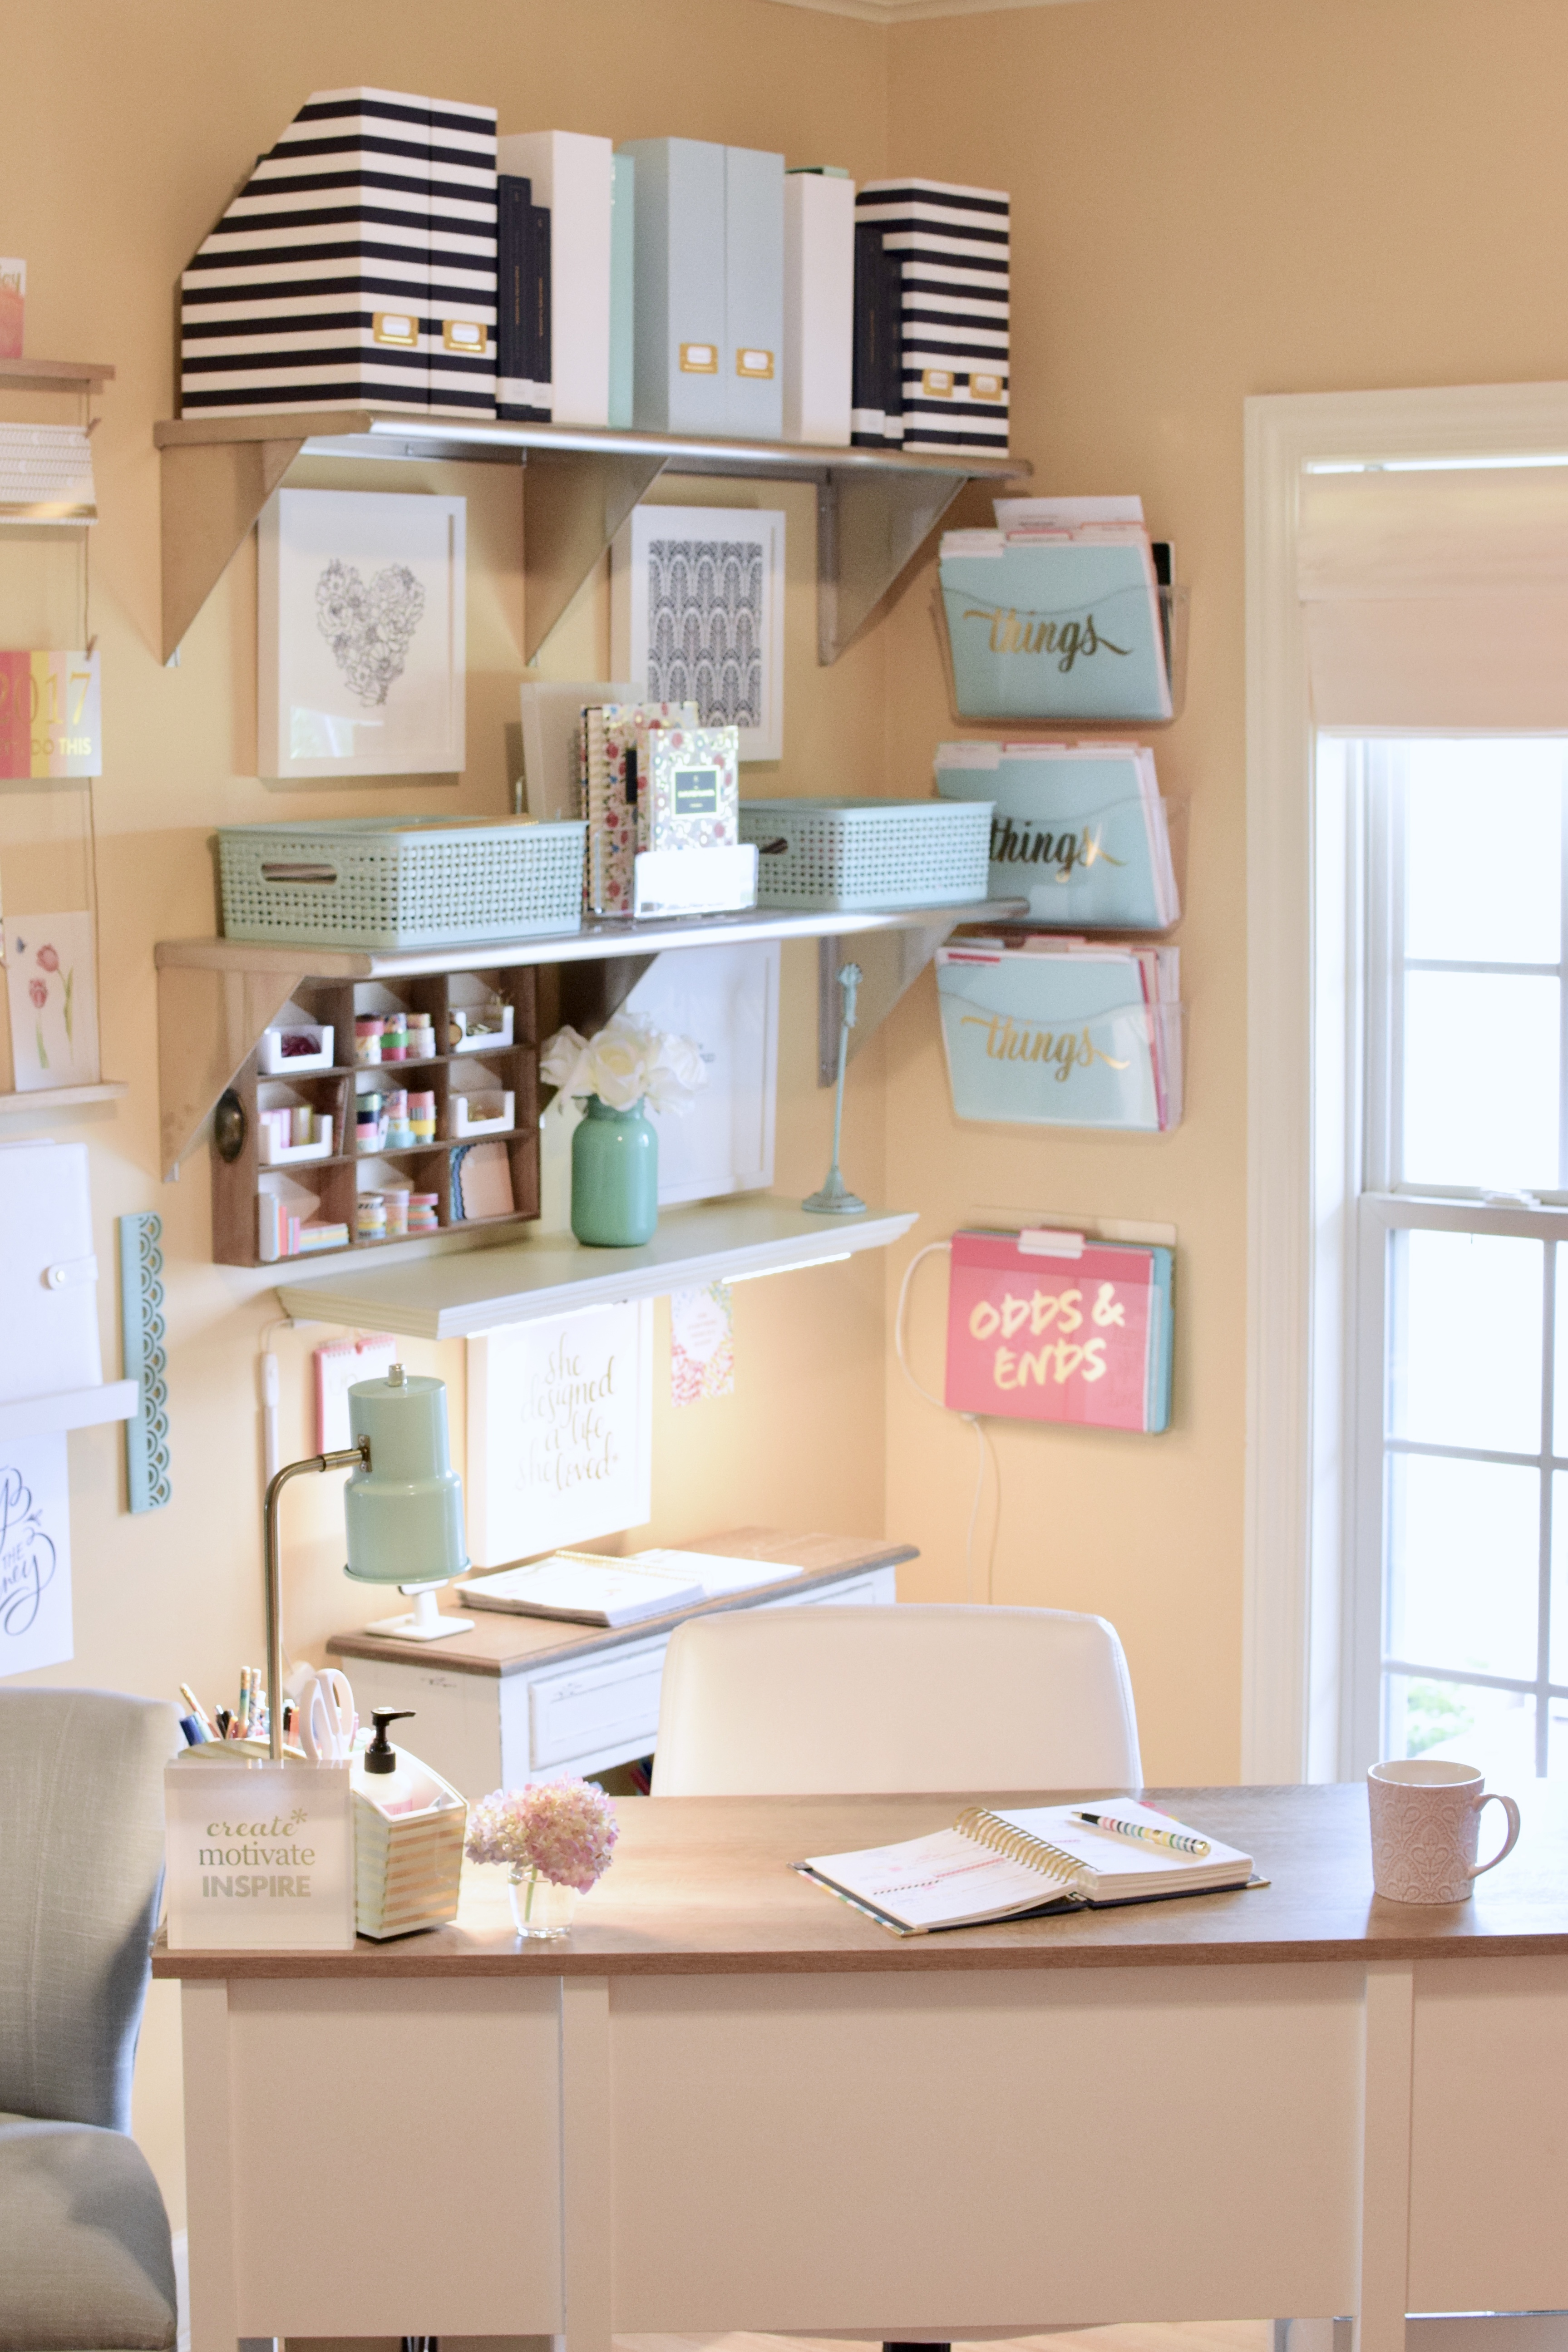
How I use The Daily Planner
And here friends is where I’m going to show you where the rubber hits the road. If you just wanted to see pictures of the new Simplified Planner, this is your chance to click away. Below, I’m going to share a few sample pages from my current 2016 Simplified Planner.


(Above) Three days before Sarah’s wedding and life is hopping. I’m juggling a lot at this point, but my planner kept up with me.
A quick word on the beautiful pens available at Simplified Planner – they are so pretty! But they come with black ink. I replaced my ink cartridge with the Pentel Energel .7 refill in blue and happiness ensued. Not every gel pen refill will fit in the Simplified Planner pen body, but the Pentel Energel is a perfect fit. And, I’m a big fan of fast drying ink, and Pentel Energel is one of the fastest. (Lefties, that bit of info is for you!)
I sometimes use washi in my planner – to note an event, block out time, or note events that run multiple days on my monthly view, but for the most part – in this planner – I’m pen-only. It’s completely functional for me.
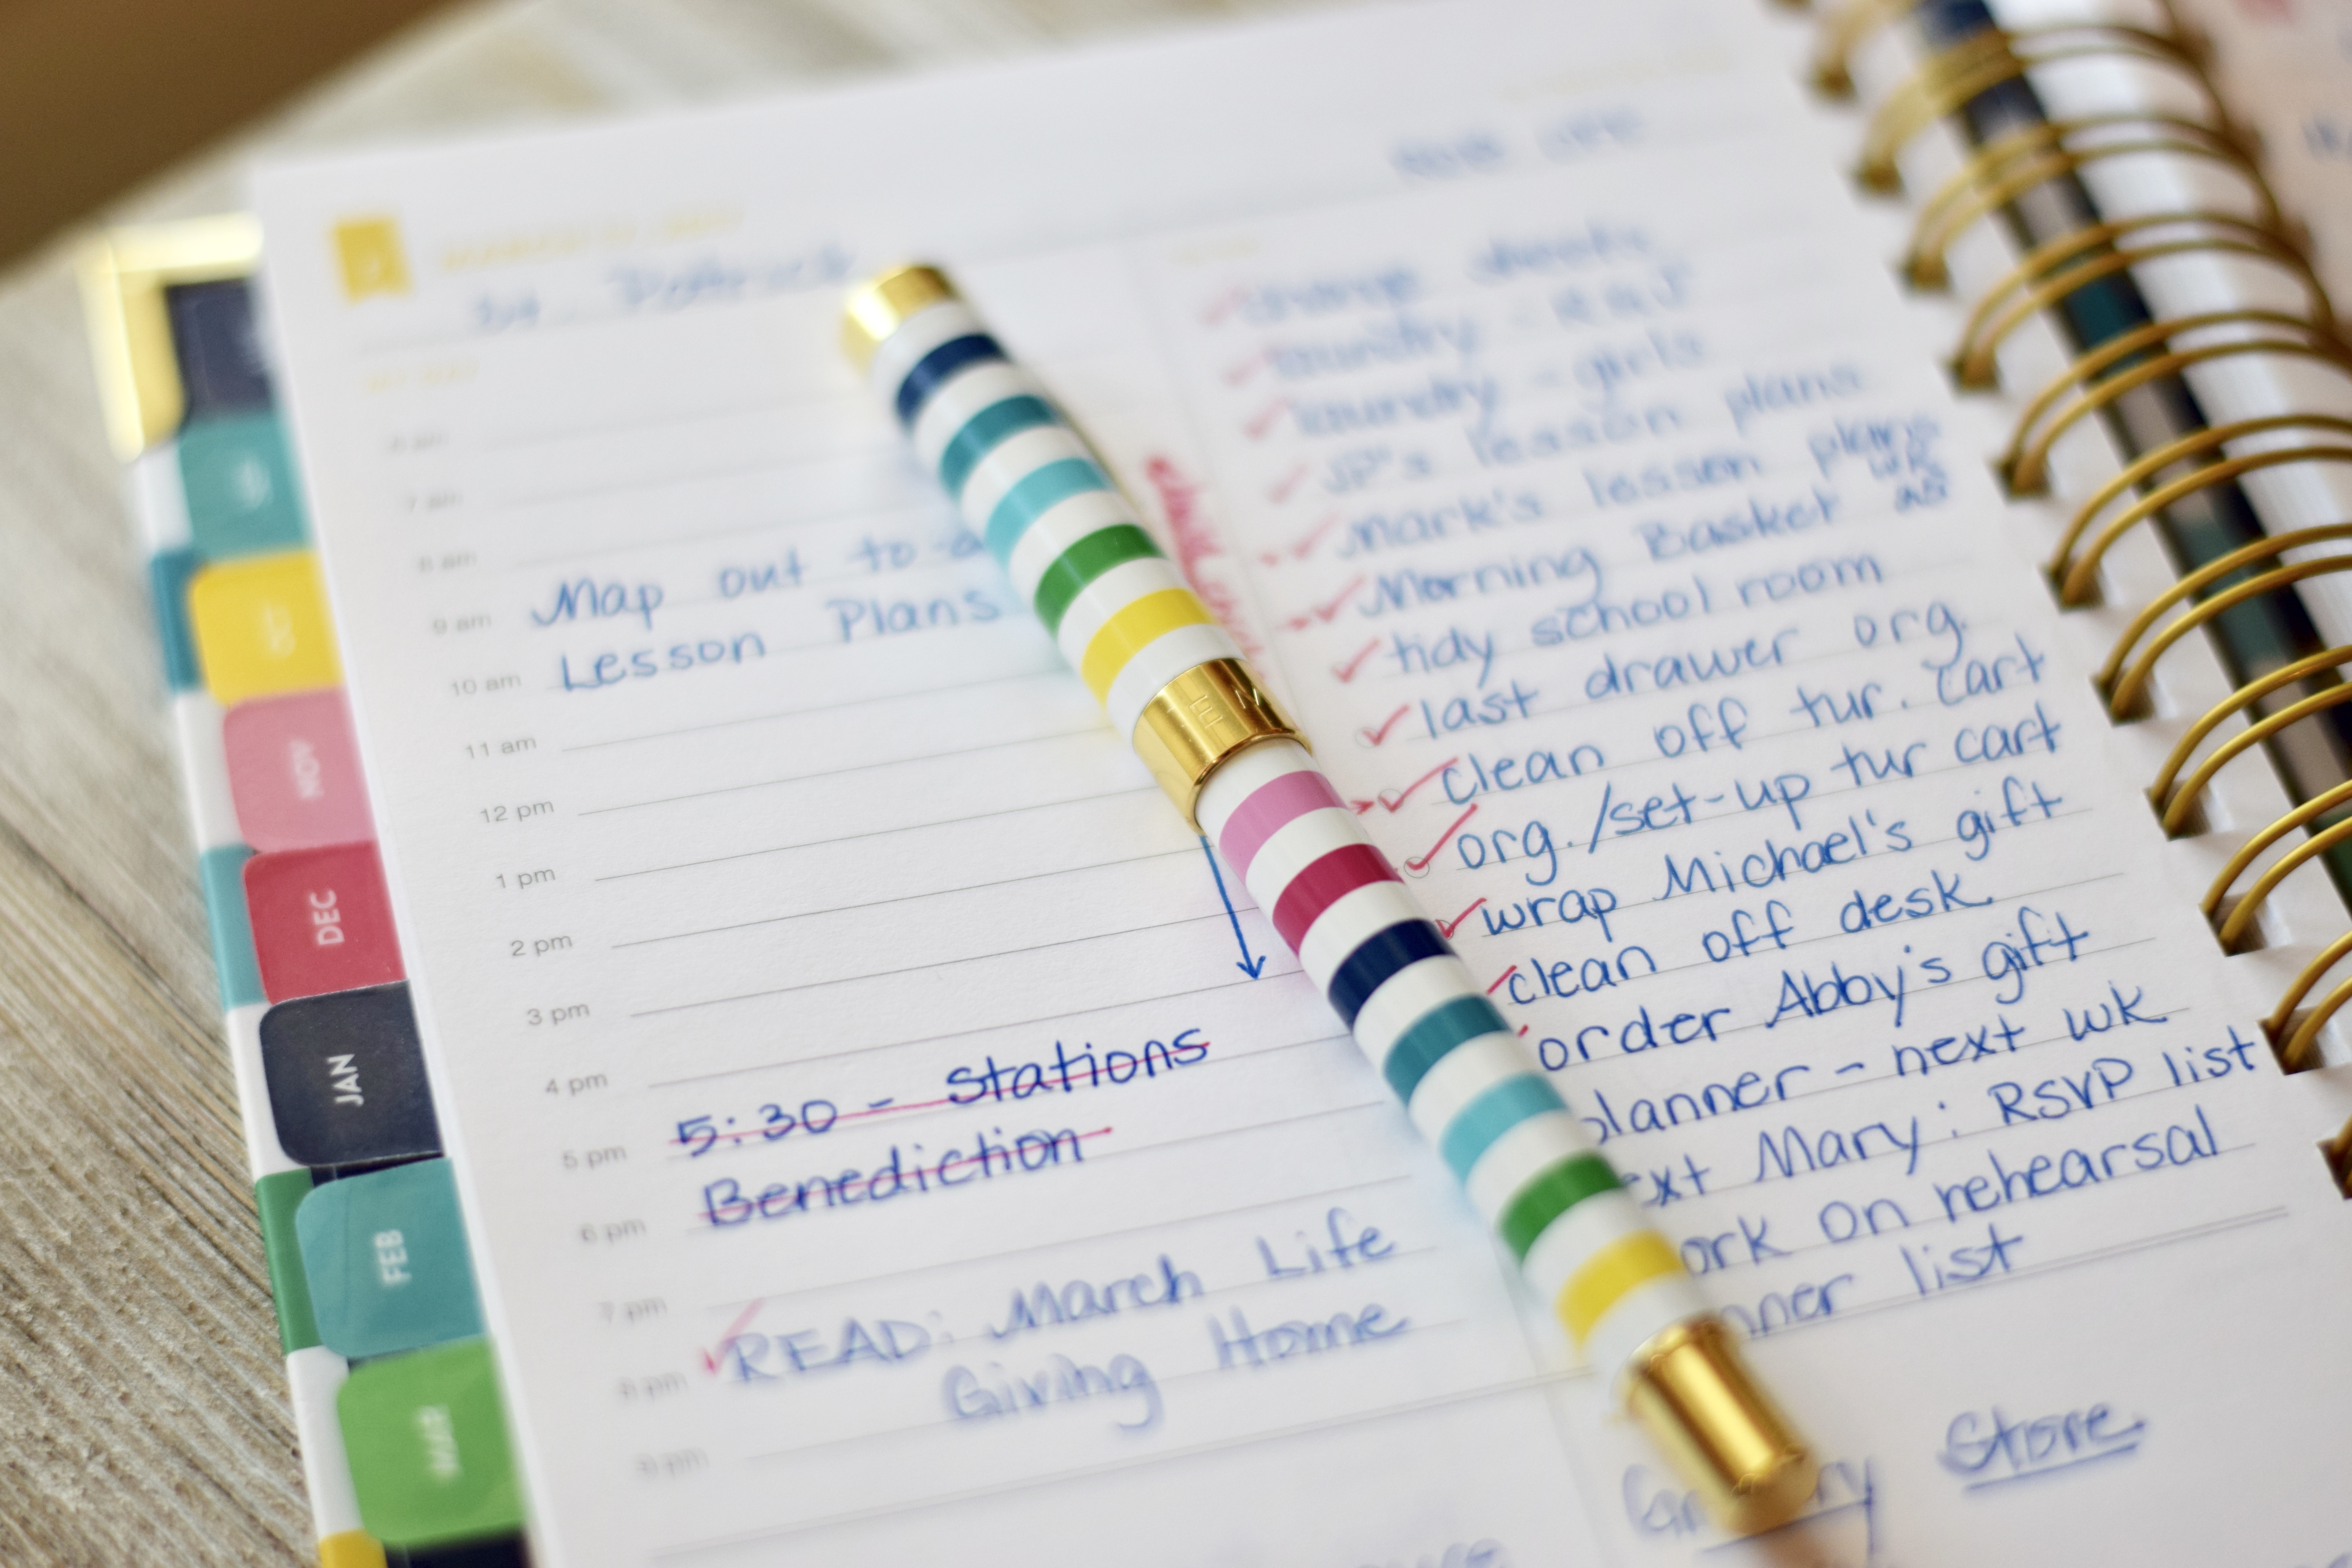
Note above – how I made appointments with myself for reading, or for working on lesson plans. Map out your time. Steward the gift.

I hope this post was helpful to you if you’re considering a Simplified Planner. There are four cover choices for you to choose from this year…

Left to right: Happy Stripe, Gold Dot, Navy Pineapple, and Fancy Floral. {Image used with permission: Emily Ley/Simplified Planner}
And the planner accessories this year are absolutely gorgeous –gold dot boxes, new stickers, and page markers! I confess, I’m eyeing the home base binder kit!


I’d love to hear your thoughts – do use a Simplified Planner? Do you have a similar 2-planner strategy? What do you think?
Full Disclosure: This post contains my completely honest thoughts – I only review products I believe in! Some of the links posted here are affiliate links. There is no cost to you, but when you click through (and if a purchase is made), I receive a small commission. And for that, I’m truly grateful! Thank you! 🙂
Happy Planning!


Yes, please speak to us about your Power Sheets! Mine just came in the mail today..I ordered it after I saw it on your IG. I’m excited, it seems intuitive for what I’ve wanted for goals, but I’d love to see and hear more of how you use them! Thank you!!
Thanks for your note, Kristen! I’ll do my best to do a walk through of reviewing and prepping a month in my Power Sheets!
I’d love a review of the power sheets, too! I just bought my first during their recent sale and have started working on it. Would love to see how you use yours!
Of course I’d like a power sheets review! 🙂 Unfortunately, I just went to their website, and they are all sold out of them until late October or early November! They sound amazing!
I’m going to work on a review soon, Emily! And then hopefully you’ll be able to make a good decision for next year’s Powersheets. They have been transformative for me!!
Great post! I’d love to see how you use the power sheets. You’re so inspiring!
Yes, I am interested in learning about power sheets.
I love your planner reviews. It’s helpful to see what a homeschool mom of many does. 🙂
I’d also like to hear about Power Sheets. I got them earlier this year and they didn’t really jive the way I’d hoped they would.
Thank you so much for your kind words, Adrienne! I do have a post coming soon on Powersheets. I’ve been working on it so I can share with all of you how they worked for me. New 2018 Powersheets launch October 25, so I definitely hope to get my review up right around that time!
Jen,
I love your view on being a good steward of our time/time is a gift. That helps a lot as I look to the last few months of 2017 and into 2018. I purchased my first SP (a daily version) for 2018 and I’m looking forward to being able to schedule out my days a little better. I work full time and have no kids yet, but I am very involved with work and activities outside the home, so I’m looking for ways to better keep track of my time. I also will be continuing with PowerSheets over the next year and can’t wait to see where that takes me.
Just a small “thank you” for showing how you use SP & PS together!
Katie
Thank you so much for your kind words, Katie!! Happy planning! 🙂