A Little February Check-up and Freshening in the Learning Spaces

While I am open to freshening, brainstorming, flexibility and changing in some areas, there are a few areas that are fixed, like points on a compass. These fixed points keep us moving in the right direction! They remain consistent in our home education and provide security and a strong and steady rudder.

The points of our home education compass:
- Living books – Again and again we return to living books as the vehicle to communicate a generous education. The author of the living book communicates ideas and thoughts in a compelling and literary way. What a load off my shoulders this is! This removes burdens from me and lightens my load! Handing my children a feast of living books over the years means they have been exposed to many different thoughts and different manners of expression. Their own ability to communicate is increased and broadened because of this growing exposure to noble thoughts.
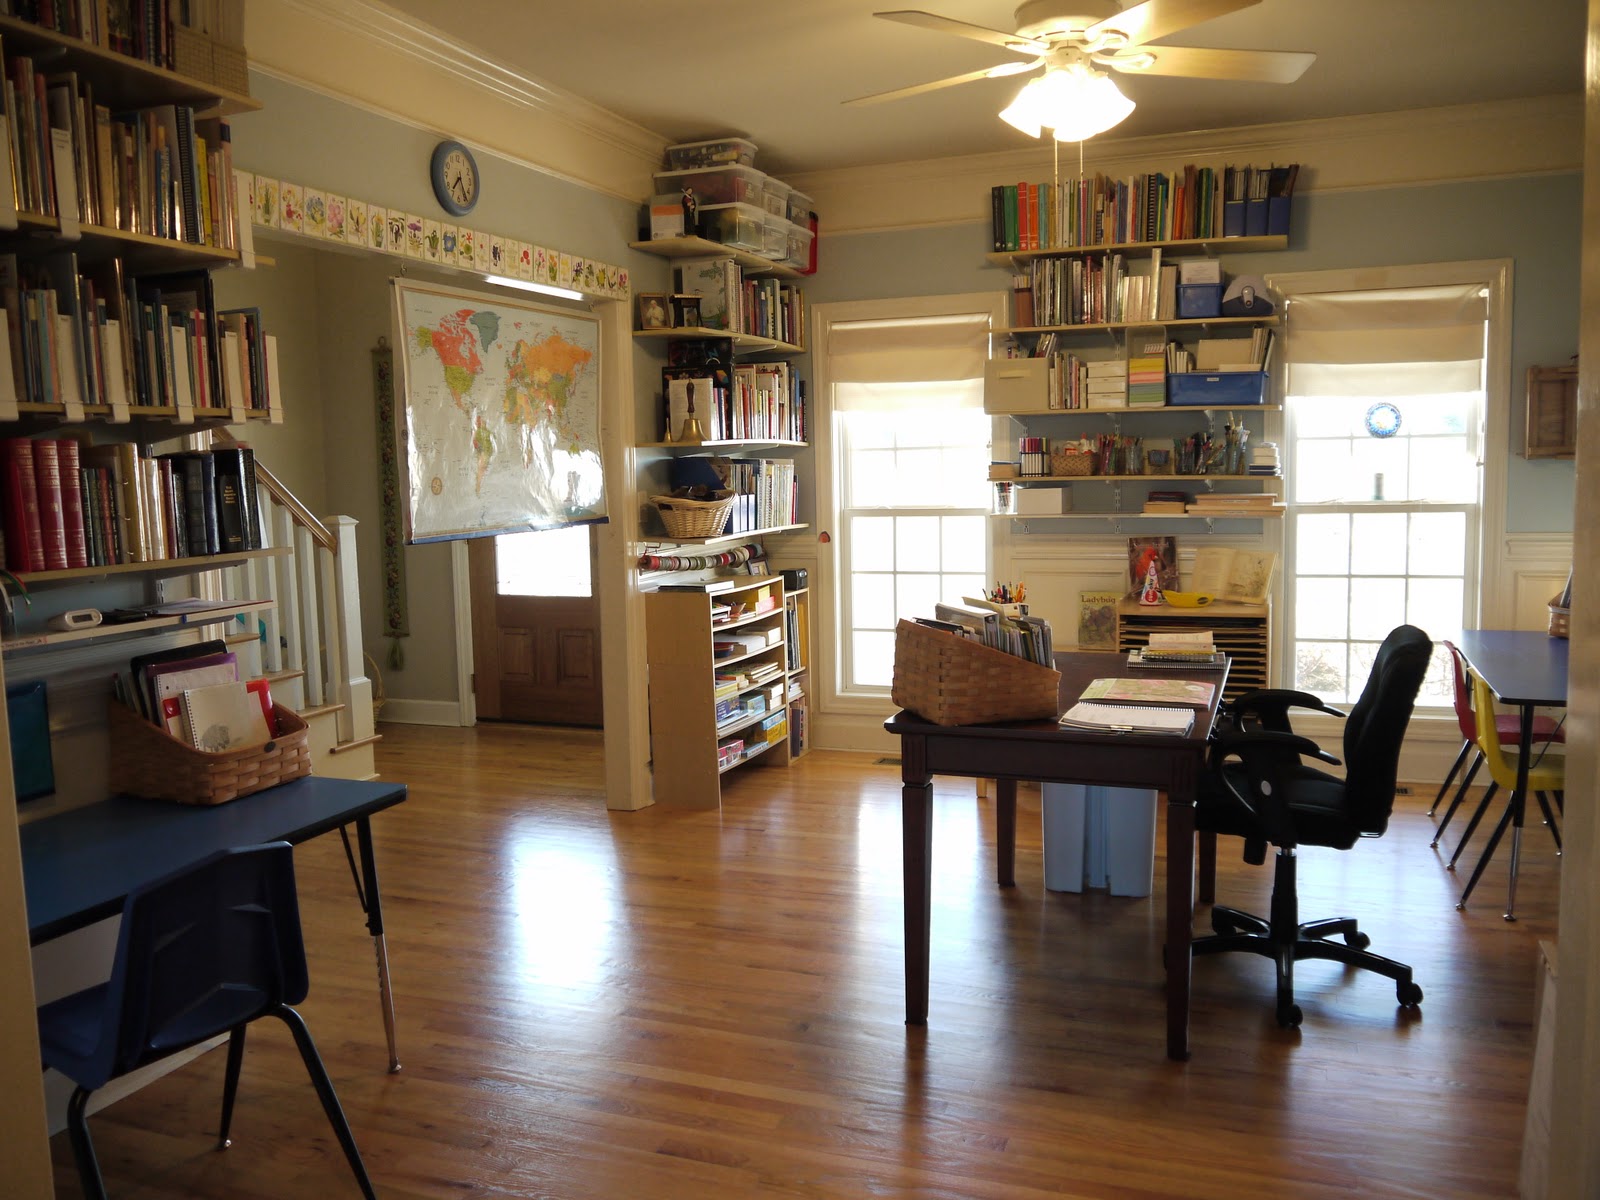
- An atmosphere that is orderly, inviting and welcoming – sunshine is a must! I like our spaces to work for us, rather than the other way around. In fact, I’d say it is imperative! Therefore, the pictures you will see below reflect how our family works at this time. Spaces change and are re-ordered when needed in order to meet our changing needs. We’re blessed to have a room to use as a central hub in our learning spaces – this isn’t necessary, but it sure is nice!
- The discipline of good habits! My wise pediatrician (a homeschooling dad of 6) once told me, “you can’t teach if they aren’t teachable.” It’s a very simple statement, but there is a great deal of truth there and I was grateful for the wisdom. Good habits – offering attention, being honest, obedient, tidy, exercising basic manners – assist the day in a way that is indescribable. No matter the curriculum, book, approach, space, or tools brought to the table, if a child is not in possession of some basic habits your days will be unproductive and unhappy. It’s just the truth of the matter.
- Eyes always open to wonder. Mine and theirs! Education may take place here in our learning room, or in the out-of-doors, or at the farm, or the supermarket, or, or…. I don’t need a syllabus or a teaching outline to appreciate and foster learning in the simple everyday moments that line the days. What I do need are the eyes to see these moments, the discipline to engage and be in that moment, and the ability to be as a child and wonder aloud. Eyes open to wonder.

- within your resources…
- within your budget…
- within the books on your shelves…
- within your spaces…
- within the tools you have right this moment…
- within the Sacrament of Matrimony – your husband is your best ally and your most valuable resource for brainstorming!
- within the gifts God gave you…
- within your limitations…
….and challenge yourself to find solutions that are INTUITIVE and make sense to you, in your family, and meet your needs. Gather ideas like a bouquet of flowers and have hope!
The past few weeks we’ve been closing out our 3rd term of work and preparing for our 4th and final term for the year. Unbelievable! Wasn’t I just planning and preparing for this year? It seems like that was just a couple of weeks ago?
Some things have worked out so well this year, and others we’ve learned from and made some adjustments along the way. I’d like to do a few future posts reviewing some of the ideas and books that have worked well for us as well as those that haven’t. (Check back for them!) After making a few changes on paper it was time to address the spaces here; our family is growing and maturing and our spaces need to reflect those needs.
My 9th grader needed space of her own…
…my 5th grader and 1st grader enjoy being together and working together on some subjects…
…and my 3 year old is enjoying some work of her own.
It was time to make adjustments so that our spaces were again working for us, assisting the days.
I am constantly amazed that the most popular post on this blog, the one you look at most frequently and comment on the most (both on the blog and through email), is A Detailed Look Through the Learning Spaces. LOL!! Really? Our learning room post? I remember writing that….and I almost didn’t post that monster!! But, it seems clear that you continue to enjoy that post and enjoy looking there for ideas you might use in your own home, so I’ll share again with a few new ideas for you!
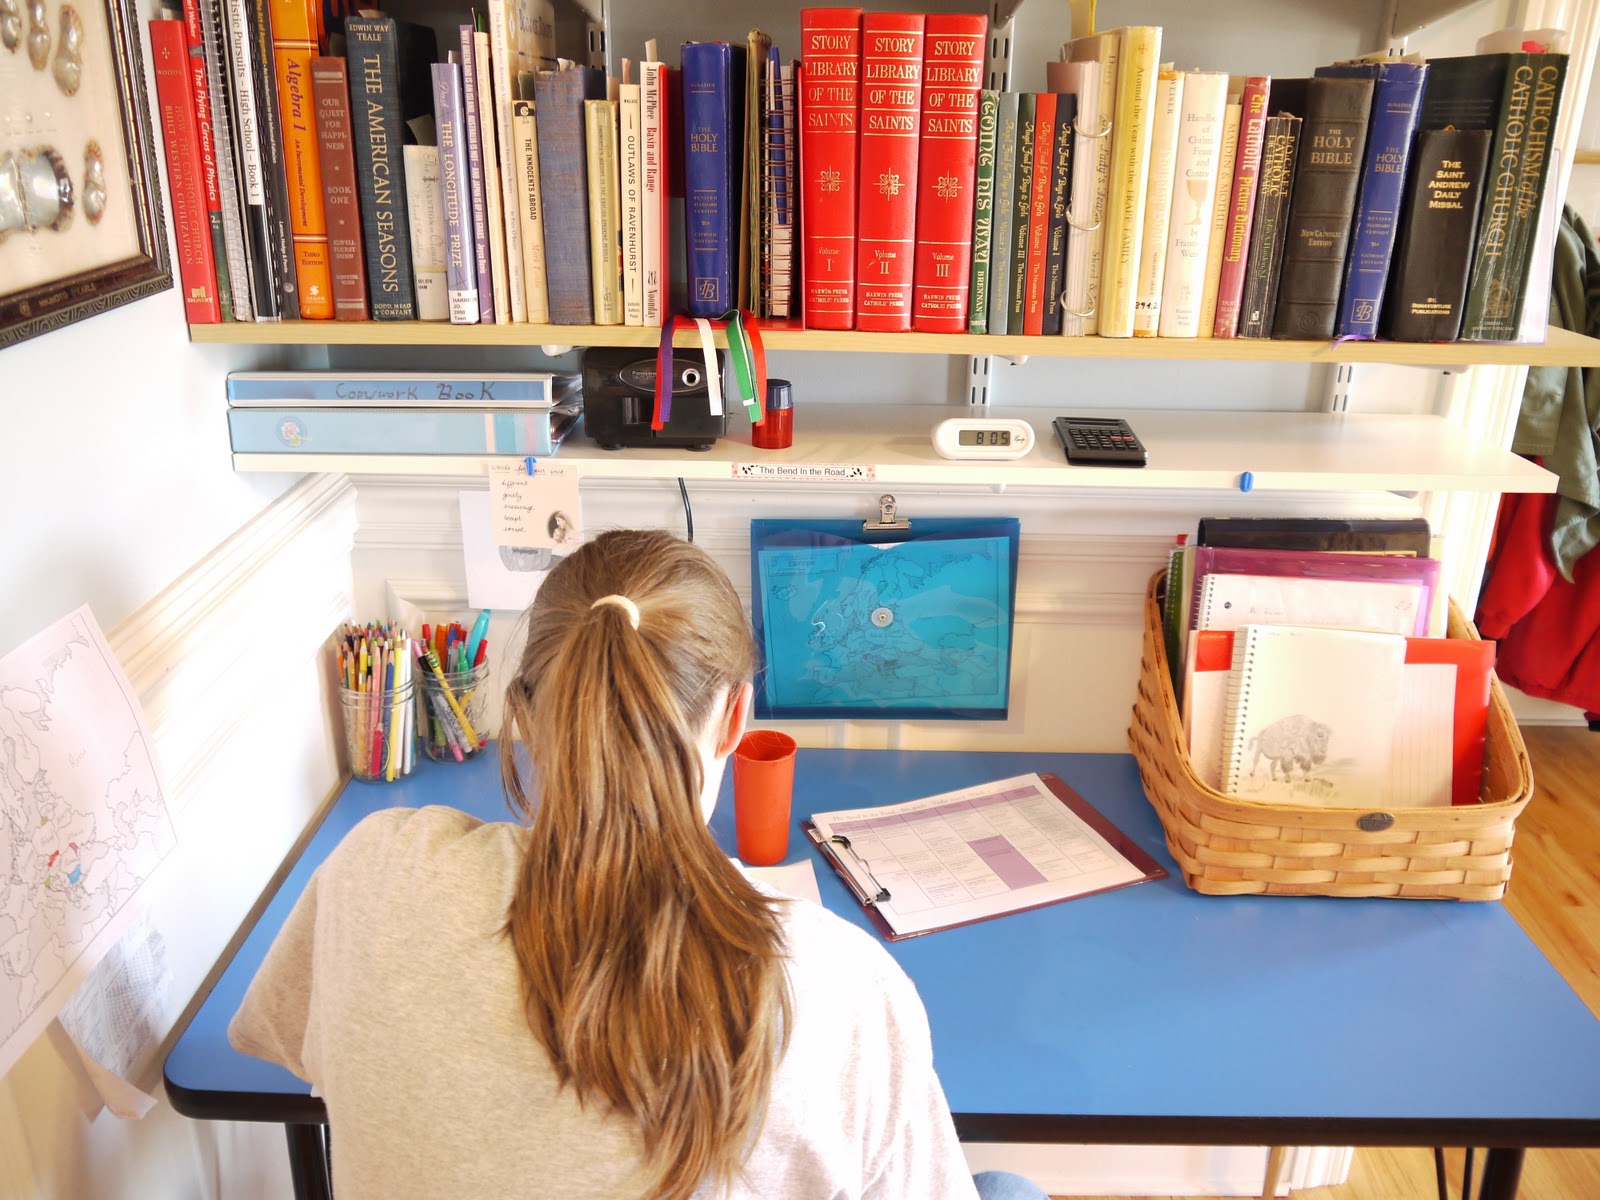
We began our year with my 9th grader and 5th grader sitting at one common table, but about 12 weeks into the year that no longer seemed to be a situation that would foster harmony and productiveness. You know what I’m sayin’ don’t you? So, the 9th grader now has her own workspace.
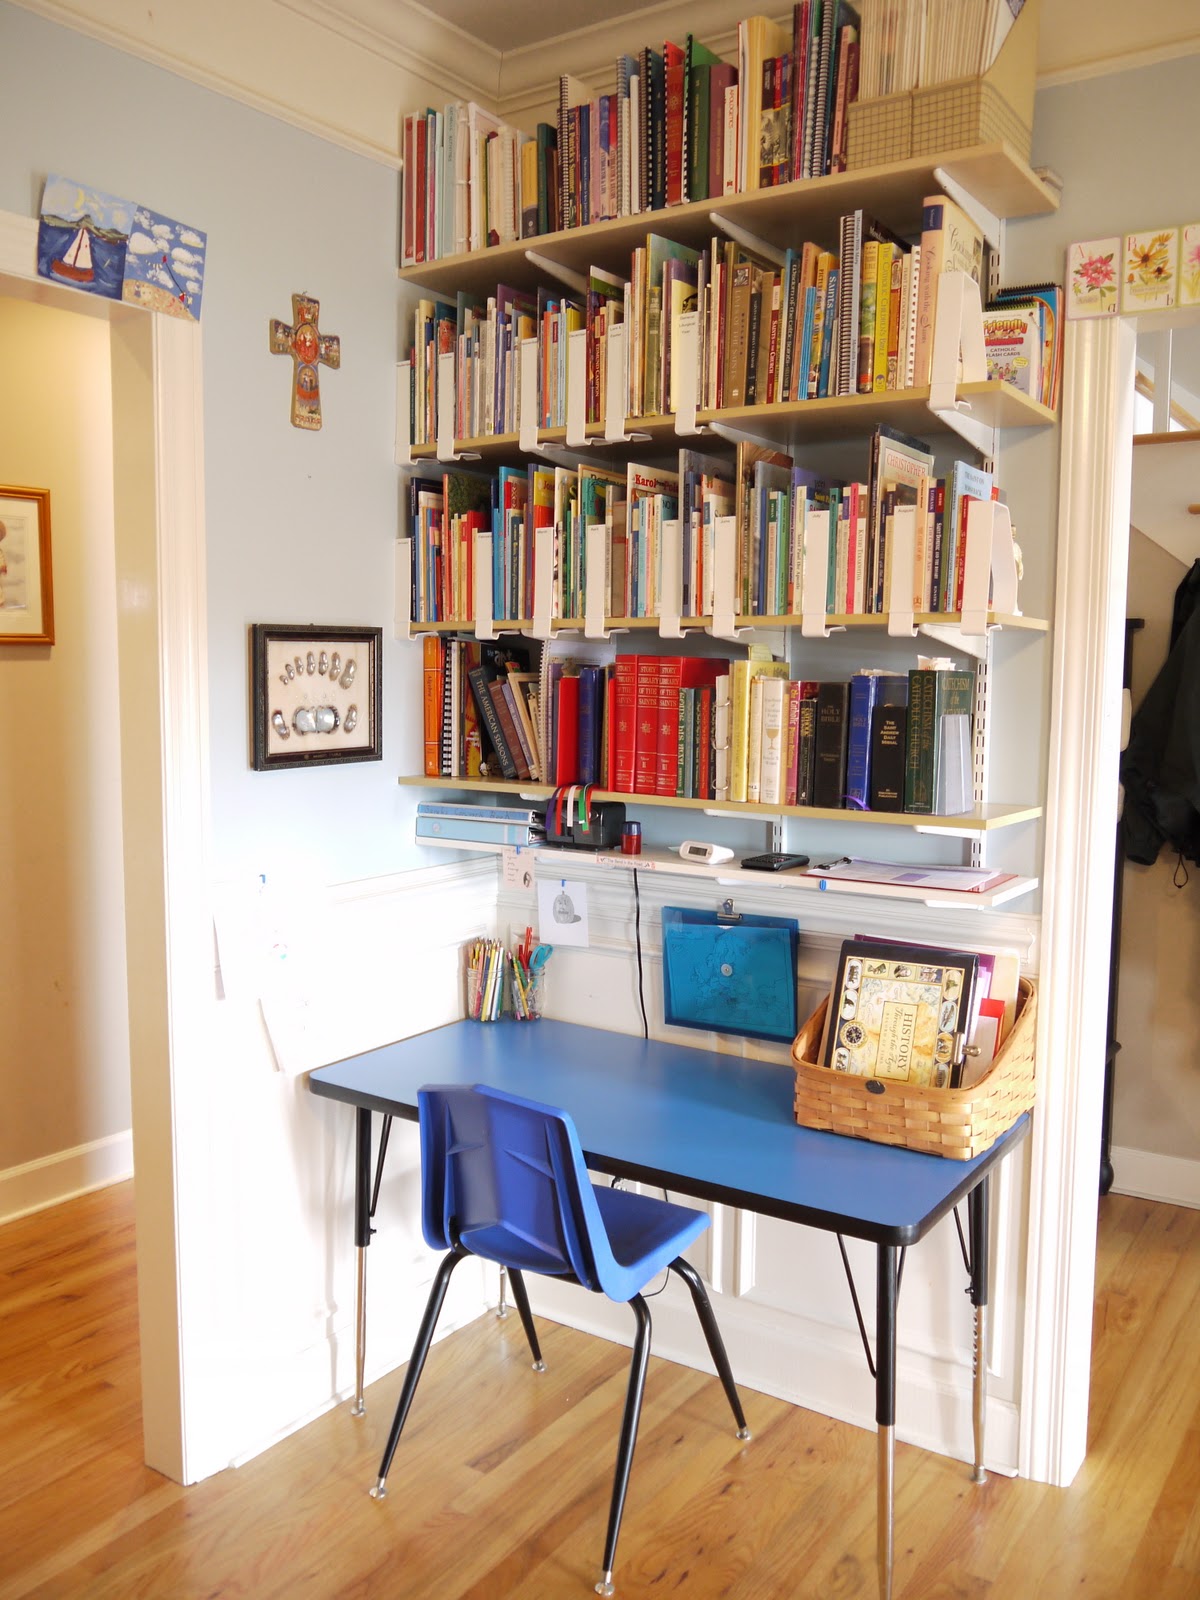
She enjoys the space here though she has other work areas in different rooms of the house…some of which allow for more quiet than others. On the shelves above her table are the liturgical book collection. The very top shelf holds catechisms, some religion and apologetics books and other Catholic resources. The middle two shelves contain the liturgical year reading collection. You can see the clip-on book supports used to divide up the books.
The bottom shelf is a shared space – on the right are our most frequently used liturgical year resources and on the left are my 9th grader’s books. She also keeps some books in the basket on her desk. Because she needed a small shelf space to hold calculators, clipboards, pencil sharpener, etc, I *liberated* an 8 inch deep shelf from another room of the house and used it as the lowest shelf. You’ll see that I’ve done this under one other set of shelves in the room, providing a shallow storage space under the larger wall shelves. It’s handy and useful.
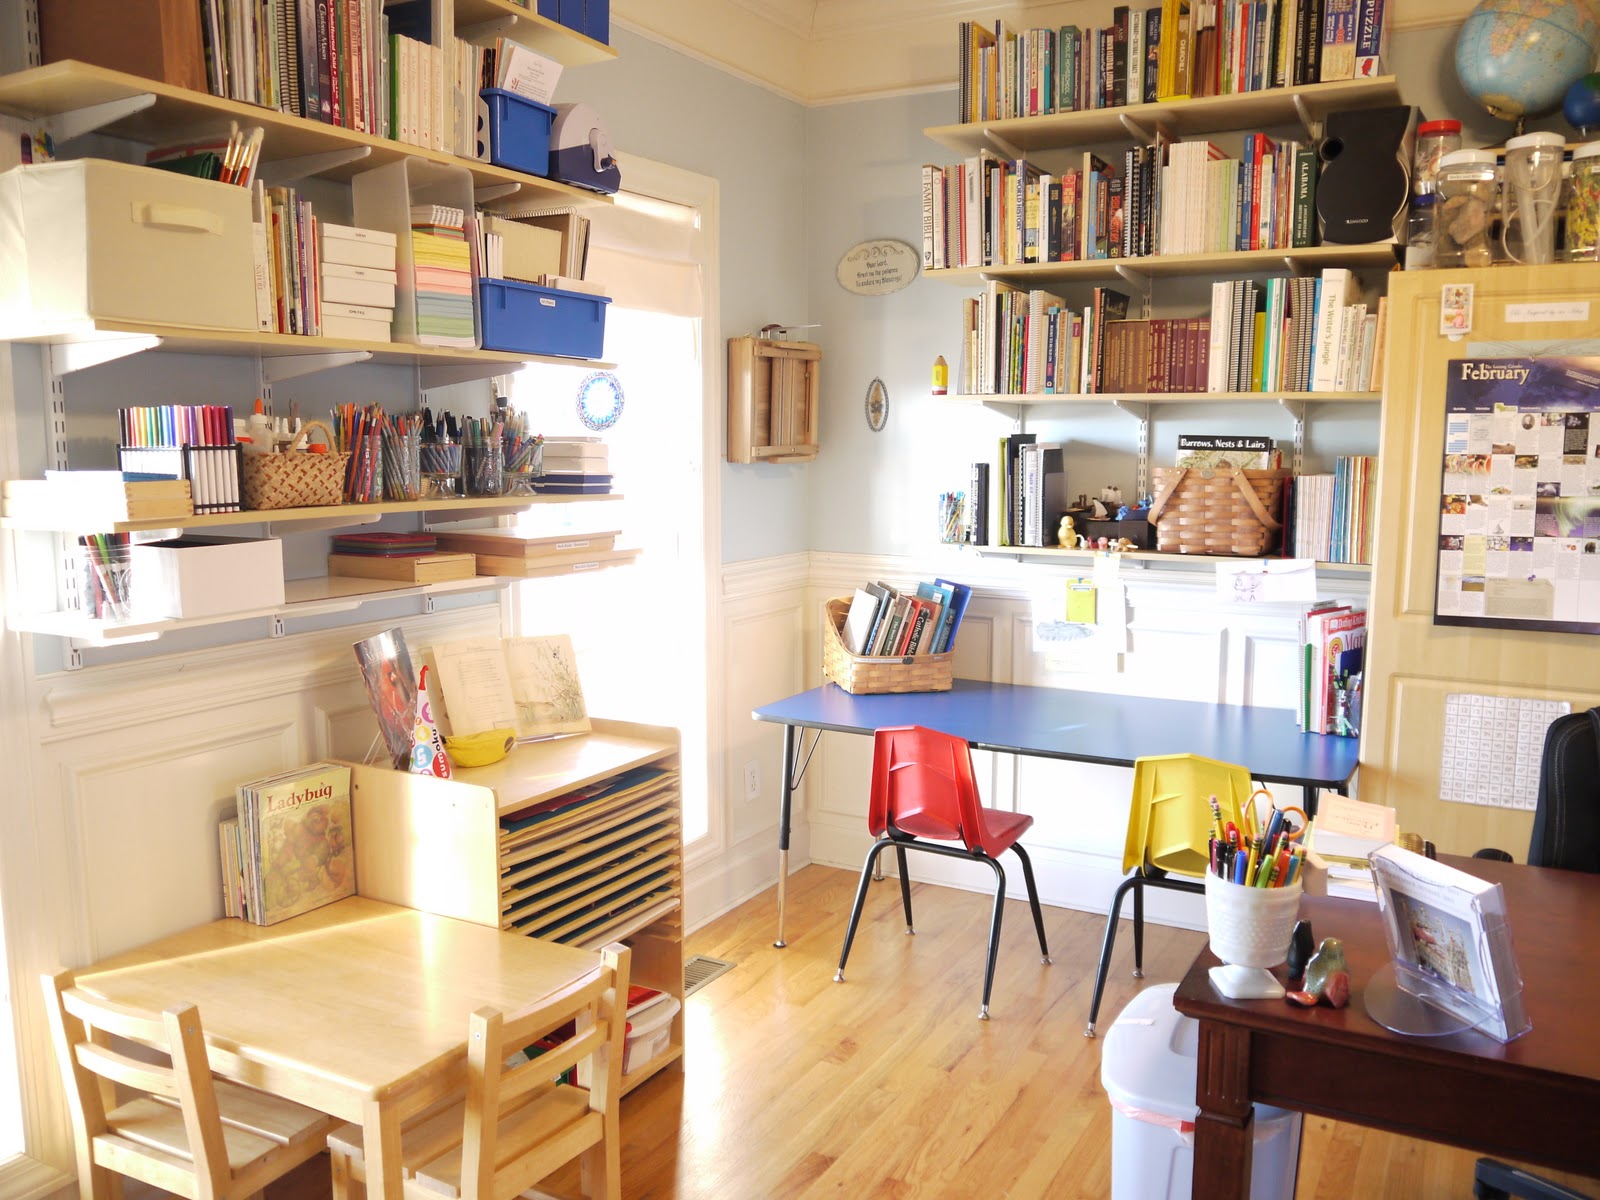
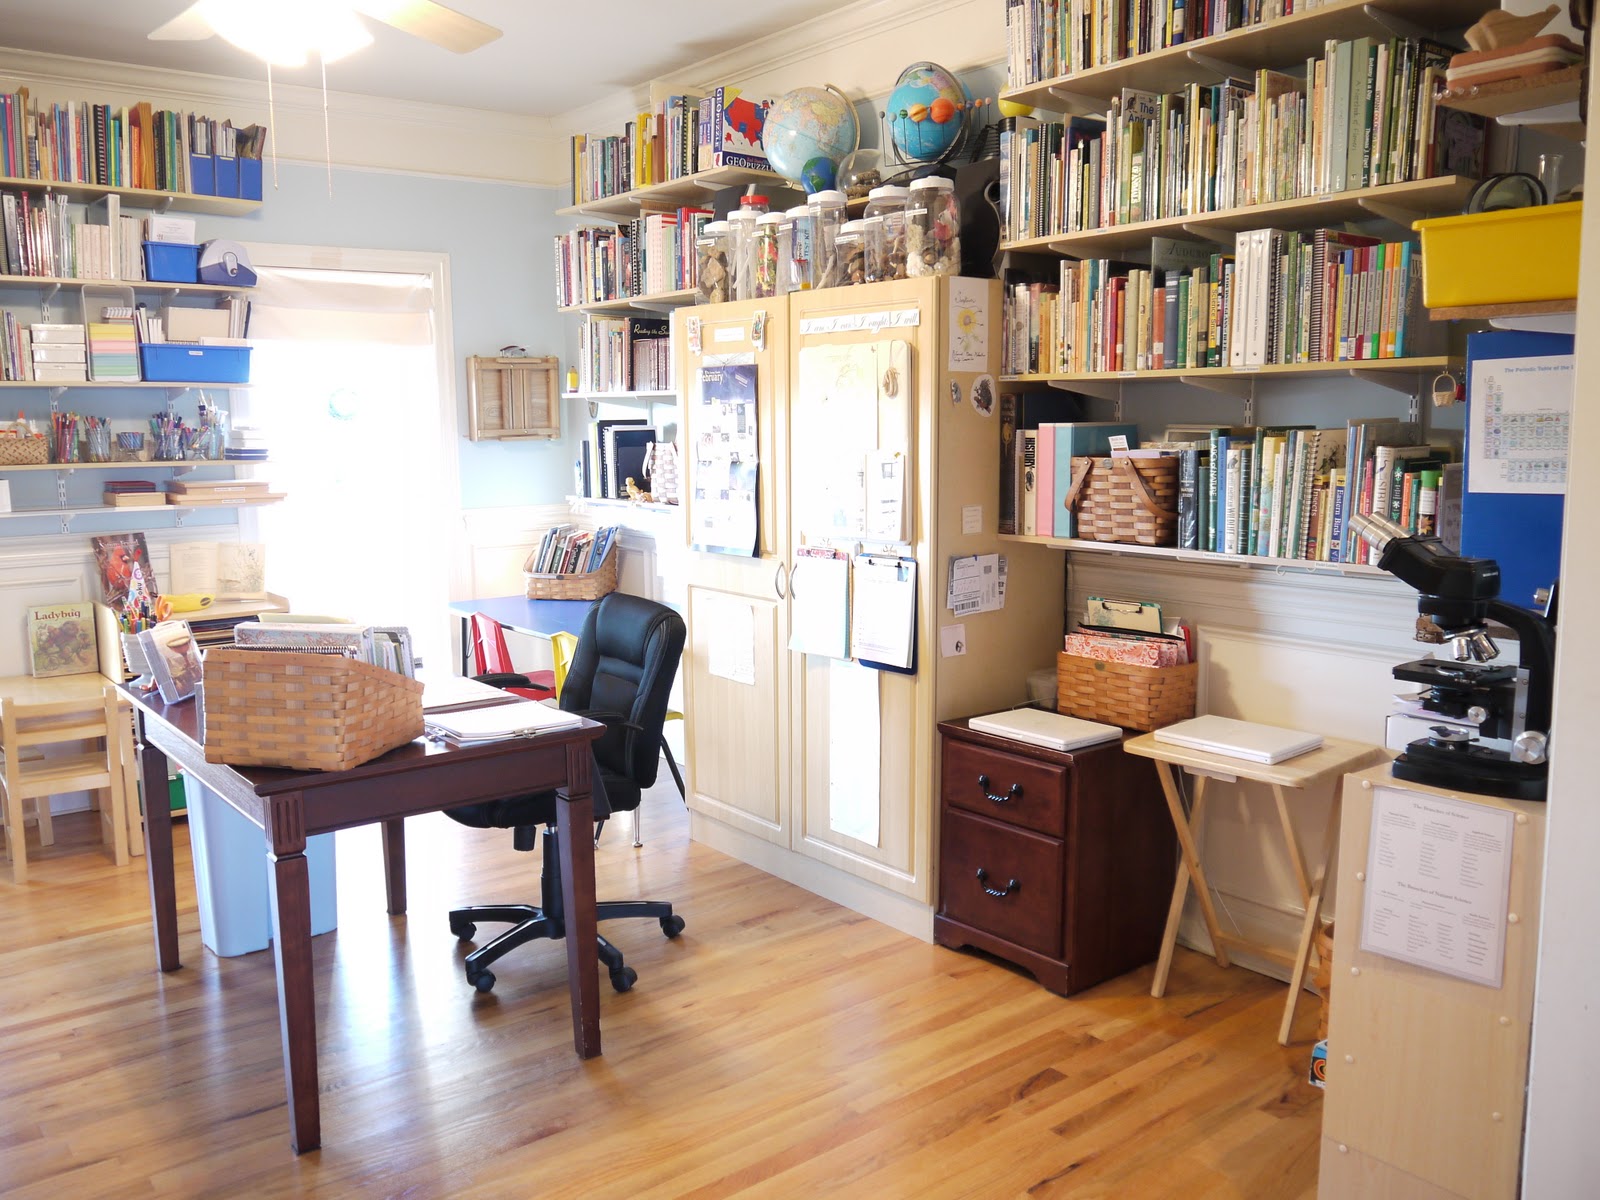
So….let’s re-center. Walk with me to the other opening just across the room and you can get another sense of the overall room (which, if you remember, is actually supposed to be a dining room which we have given a new purpose)…
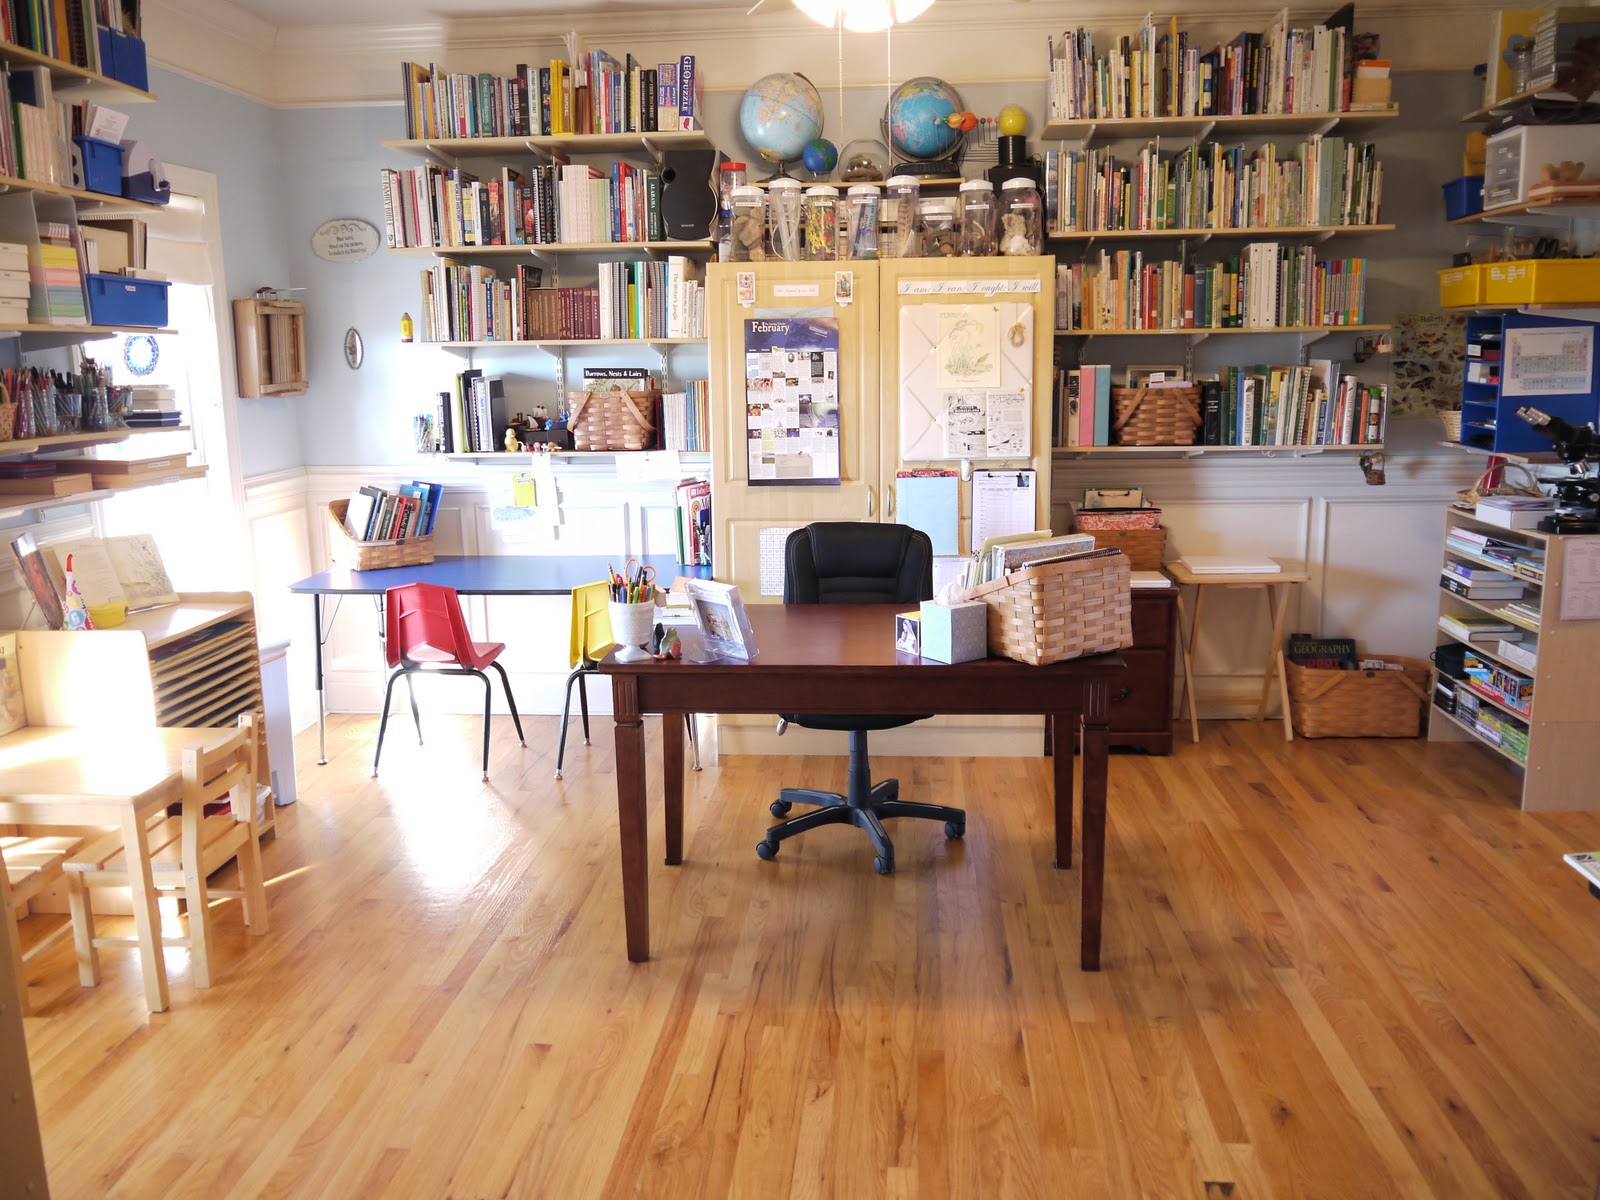
That’s my desk there in the center of the room. There on the far right is our science and nature study area. Our supply cabinet is directly behind my desk.
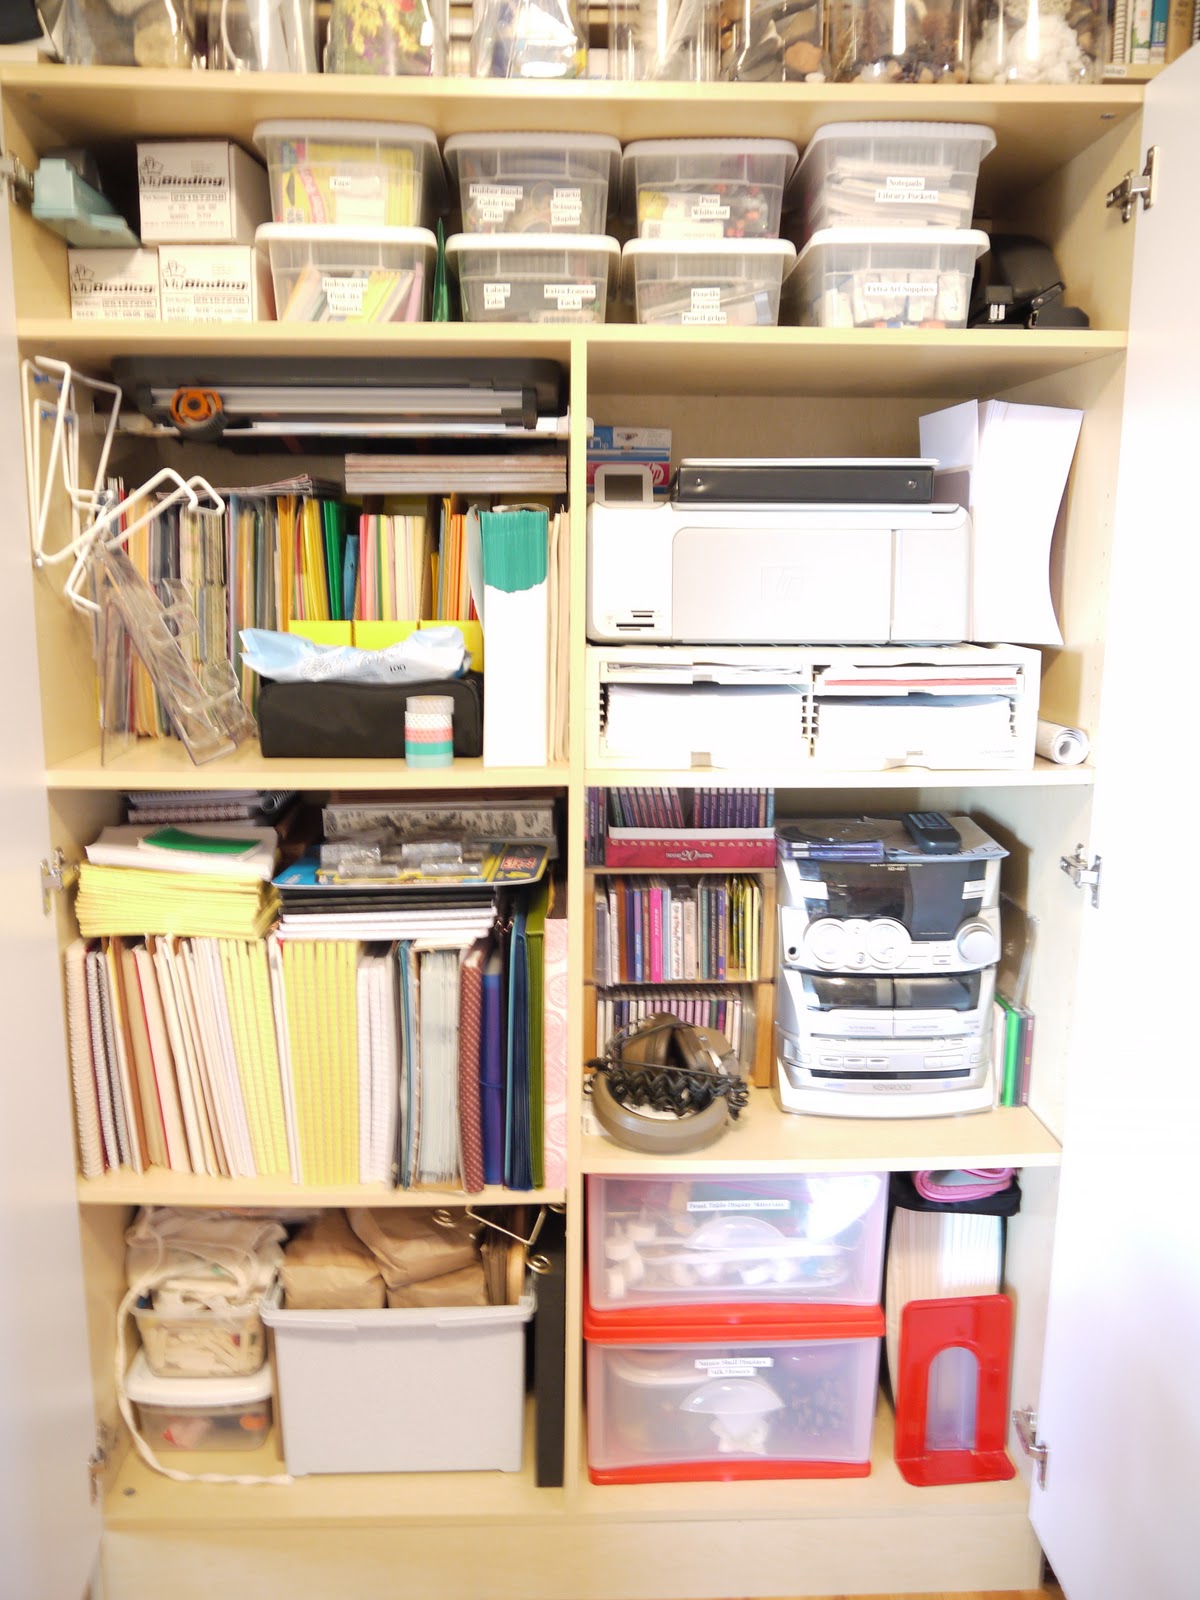
I held my breath, closed my eyes and opened the doors to take another picture for you of the interior of this cabinet. Sigh. So much lives in here! It’s clear I need to turn my attention to my cabinet and do a little purging and re-organizing now that the room is tidy and fresh!
Above the cabinet is our collection center, mostly science and nature study materials and treasures we’ve collected. High spaces are great for collections that are enjoyable, sometimes visited, but don’t see everyday use.

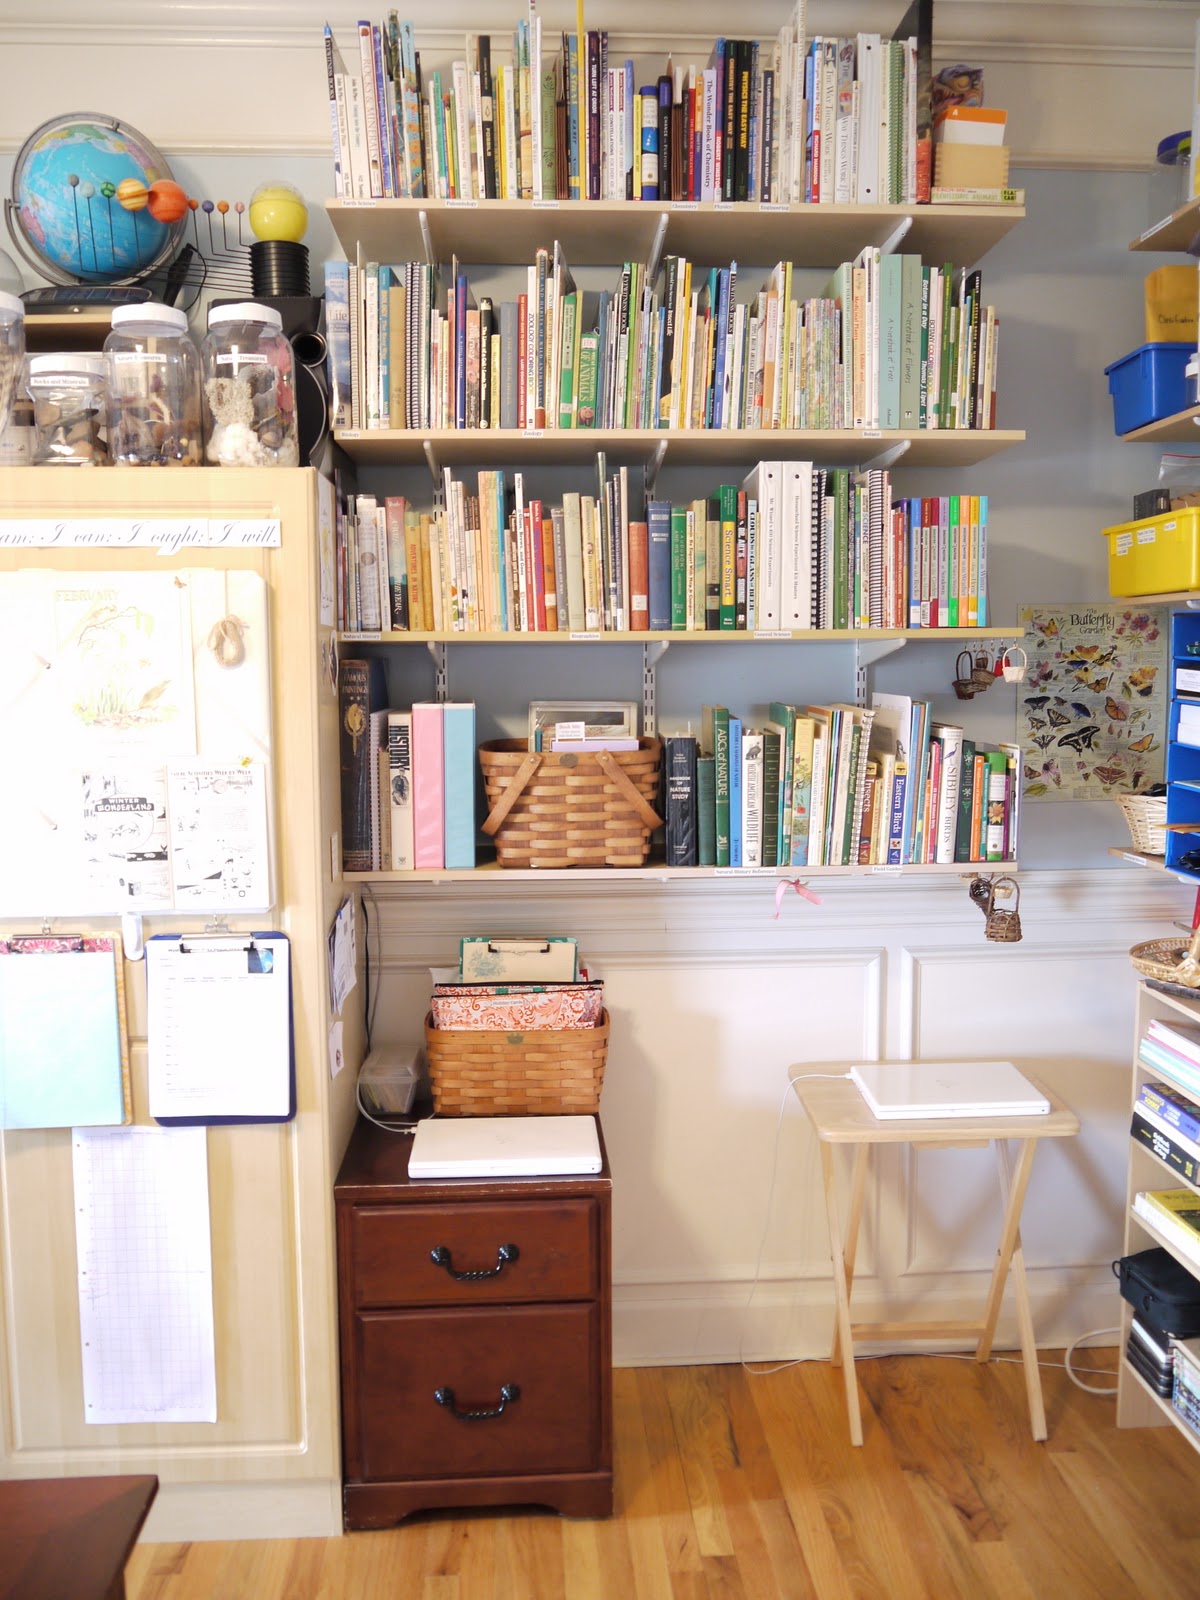
These pictures were taken on different days, so you may notice some differences (look above…the big basket on the floor containing the books that have been completed during the 3rd term is missing.)
A word about computers as a tool — they are just that — tools. They are not evil in themselves, though they can be abused and over-used just like any good tool. They can also be applied and used judiciously and wisely, aiding the process of home education greatly. I keep them near me to ensure that they perform as the latter, as tools in use for the good. One laptop was purchased used (but with warranty) at a local computer store so be sure to check used options if you are in the market (the other laptop was gifted to us). In our home laptops fit our needs best because they are 1) portable 2) lightweight 3) fit on my desk, a child’s desk, a lap, on the kitchen table…with ease 4) have a lid that conveniently flips down when they are UN-available or not in use 5) take up very little overall footprint. Things our laptops do not do: 1) travel to bedrooms…or anywhere without permission 2) live permanently on children’s desks 3) surf the web without restraint (we have parental settings on the highest restriction on one of the laptops) 4) substitute for books. There. Stepping off my soapbox. 🙂
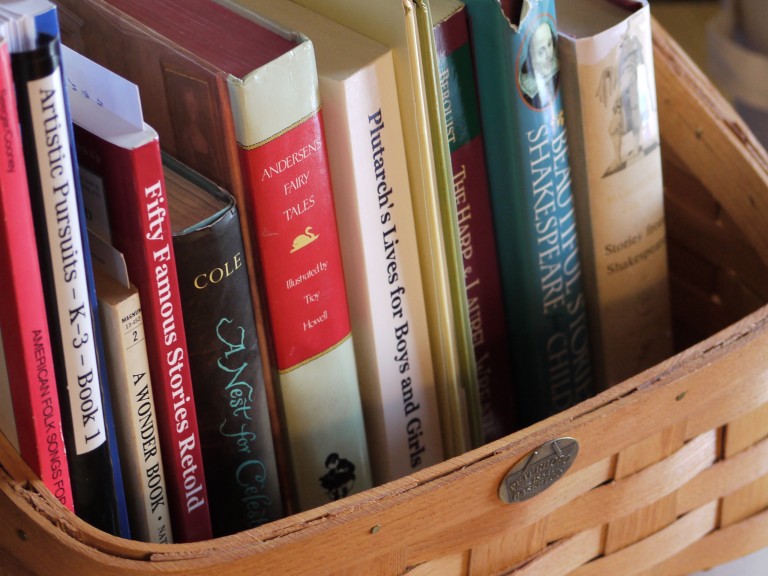
Above the laptops, on the shelves you’ll find our collection of nature study and science books. The basket on the lower shelf there contains our Morning Basket of work as well as some of our most frequently used resource books:
- The Timetables of History
by Bernard Grun (revised and updated edition here
)
- Victorian Family Celebrations by Sarah Ban Breathnach (now published under the title, Mrs. Sharp’s Traditions
)
- Famous Paintings
, reviewed by Gilbert Keith Chesterton (These treasures are being used for picture study this year!!! There are 2 volumes in the set)
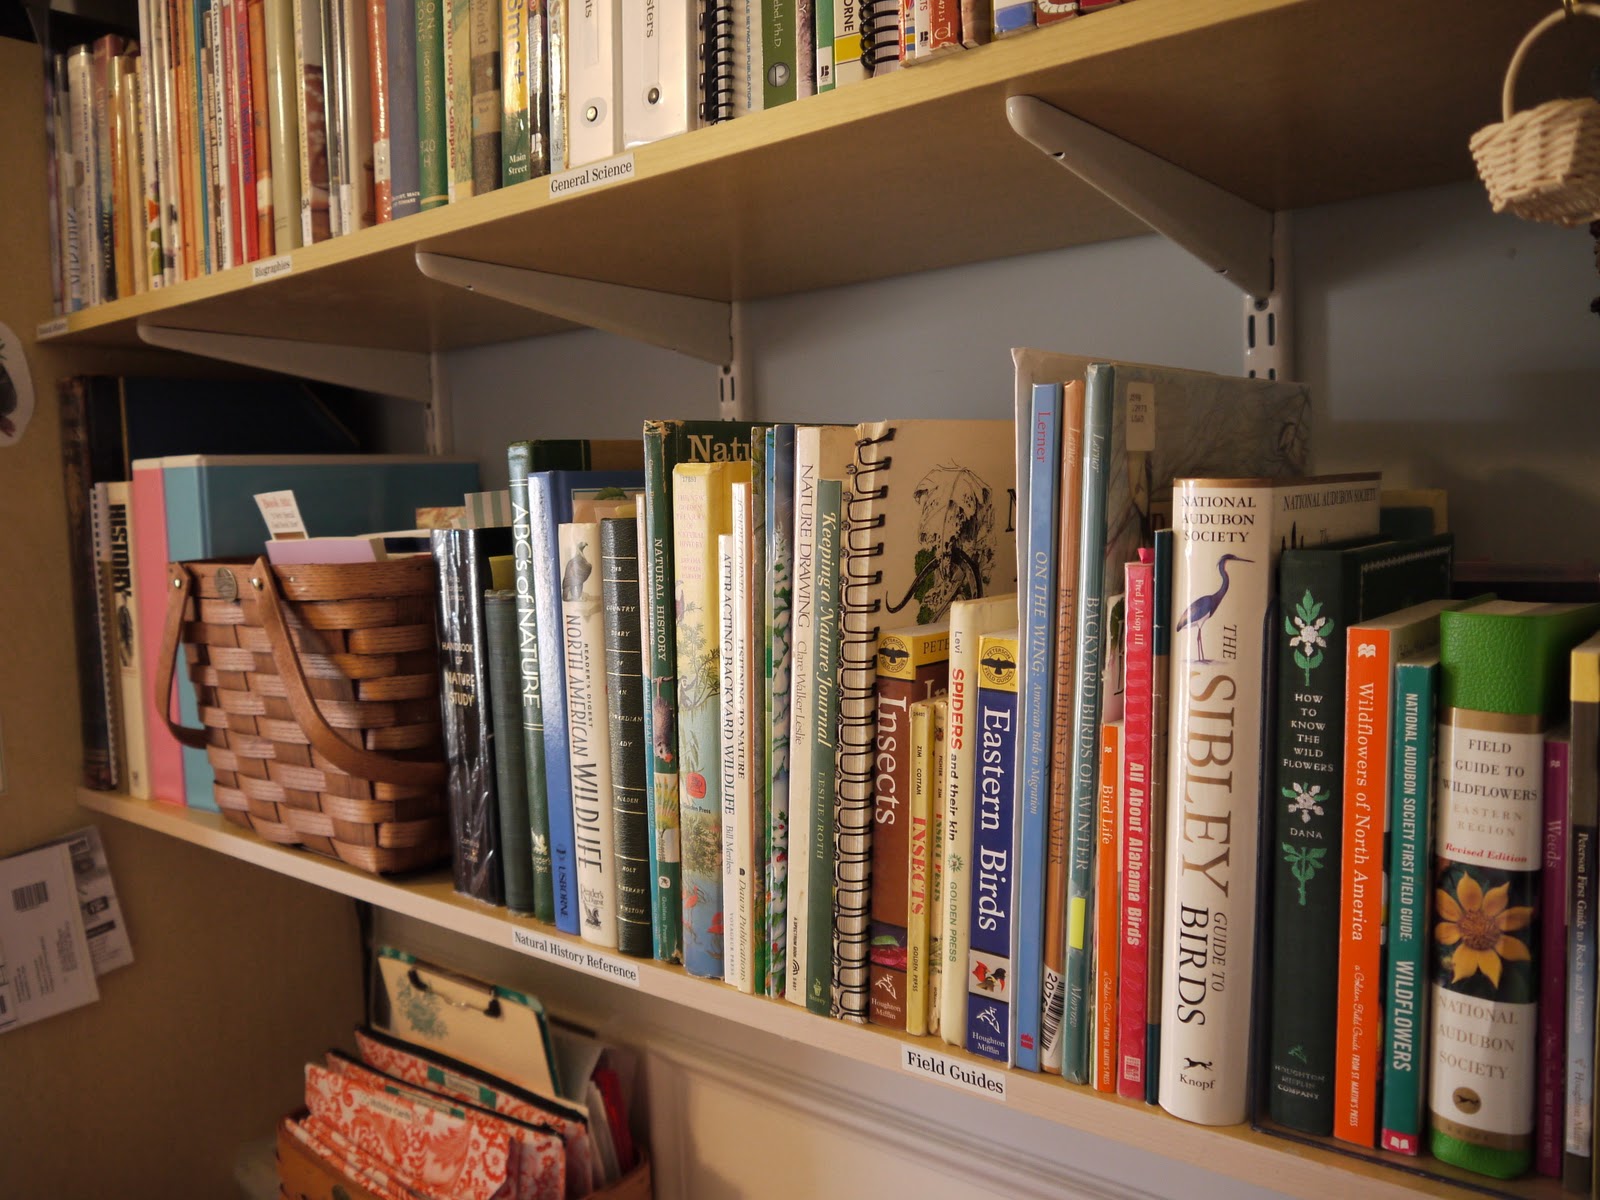
To the right of our Morning Basket are our favorite field guides of which we have some absolute favorites that we return to again and again and again:
- Reader’s Digest North American Wildlife
- Handbook of Nature Study by Anna Botsford Comstock (make sure you get the book with the black cover – the new version with the much prettier cover
is abridged.)
- Attracting Backyard Wildlife
by Bill Merilees (out of print, but wonderful if you come across a copy)
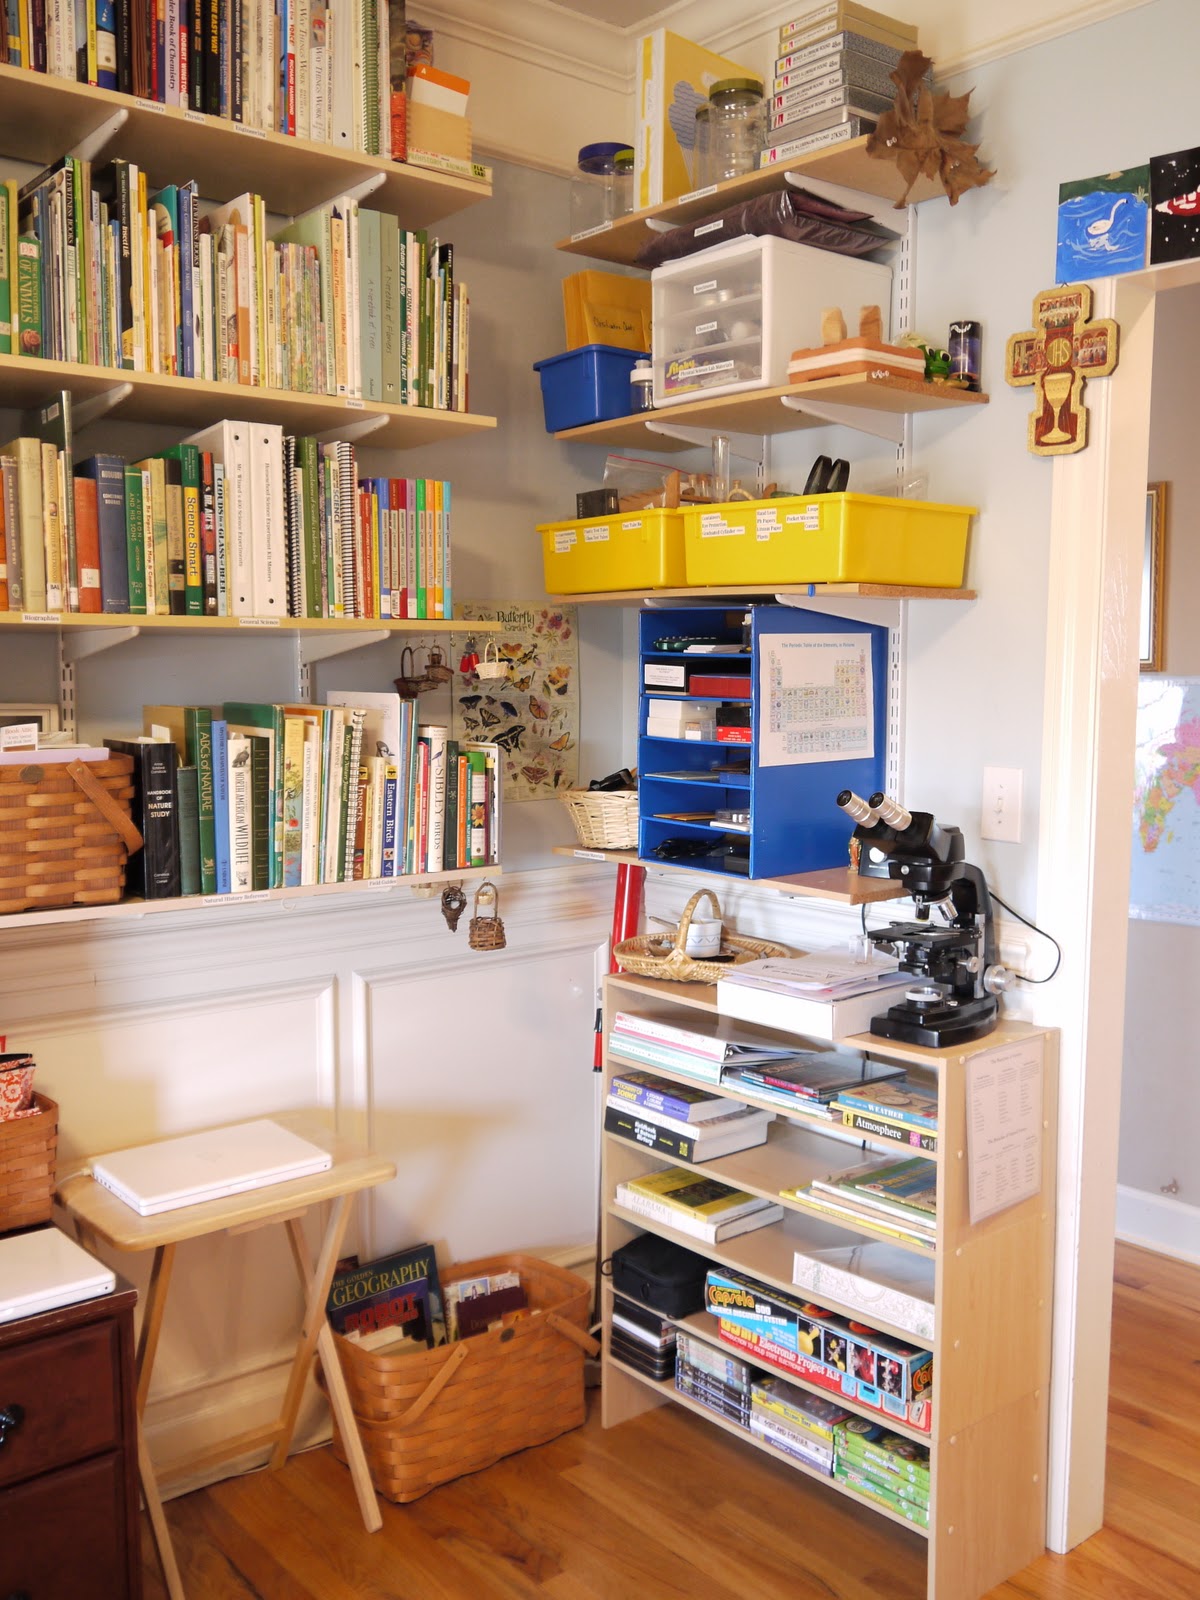
To the right of the laptop area and science/nature study books is our science and nature study resource area. We keep engineering projects on shelves here (like a new-to-us set of Capsela motorized construction toys which used to be my brother’s and is now enjoying renewed play…by the way, you can still find these sets on ebay) , a few nature treasures, experiment kits (from homeschool science), and a variety of other resources and tools for further studying and understanding science and the natural world. Organizers like the blue cardboard mini-shelf are great for organizing small collections like microscope slides that need only a shallow amount of space. They’re not very heavy either which makes them ideal to sit on an existing shelf. These could organize a number of collcections very well!
Back to my desk….
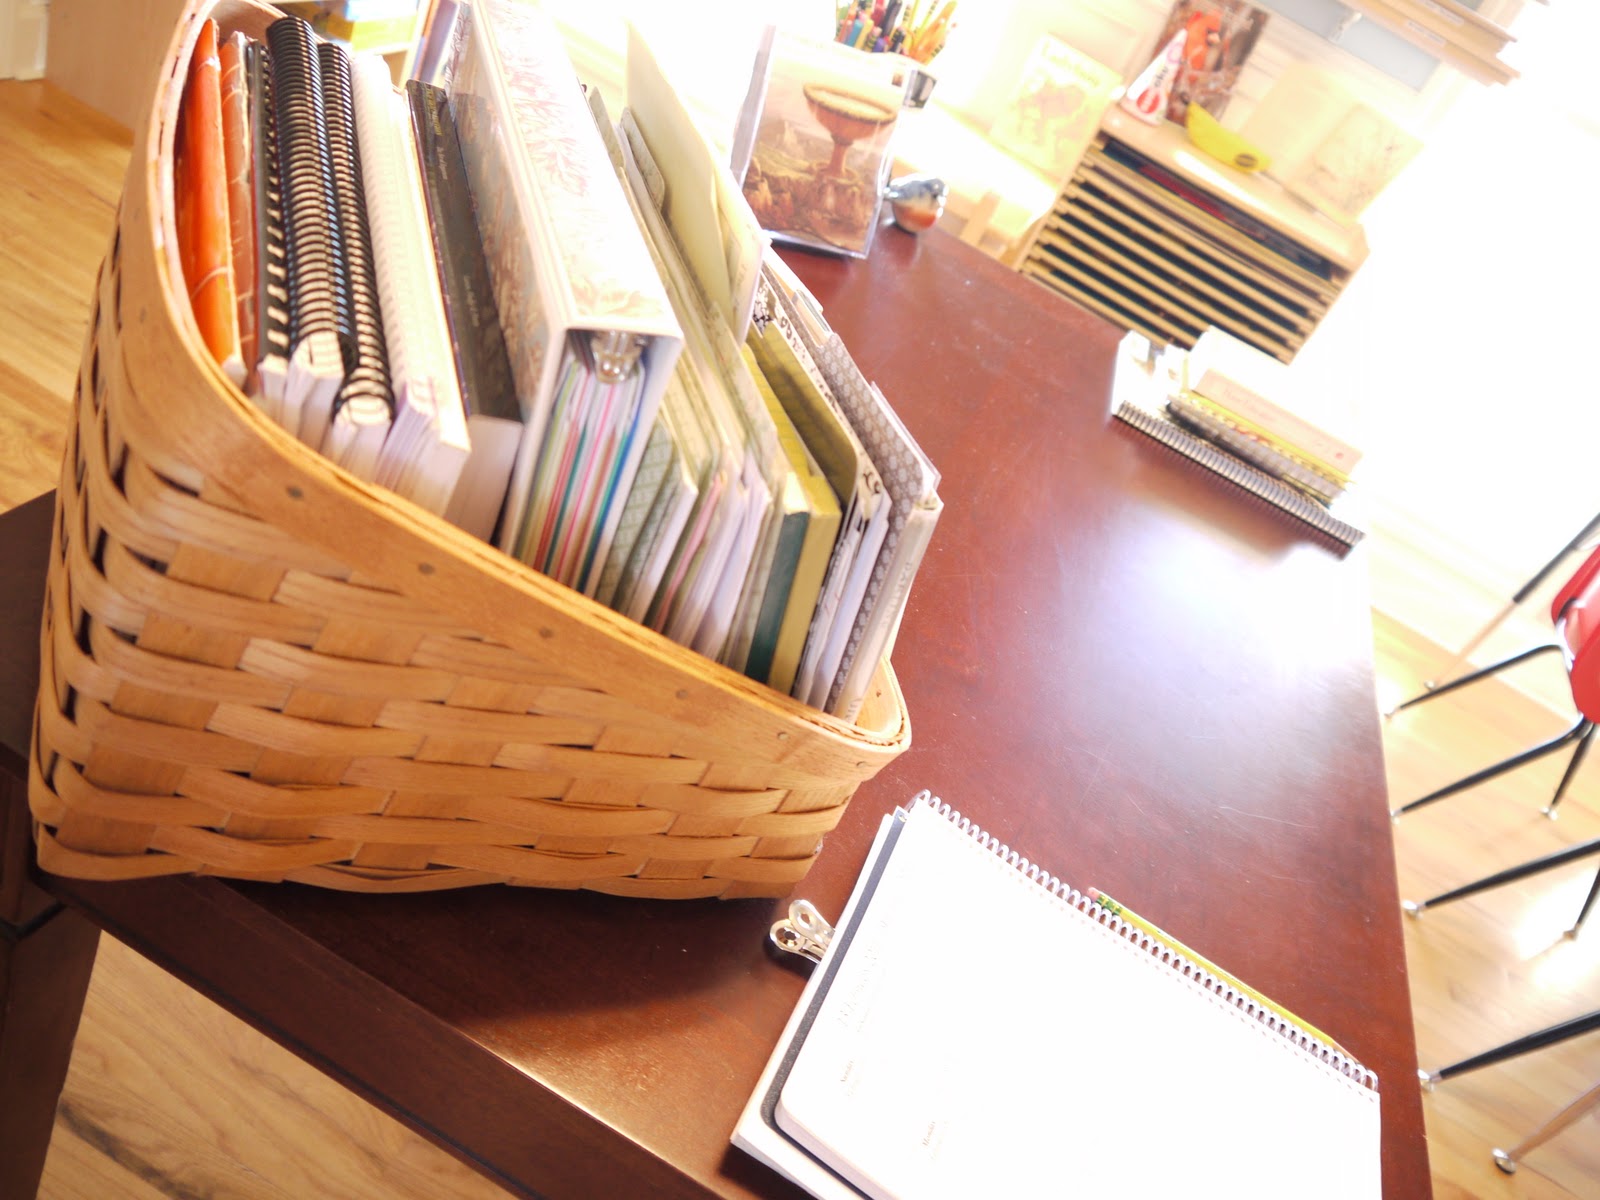
This is the top of my desk. I’m pleased with a few small changes I made to it. I sorted and resituated some of the files in my file basket that weren’t being used too often and made enough room for my dictation books (Spelling Wisdom from Simply Charlotte Mason), math answer keys, logic books, and other useful, small books. Very handy! That’s my favorite Catholic daily planner just below my file basket. I use this planner every.single.day! There is a stack of reading books on the other corner of my desk. To increase our daily exposure to great art, I ordered the 2011 Art-Page-A-Day calendar and we really enjoy it. (HT: Satori Smiles) I should mention that not every piece of art is for innocent eyes, but I’ve only found a couple of concern. These images will make fantastic art project work after the year is complete!
Turning to the other side of the room you can see our hanging maps – you remember those, don’t you? We’re moving into the area I set up for my younger learners.

Isn’t it amazing the difference between the morning light (picture below) and afternoon light (picture above)?
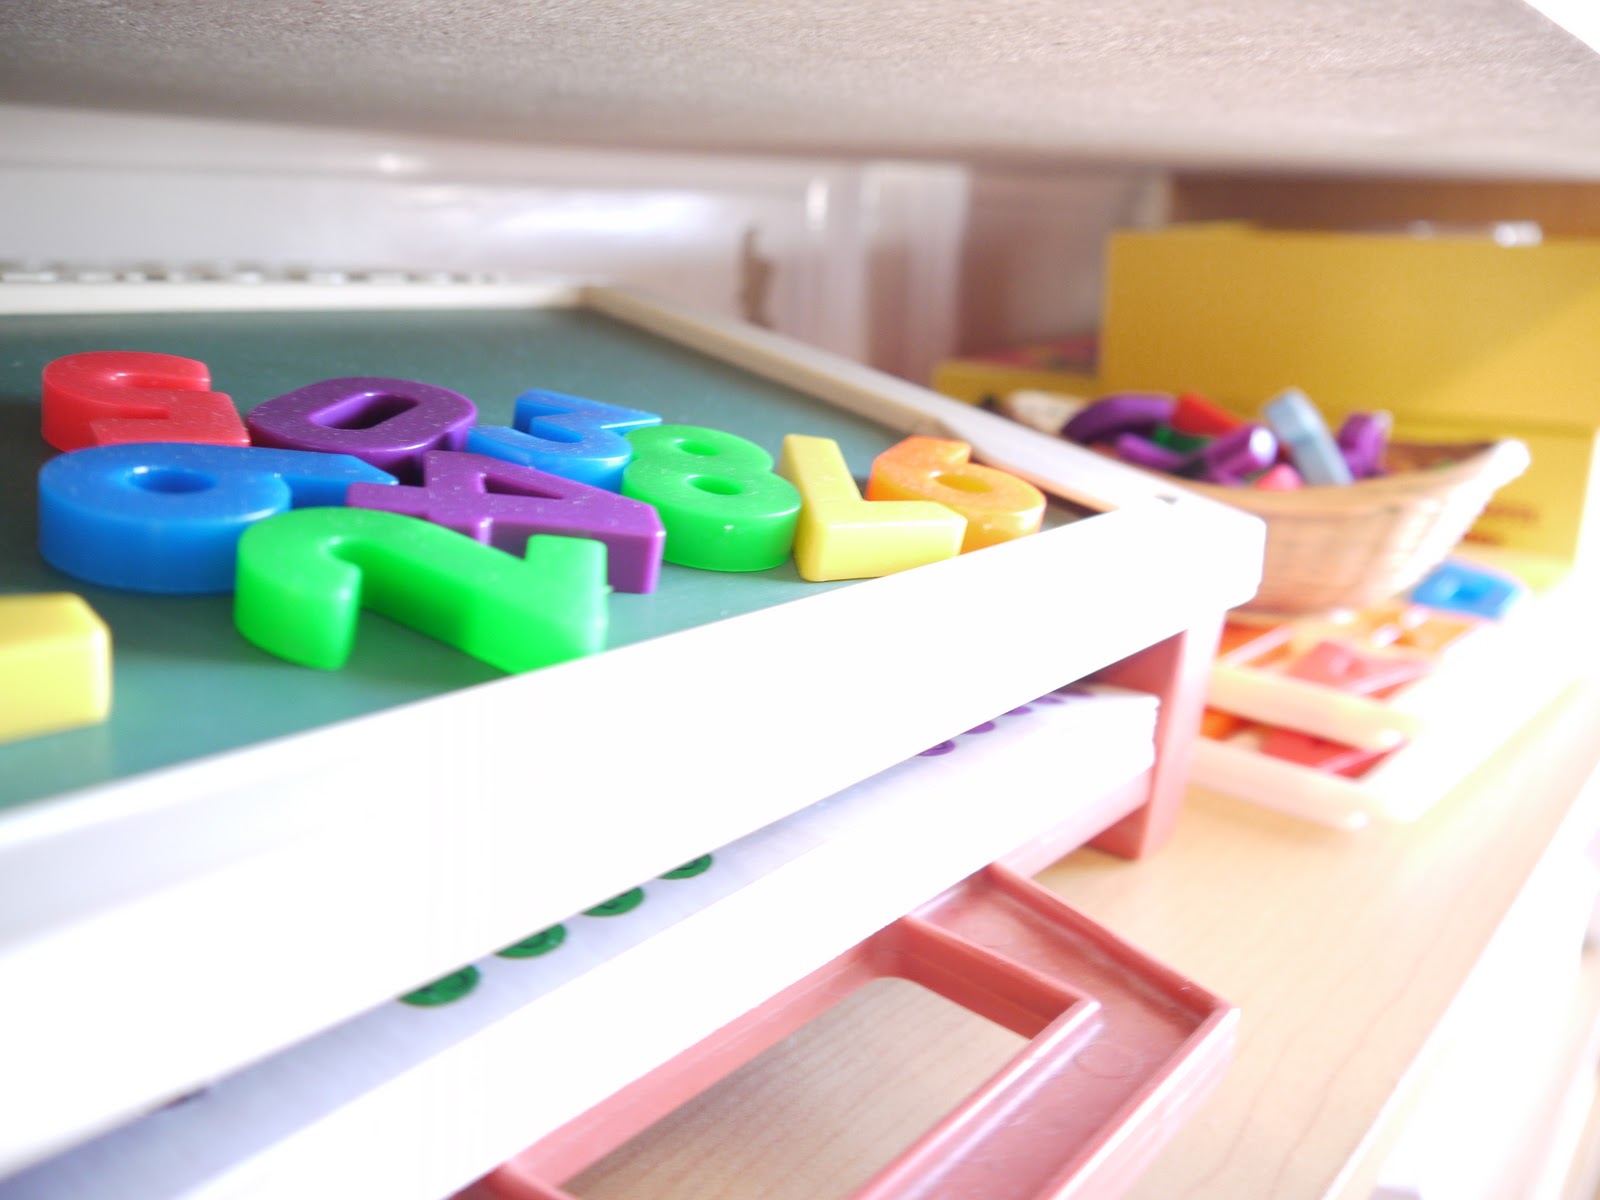
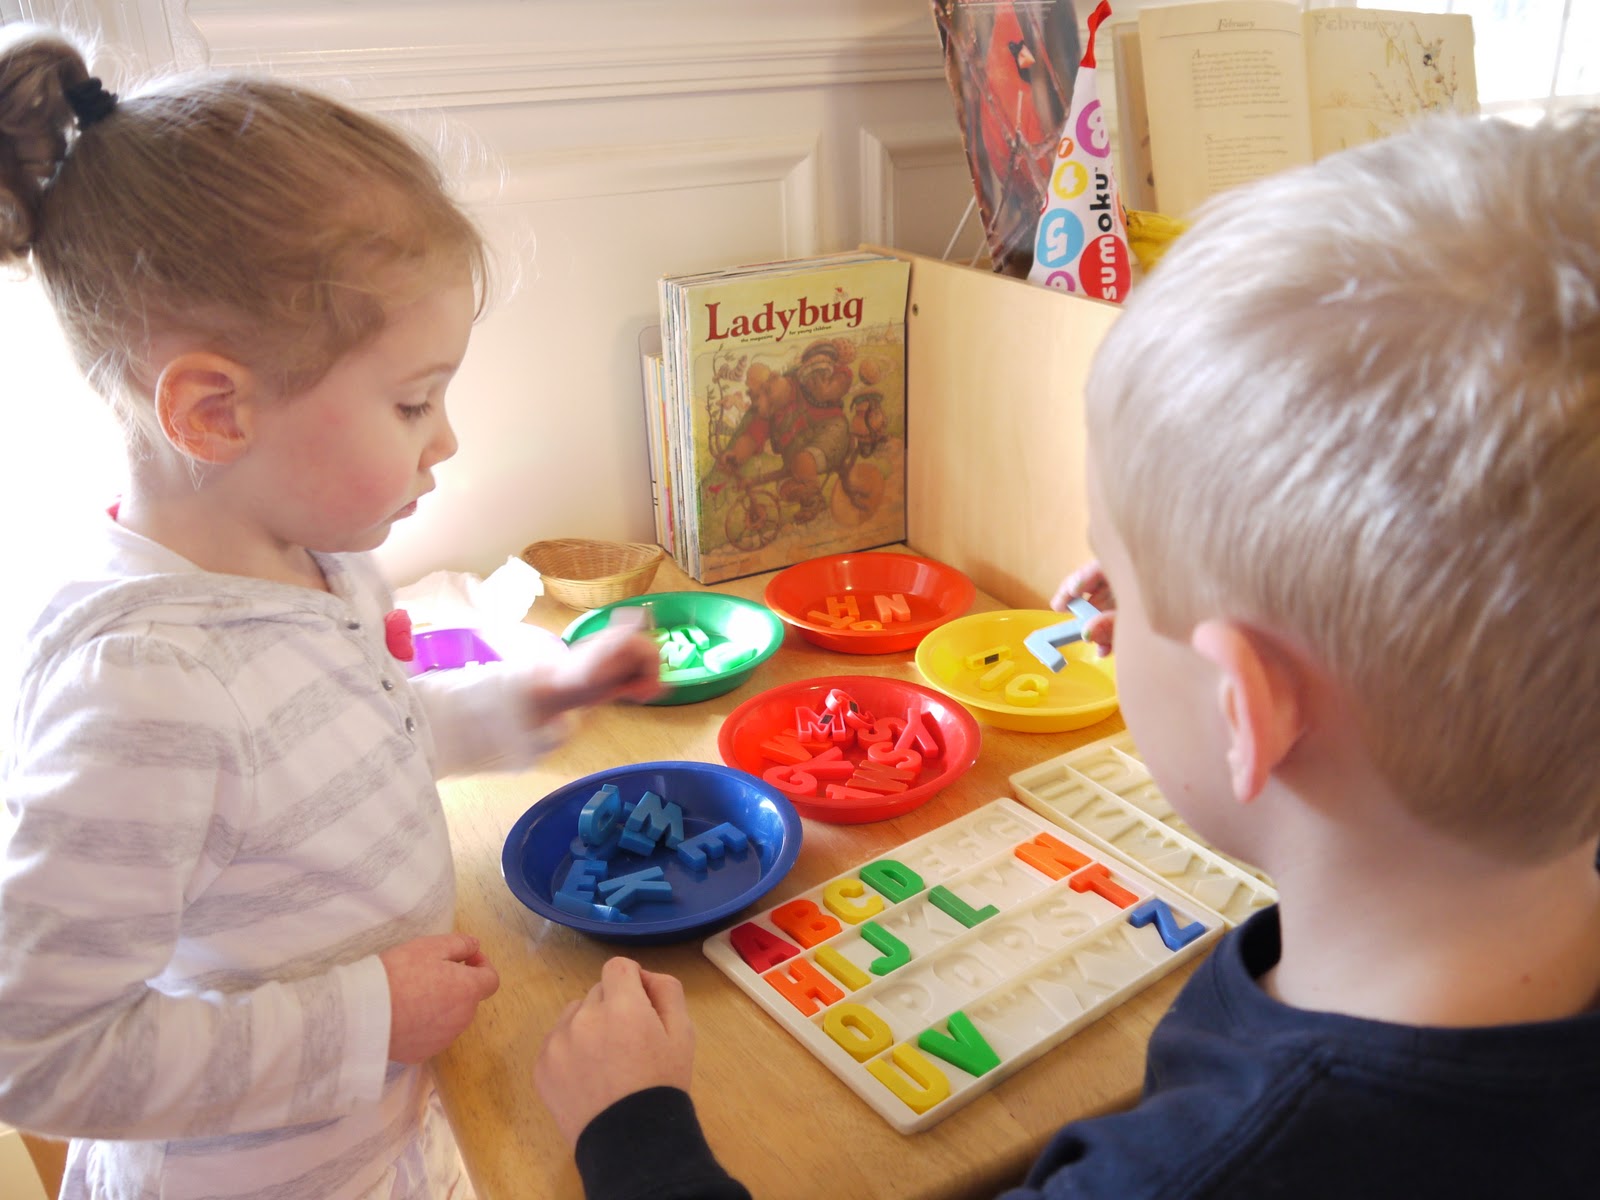
This is a little area set up for Doodlebug with favorite puzzles, magnetic letters, games, and paper. Something I found recently that both my little people love are Alpha Magnets – there are upper and lower case. What I enjoy is that the vowels are red and the consonants are blue just like our Montessori moveable alphabet. (NOTE ** I can’t find the same sets to link for you. The lower case set of red vowels/blue consonants is the correct link, but our upper case also has the red vowels/blue consonants – only in capital letters. Not sure why I can’t find them to link them. We found ours at a local school supply store.) Here are some new games that my littlest learners enjoy:
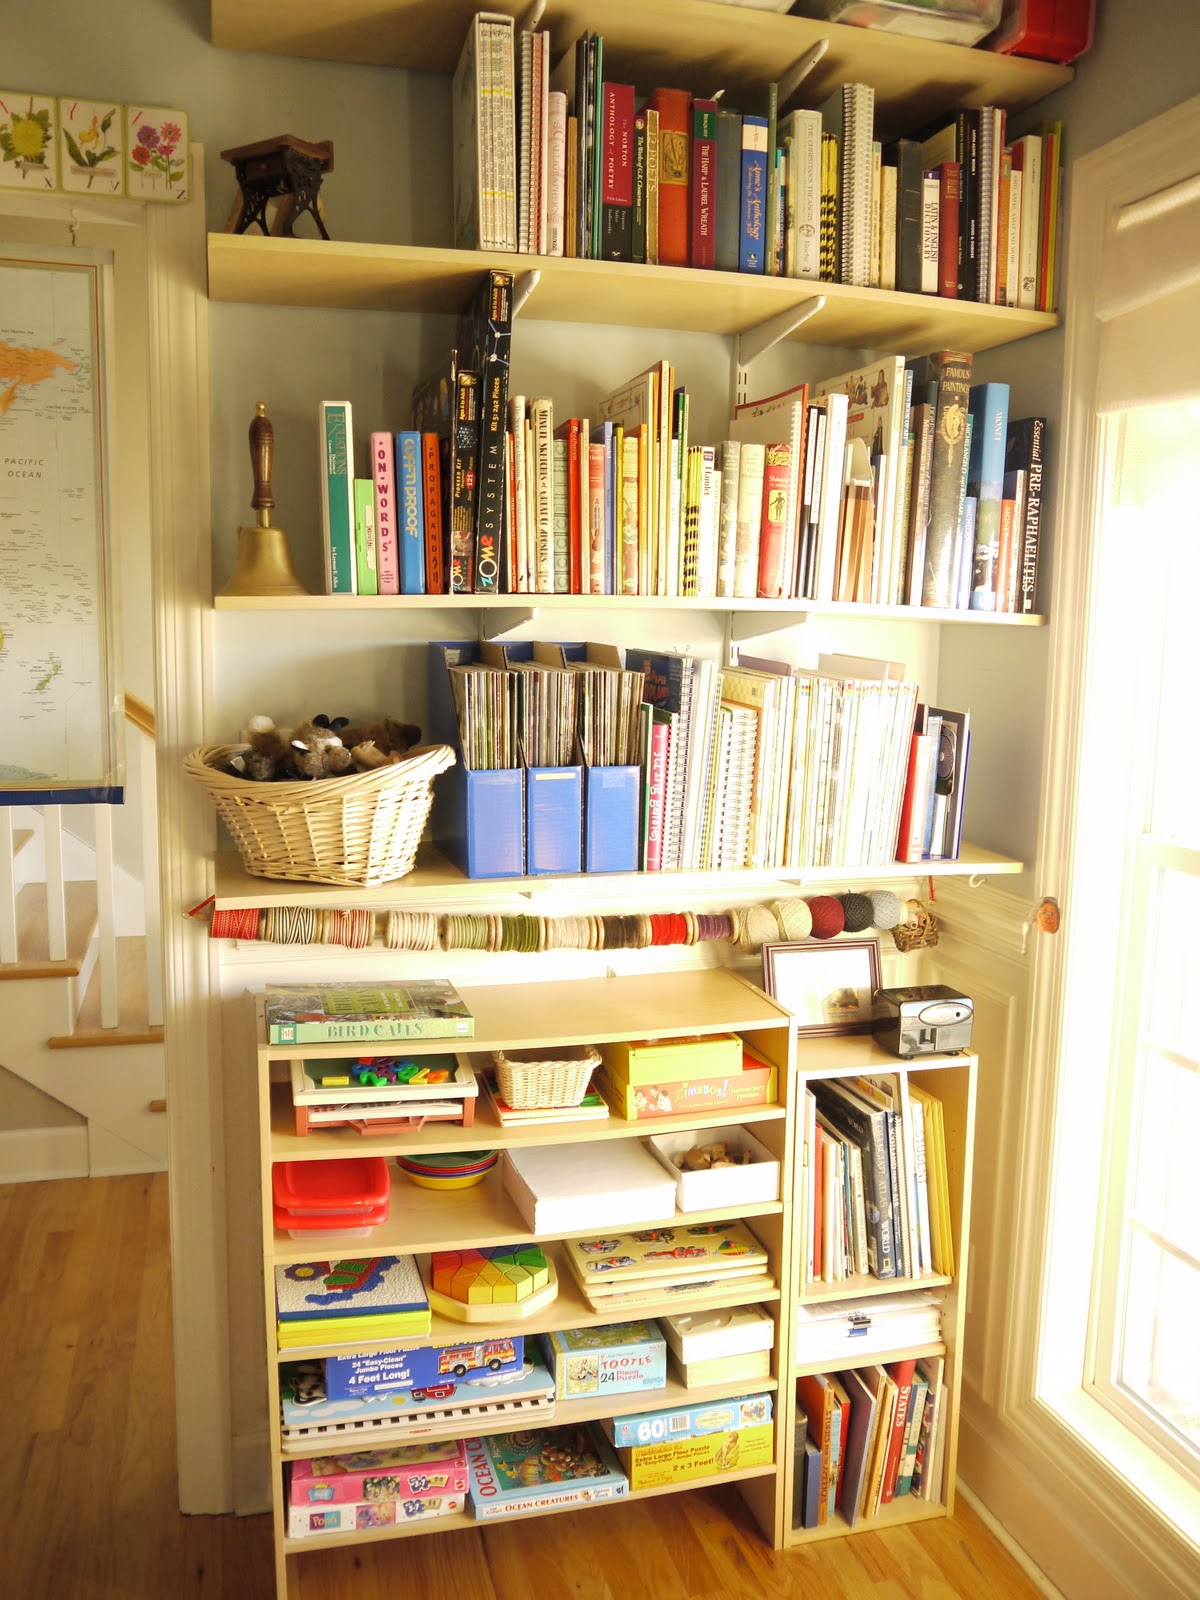
To the right, in that small bookcase, is our collection of geography books. I’m thinking of relocating them nearer our map cabinet…but for now…here they are.
Above the small floor shelf is our rainy-day shelf of Dover coloring books, Folkmanis finger puppets
, and back issues of our favorite magazine, Nature Friend
(which all the children enjoy re-visiting). Our logic games and Zome building tools
are here as well. Here are a few other *new* favorites (that weren’t in the last post):
- An old stamp and coin collection – these are really enjoyable, and a wonderful way to learn about history! Ask grandparents about these – they may have a collection they don’t mind loaning out! Our coin collection is one that was collected by 2 generations of paternal grandfathers and loaned to us. The stamp collection belonged to me and has been merged with one that my husband started when he was a boy. Our kids are enjoying adding to it!
- All the Knots You Need: An Illustrated Guide by R. S. Lee with accompanying ropes for practice
- The Spiral Draw Book

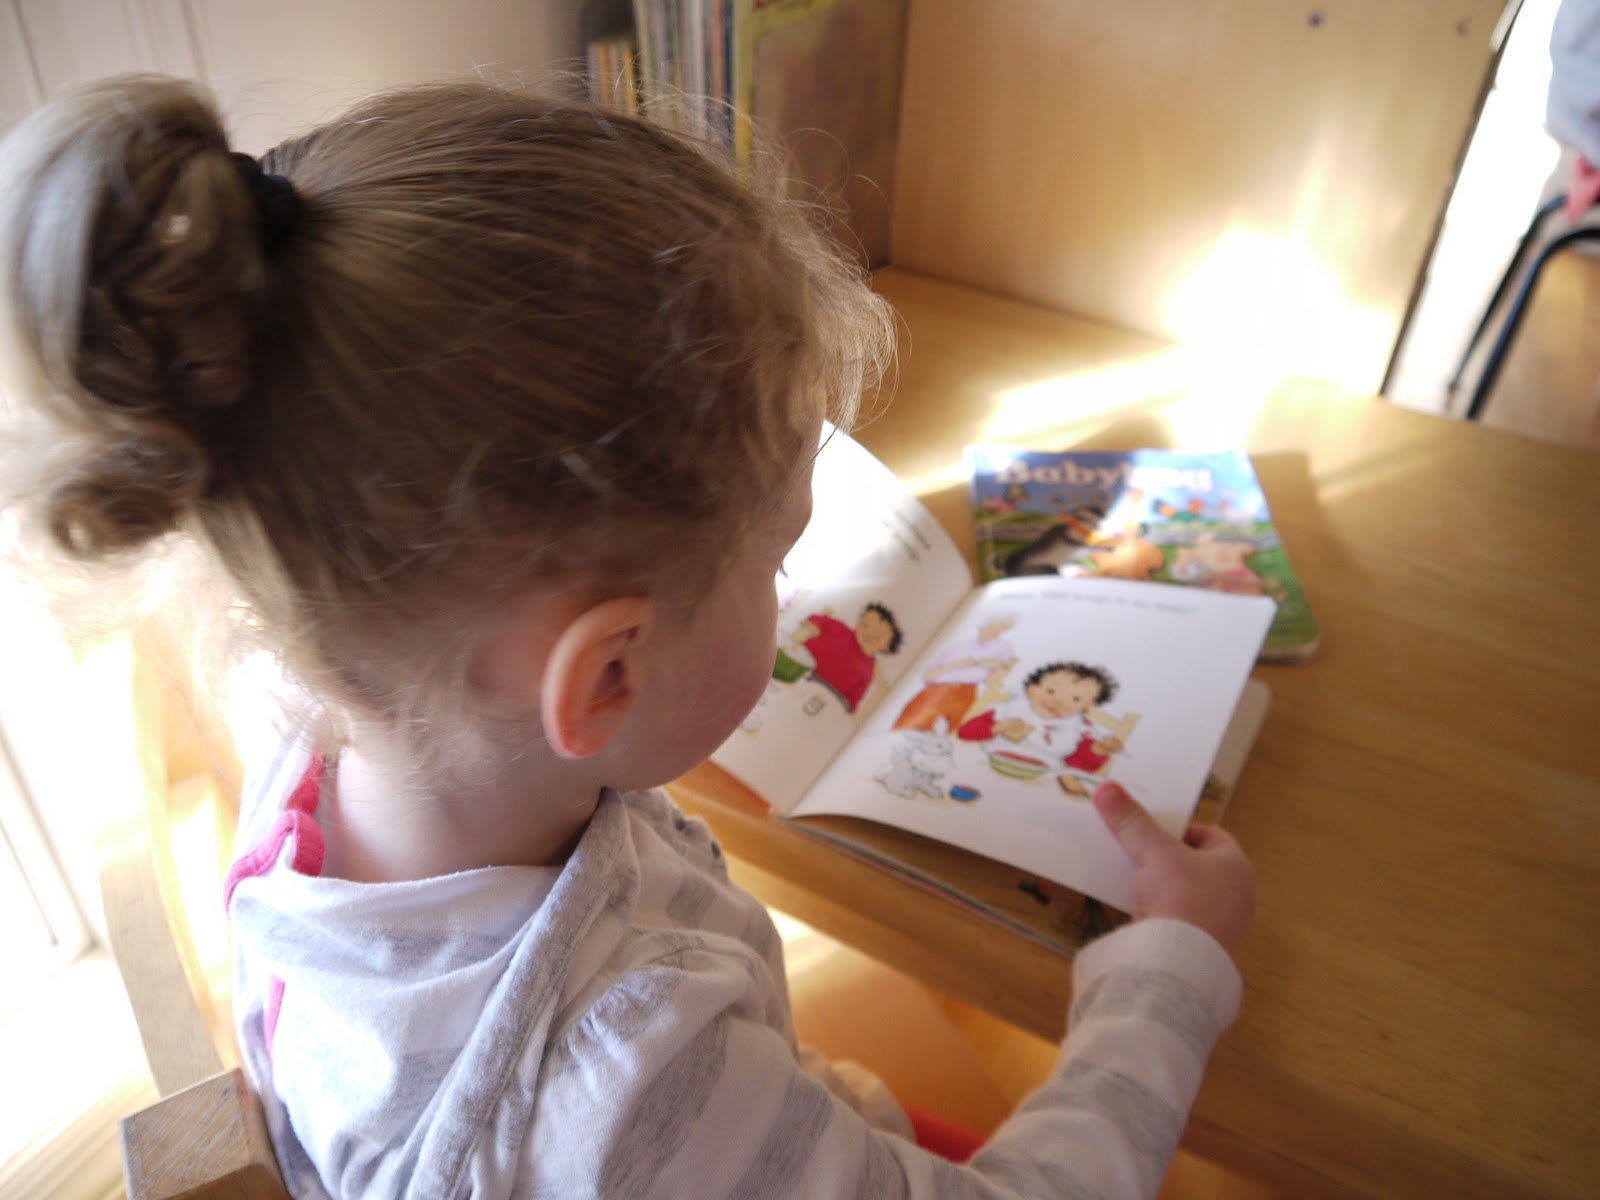
This is the little work area set up for my 3 year old. The small table tucks in nicely here and her favorite Babybug and Ladybug magazine collections (both found as a used set of back issues) can be kept on her table. This is a cheery little spot for her to work….with friends. 🙂
Next to the little work table is our map cabinet and I’m excited to share two more games we’ve really been enjoying!! We enjoy these so much that they live on top of our map cabinet so we can play them when we have time.
- Bananagrams
– which I think everyone in the world except me already knows about and uses! LOL!
- Sumoku
– a fantastic math game! Your student needs to have a good understanding and knowledge of multiplication tables to play this game, but the game will stretch their knowledge and build their speed and ability to think of multiples of a certain number. Highly recommended!
Above the work table and map cabinet I’ve relocated most of our art supplies.
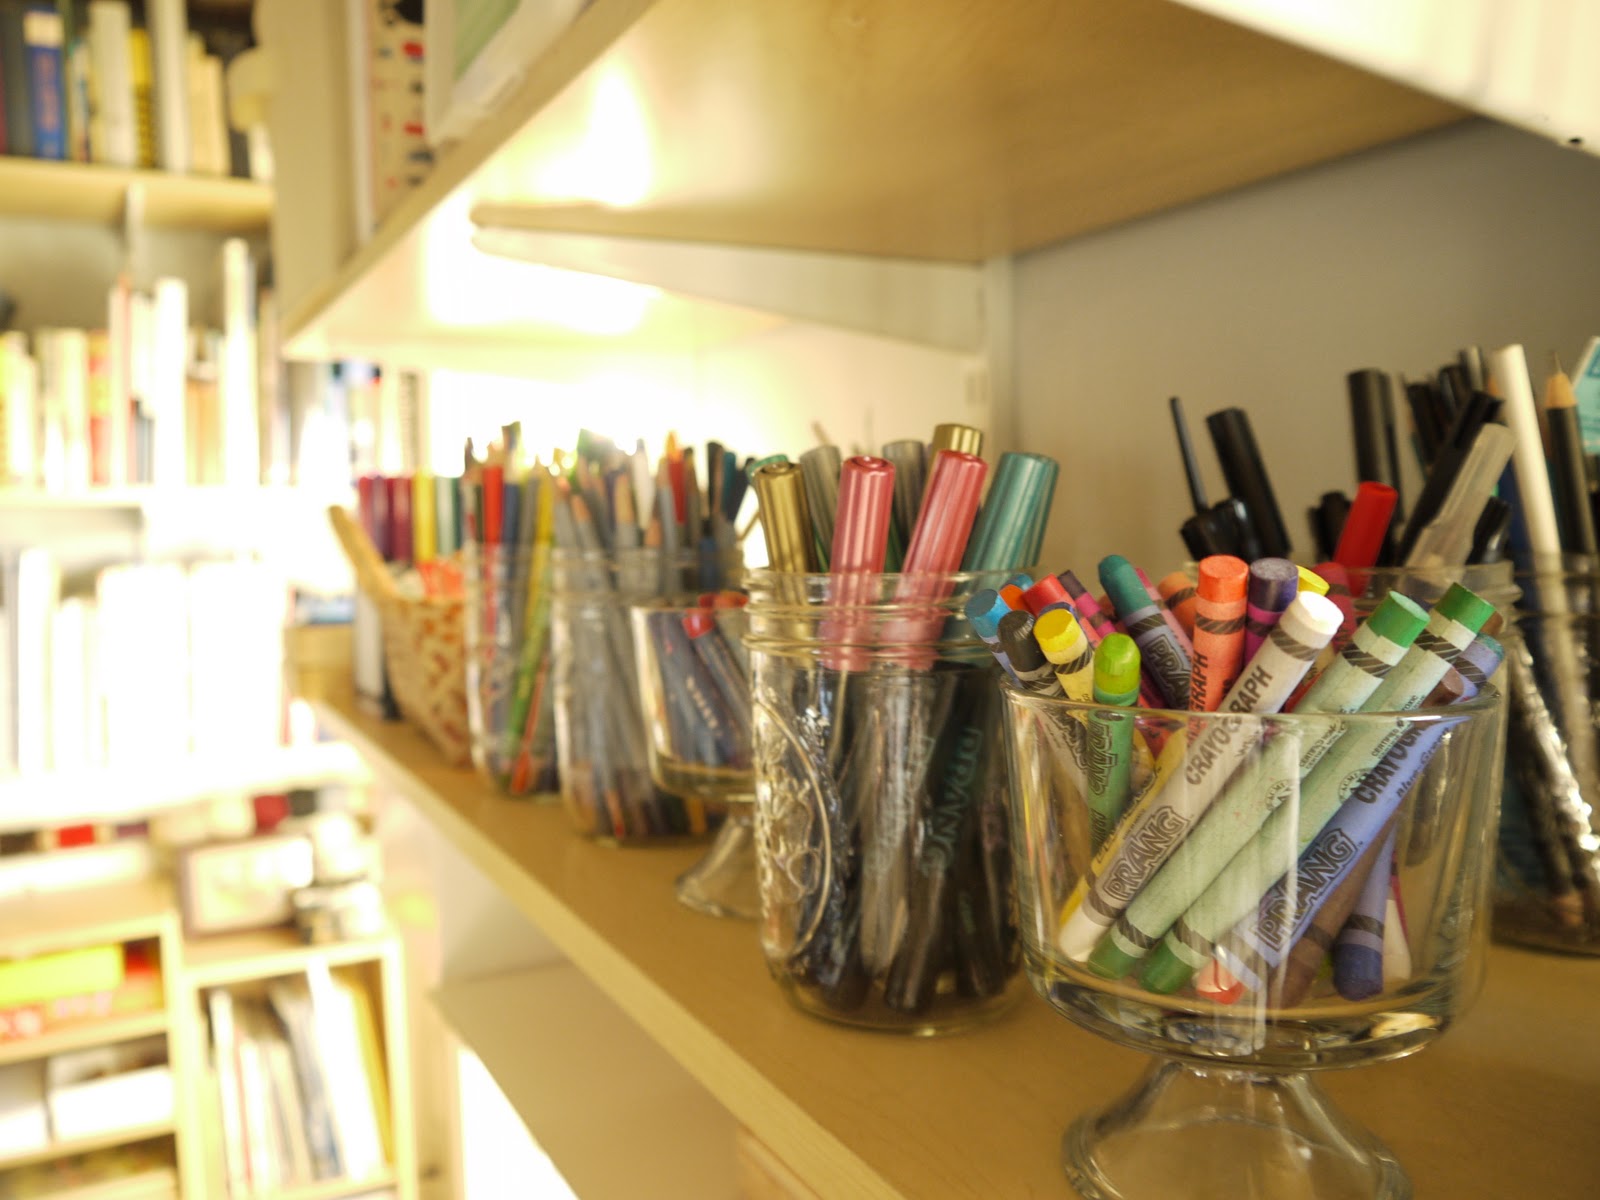
You can check out the links for almost everything on our art shelf from the detailed learning room post. I did add a set of Prang metallic markers that the kids really enjoy – especially the boys that are enjoying illustrating medieval armor! The metallic markers are in the glass jar second from the right.
Just below the art shelf you can see another of those shallow shelves which contain activities for my younger students.
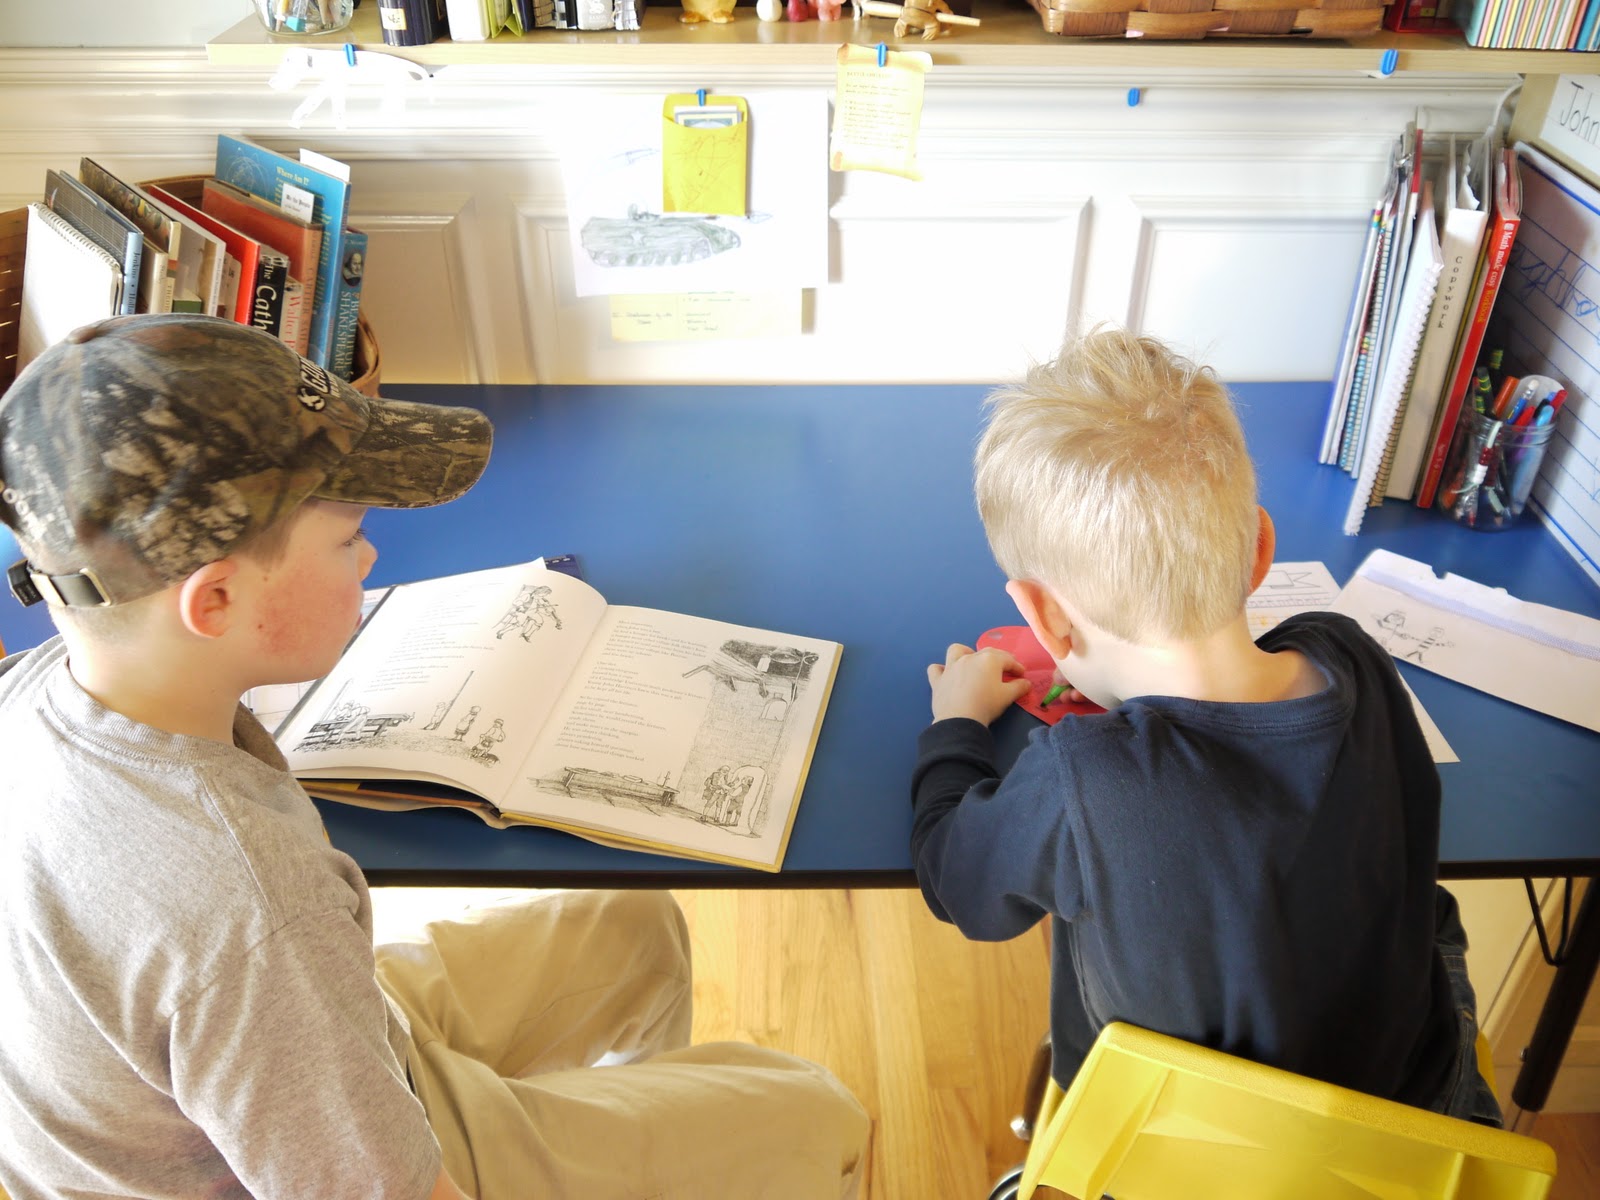
Swinging around a little more is the boys’ work table. It has been a good thing to pair them at the same table and allow them to work together on projects. This year has been a little bittersweet in that respect. My 14 year old is now working independently, on her own projects, schoolwork, and passions. In days past, she and my 10 year old would happily work together, but it’s time for her to stretch out further on her own and for the 10 year old to work with his younger brother just as his older sister worked with him. It’s been a time of change in that respect, so the tables moving around and seating arrangements changing is reflective of that new season in our learning spaces.
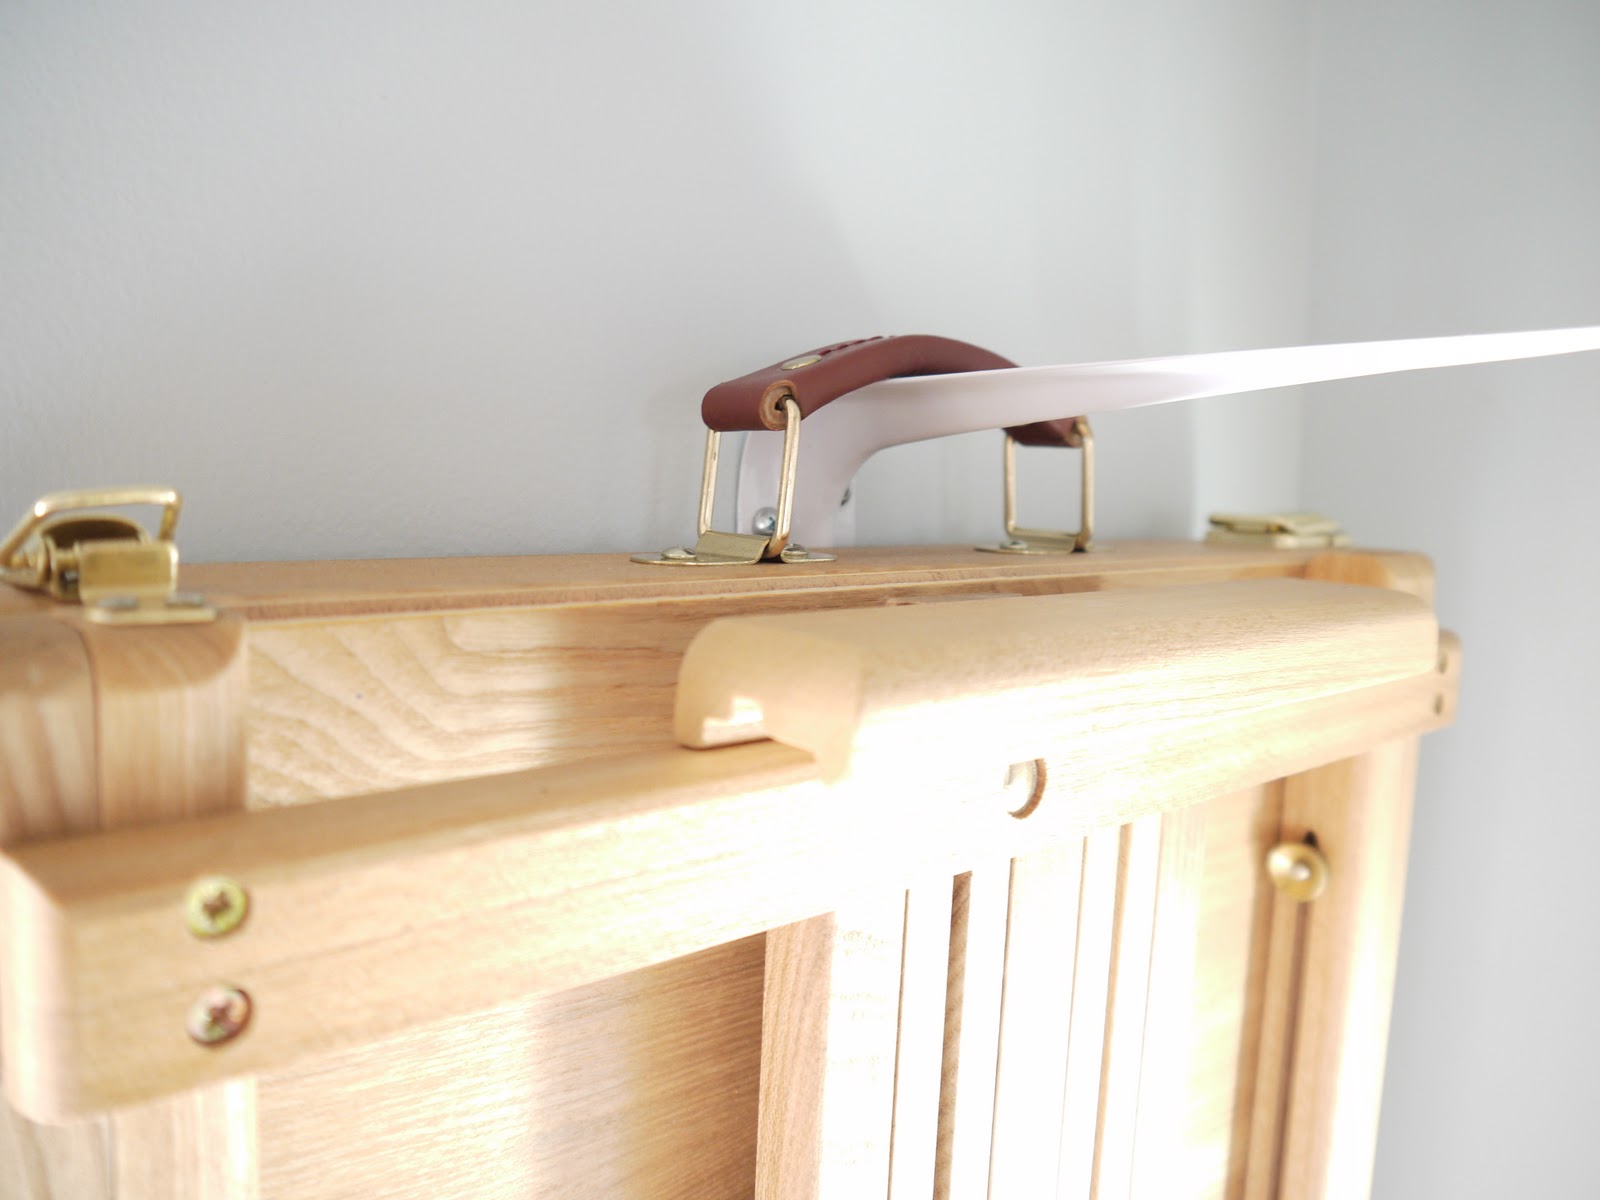
And finally, I have a solution I’m thrilled to share with you! We hung our folding table-top art easel and now it is so accessible while still being off the floor! I’m thrilled!
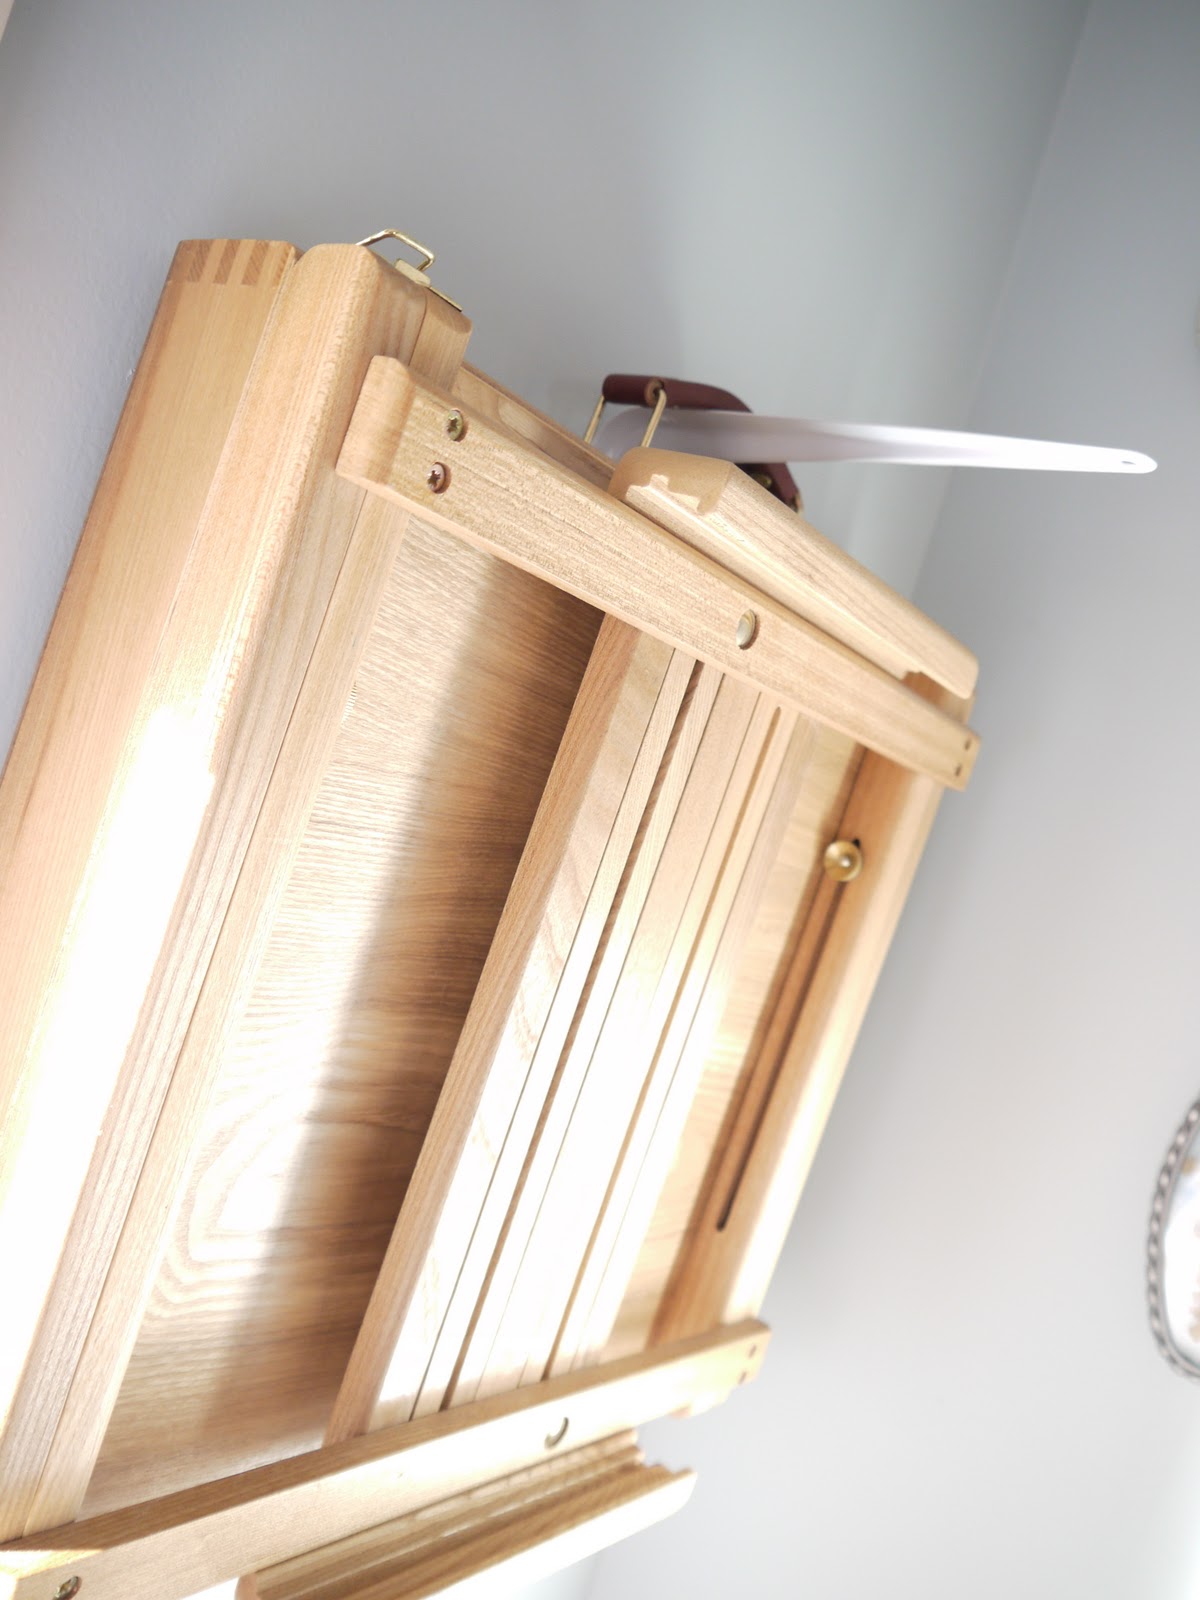
We had been watching for this particular table top art easel for some time because it is compact and doesn’t take up a lot of space. Once a year, Michael’s craft store offers all of their art easels for 50% off and when they did, we jumped! If you’re in the market for an art easel, ask around to see if there is a time when local craft stores offer them for sale!

I felt our art easel didn’t really have a home. Even though it is relatively small, it’s still awkward to store. Once it is stored it is out of sight and rarely used. I asked my husband to help me come up with a way to hang it on the wall. My requirements – spend nothing and have it look nice, be functional, and sturdy. Rob went into the garage and came in with a simple leftover L bracket from another project. He mounted it using wall anchors because there wasn’t a stud in the center of the wall…and you must know how I feel about symmetry, right?
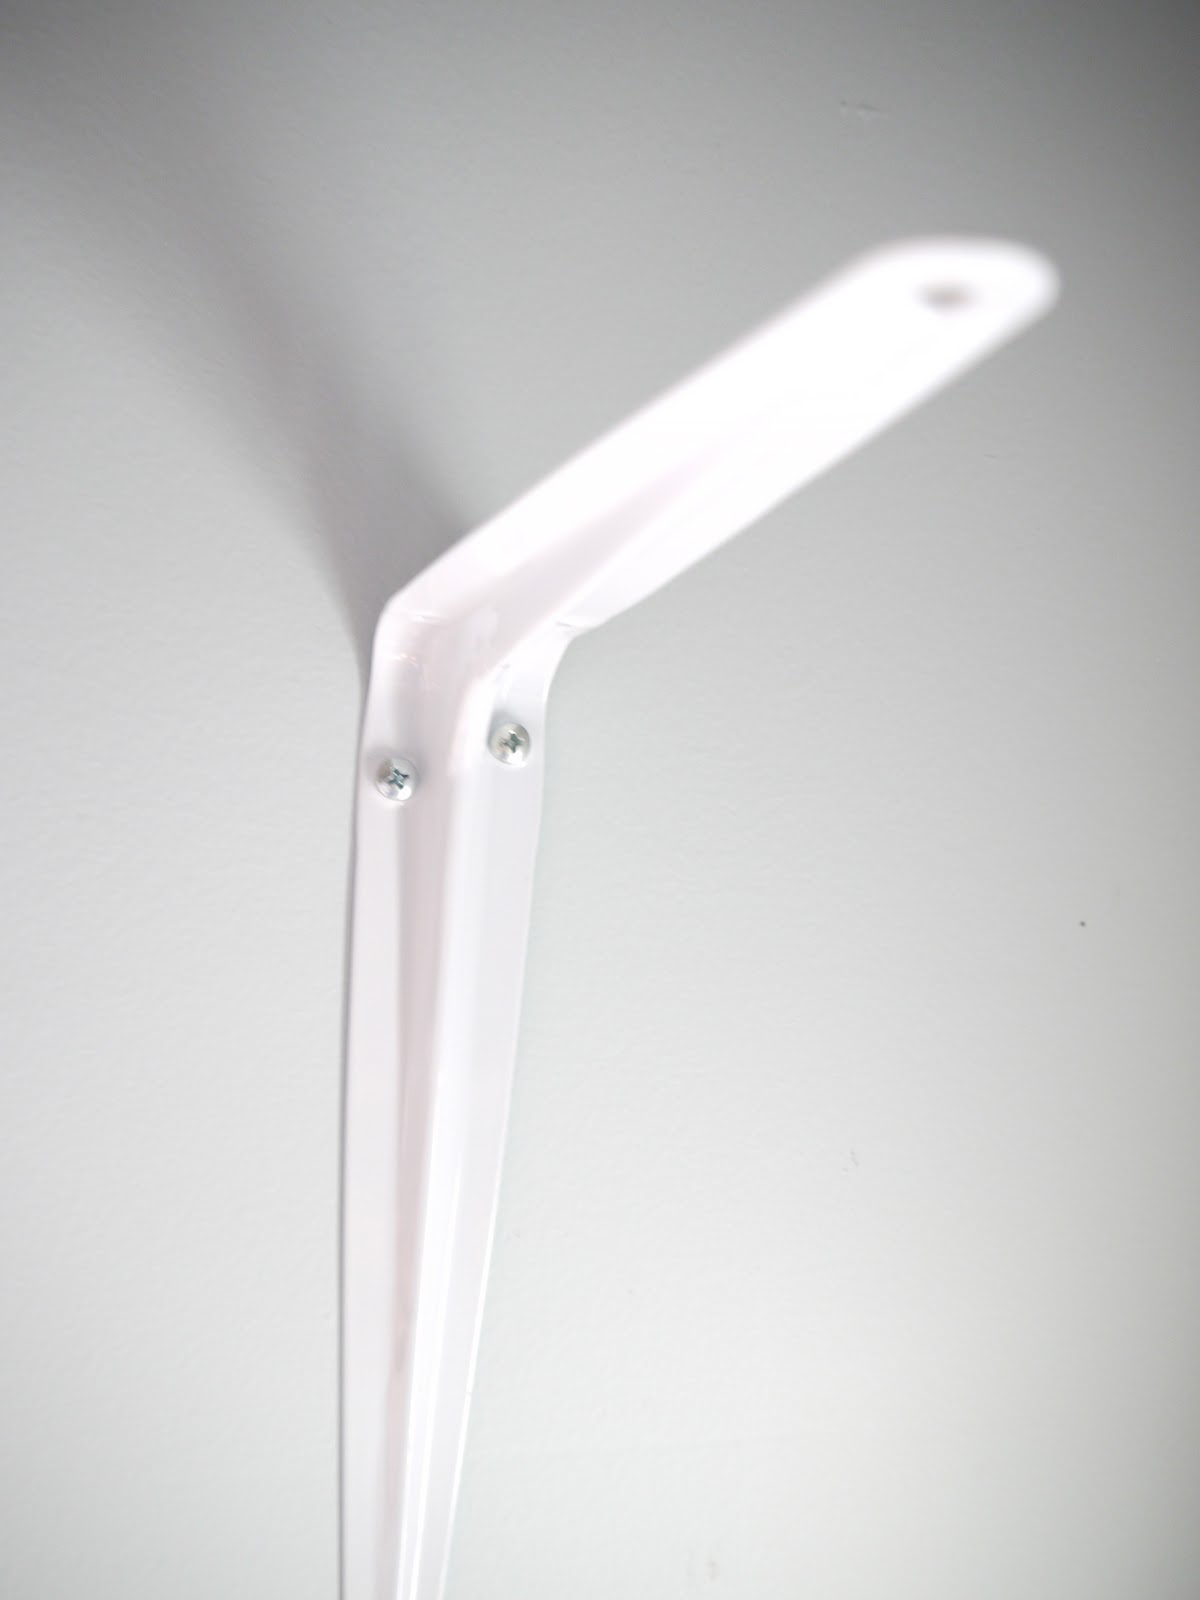
Perfect! The handle easily slips over the bracket and the horizontal length of the bracket means it won’t easily slide off. The weight is supported by the vertical length of the bracket mounted to the wall so it’s nice and sturdy.
And that is it!!! I CANNOT believe I just put together another ridiculously long learning room post! LOL! Hope you all enjoyed!


wow! It's amazing. Can you come to my house? lol!
I will bookmark and come back to it to soak more in. Had to skim this time. I love the space you made for your older daughter. The openness. The CM style all through, but without pushing curriculum; just main goals. Great job.
So fun to see and know that someone else out there is rethinking, reorganizing and revamping. God bless you.
I always love you posts about your school room and what works for you and doesn't!! I am just drooling over your schoolroom.
Love your post. And by the way, do you know what blue color that is on the walls??? Love it too!
How delicious, another learning room post:) Love that sunlight pouring in:)
Looking forward to hearing about what is and isn't working.
Celeste,
I'm so sorry! Looking back at the old learning room post I realized your question about color was the only one I hadn't ever answered and I wanted to make sure to answer it this time! I even meant to post it in the post but forgot!
The paint color I chose for the walls of the learning room was from Lowe's Home Improvement Center:
LAURA ASHLEY HOME POWDER BLUE 2 — LA1308
I found it online for you:
http://www.myperfectcolor.com/Match-of-Laura-Ashley-1308-Powder-Blue-2-p/mpc0054774.htm
It is a lovely light blue. What you see on the walls is a semi-gloss finish and has been very durable. The semi-gloss helps to bounce the light around the room. We painted about 6 years ago, and I need to do some touch up painting this summer.
Hope this helps, Celeste! So glad to finally answer your question – sorry it took me a couple of years to do it though. 🙂
We are in the process of moving our school room from a small office to our upstairs room (more room for our growing family). Your schoolroom posts inspire me and give me great ideas. I can't wait for my husband and father-in-law to finish building my desk so that I can get up there and really organize everything. I have such high hopes that our learning space will be a place we all love to be. I shared your previous learning room post with him and he was impressed, I am going to show it to him again as well as this one. Thank you for writing this post and adding all the pictures.
That is such a kind note, Jennifer!
Thank you all for NOT making me feel like a lunatic for posting another crazy-long post about the learning room!! LOL!!!
Oh, how funny! I had no idea that I had asked the same question before! That must mean I need to paint with that color! I like it so much, I asked twice. Apologies not necessary since I didn't even know I'd asked before! Thanks for putting the work into finding the answer for me.
I love the learning room posts. They're very inspiring and make me want to go tidy up my whole house! =)
I needed that, especially today. Thank you so much.
I love seeing your learning room! We are in the process of finishing our basement, which will have a large learning space for us to use. It has nice windows, but faces north, so not very much light. Unfortunate. However, I am really enjoying getting so many ideas from your room!
Thank you!
Jen, thank you once again for sharing your learning space with us. Things DO change with many children of multiple ages, etc.. and your room has been inspiration for me when I needed to make some changes this year with a new baby, etc.. I am going to revisit this post again in more detail. Take Care!
-Susana
Looking forward to your reviews 🙂 We are supposed to have a bunch of Ikea bookcases delivered very soon and then I will be working on trying to make our space work for us, too… such as it is. Probably one of our biggest challenges this year has been the one you highlighted — giving the older kid(s) some space of their own to work.
I always appreciate your light-filled spaces 🙂
Thank you, thank you, thank you for your learning spaces posts! They are such an immense inspiration to me. Being in that room (and in your life!) every day may make it hard to understand why it is such a breathtakingly beautiful sight to many of us.
I thank God for you and your family!
Always delightful to read your posts – especially about organizing!
Very inspiring! Thanks for taking the time to walk us through each space and the strategy behind it.
You are right, all homeschoolers want to see how everyone else is doing it. Your learning room is wonderful.
Blessings
Diane
Jenn — Love your updated school room post.
About the Alpha Letters: The link you posted to the upper case is correct. Even though the picture does not correspond, in the description, it says: “Color-coded sets help teach differentiation with red vowels and blue consonants.” Thanks for the links – and your blog!
These kinds of posts are really helpful to me as a new homeschooler… I know I will have more and more supplies as we move through the years, so it is helpful to be thinking ahead of all the possibilities for organizing our supples and space, and seeing ideas of how others do it is helpful! I love that you have mostly wall-mounted bookshelves on the top halves of the walls – it makes the room look bigger and more open, I think, and free of clutter (and the light-filled windows and the hardwood floor helps with that too!). It's a great room!
I have a random question… I saw your post from several years ago linking the Angel Food stories with the catechism lessons, and I have been keeping that idea in the back of my mind. My question is whether the Angel Food stories can be applied to the First Communion St. Joseph's catechism (we will be starting it with our 1st grader) or with the #1 catechism? I certainly look forward to using them with the #2 catechism which you connected the stories to and so kindly shared in that post! Sorry for the randomness of asking this question here!
Wow! Your learning space is A-maz-ing! As a relatively new homeschool mom (3 years in) I am always looking for ideas, suggestions, and reviews of things people have tried and loved. This post was wonderful! Thank you!
seriously, your schoolroom is ASTOUNDING! what a blessing!! I suppose you've already considered submitting this post to the CM blog carnival?! please do! 🙂
amy in peru
Love the learning room posts so much! I was finally able to get the materials to make shelves in a nook of my kitchen, and I had some questions about your shelves.
First, I noticed that your shelves aren't screwed to the brackets and wondered if you had any problems with the shelves popping up? Do your children ever lean on them? My children are 7 and almost 4 and my husband is concerned that if we don't screw them in that one of them is going to end up getting hurt. I'm hesitant to screw the shelves in case I want to move them of reuse them somewhere else. Does that make sense?
The second question was how high is your bottom shelf? That may sound a bit silly, but… Do your little ones have access to the materials or did you place them higher to prevent little hands from getting into trouble?
You and all the ladies at 4Real are such an inspiration! Thanks for… being you!!
you are so organized!!!!
please post your whole curuculum
Great post! I'm also amazed that my learning space post is my most popular.
Thank you all for your comments! I'm so glad you enjoyed this post!!! I'll try to answer a few questions!
Erin asked:
>> I have a random question… I saw your post from several years ago linking the Angel Food stories with the catechism lessons, and I have been keeping that idea in the back of my mind. My question is whether the Angel Food stories can be applied to the First Communion St. Joseph's catechism (we will be starting it with our 1st grader) or with the #1 catechism? <<
Yes! You can use it with the FHC catechism because that catechism derives its questions from the St. Joseph's Baltimore Catechism #1.
Amy in Peru said:
>> I suppose you've already considered submitting this post to the CM blog carnival?! please do! 🙂 <<
I hadn't thought of this, but I should! Thanks for the invitation, Amy! I'll try to figure out how to add my post to the carnival!
Mrs. White asked:
>> I had some questions about your shelves.
First, I noticed that your shelves aren't screwed to the brackets and wondered if you had any problems with the shelves popping up? <<
I do have some shelves screwed in to the brackets in order to provide added stability and to prevent them from popping up! They don't pop up on their own, BUT….it is not unusual for the children move and rearrange items on the bottom shelves. An older child may remove a number of books from the shelf to take them to another room to work on…or a child may remove a number of art supplies from a shelf to bring to their desk to work on. If you remove enough from one end of a shelf, and have a substantial amount of weight at the other end, the shelf *could* flip. So, for this reason, most of the bottom-shelves-only are screwed to the brackets using deck screws. It is also a fact that these bottom shelves tend to attract hands – both large and small – which is another reason for the added security.
I do move shelves around — a lot!!! I've never had a problem with the fact that some shelves have holes. They're either reused with screws in the shelf's new location, or flipped and once books are on the shelf you don't see the holes.
ANOTHER QUESTION FROM MRS. WHITE:
>> The second question was how high is your bottom shelf? That may sound a bit silly, but… Do your little ones have access to the materials or did you place them higher to prevent little hands from getting into trouble? <<
The bottom shelf is 43″ high and that was determined primarily because of the architecture in the room, but it's a really good height! High enough that it works well over a desk or table — low enough to be accessible. Most children from 5 and up can reach this shelf with relative ease. When we installed the shelves, I did want upper shelves to be accessible to older children only. This allows me to keep baby–>toddler–>preschool materials down low, and elementary – high school materials on the shelves.
The little people **can** use some materials on the upper shelves, but they must ask permission first and a taller person retrieves the item for them…or redirects them to an item on one of their shelves.
Hope this helps!!! 🙂
you are amazingly orgonized!!!!!!!!!!!!lol
Thanks for the inspiring me! I love the sharing of favorite resources and practical advice from your blog.
I want you to know what an inspiration this post was for me. I am just getting started researching options for my homeschooling material and setting up a designated area in our home that can act as a 'learning space.' It is incredibly helpful to see what you have done here. It helps me envision all that my own home school can be. Thank you and God bless you!
So pleased to see you join in the carnival:)
I am loving your school space! The idea for hanging the easel is wonderful, and all those book shelves are fantastic! I'm trying to figure how to readjust the best use of our space, too. You are right that nothing is ever done or fixed permanently, and that's one of the great things about homeschooling!
You are an inspiration! Just lovely, all that you've arranged and organized. If you are having a bad day, just go back and reread your post here – you have accomplished so much clearly through His guidance.
Sursum Corda,
Nancy
Where oh where did you get those magnetic letter holders/molds (don't know what to call them)????? I LOVE those and they would be perfect to add to our collection!
Amy,
Those magnetic letter holders/molds (LOL!!!) are actually a blast from the past! They're vintage Fisher Price circa 1970. I played with them as a little girl, and thought they'd make a nice addition to our learning spaces, and they have!
You can still find them in vintage shops as well as searching on ebay. They came with the Fisher Price school desk and the Fisher Price little people school. We have both and thus have 2 trays with magnetic letters.
I found a couple of links for you on ebay so you could take a look:
Vintage school desk:
http://shop.ebay.com/i.html?_nkw=fisher+price+vintage+school+desk&_sacat=0&_odkw=fisher+price+school+desk&_osacat=0&_trksid=p3286.c0.m270.l1313
Vintage school house:
http://shop.ebay.com/i.html?_nkw=fisher+price+vintage+little+people+school+house&_sacat=0&_odkw=fisher+price+vintage+little+people+school&_osacat=0&_trksid=p3286.c0.m270.l1313
Hope this helps! 🙂
I love, love, LOVE this post. I am “organizationally challenged” and with a fifth child added last year, I am honestly overwhelmed with all the STUFF in the house. I am getting some great ideas from you and have started drawing some ideas with my hubby to use our space more efficiently. What a blessing!
Jen you probably do not need another comment here 😉 but I'm going to leave one anyway .
This is so organized ! I mean your school areas that is ☺
I like how you have open space .It appears that way from the photos .
Okay I so wish my floors were finished like yours the kids are so tired of getting slivers from our unfinished floors 🙁
I really really like your 9th graders space it lloks very warm and calming space .
I'm glad I stopped by .
Lov Rox
I love this post, and have come back to look at it several times in the past two days. I'm inspired on so many levels to get organized in my supplies, budget, and thoughts for homeschooling! Thanks so much!
Rox, Tara and all – thank you so much for your warm and kind comments! What a blessing if you have found ideas here that you can make your own!
God bless us all as we seek to please Him in the spaces of our home and within our vocations!
I so appreciate your learning room posts – among others!! – thank you for continuing to share are you update the spaces.
We've been in our house for about a year and a half now and I am looking at my learning room and thinking… “hmm” Now that my 5 yr old is doing more school type stuff and his little brother wants to join in, the space just doesn't work well for everyone anymore. I can't quite figure out how to fix it, and at times I'm about this close to just taking everything out and starting all over again! lol
The other thing I am struggling with is how to “deal with” the kids' art work, projects, and projects-in-progress. (that sounds negative, but I think you know what I mean) We have deep windowsills and they end up being catch-alls for project displays and stuff of all kinds. I have some wires hung at different heights in various places where the kids can display art with mini-clothespins (which works beautifully!) but the bigger and 3-D projects are an almost constant issue. I've tried a shelf dedicated for that, but it keeps getting more and more stuff shoved onto it.
What do you do with finished artwork, both 2D and 3D, in your home?
Thanks again for being so helpful and thought-provoking in your posts!
Hi Amber! Thanks for your comments and question:
You asked what I do with finished artwork – both 2D and 3D.
Brace yourself, but with 4 children, and many, many art projects that they enjoy completing…sometimes I must purge/throw away! At the end of each year, I go through projects and keep only the very best. I just don't have room to keep everything. I will occasionally remove a few recent projects as well if they are encroaching on all our living spaces.
3D projects:
In general, we might display or enjoy a 3D project for a little while and then I take pictures of all 3D projects, and the parts are then harvested and taken apart and kept for future project work. These items are stored in a big bin. 3D projects are not kept unless it is EXTREMELY special…some clay creations that are baked and hardened are kept.
2D projects/art:
Each child gets a large art portfolio – http://www.amazon.com/Star-Wallet-Art-Portfolios-handle/dp/B001DKJJY4/ref=sr_1_1?ie=UTF8&s=home-garden&qid=1301414786&sr=8-1. Their individual art creations are kept here, with the exception of the best of the best, which is usually out for display for a short time. At the end of the year, or periodically throughout the year, I go through the art folio and keep only the most special art pieces. Each child's art folio then collects special or treasured pieces from that child. Pictures of special 3D art projects also go in this art folio.
It's very important that children put their name and date on their art. This is so important when they're older!!
Hope this helps.